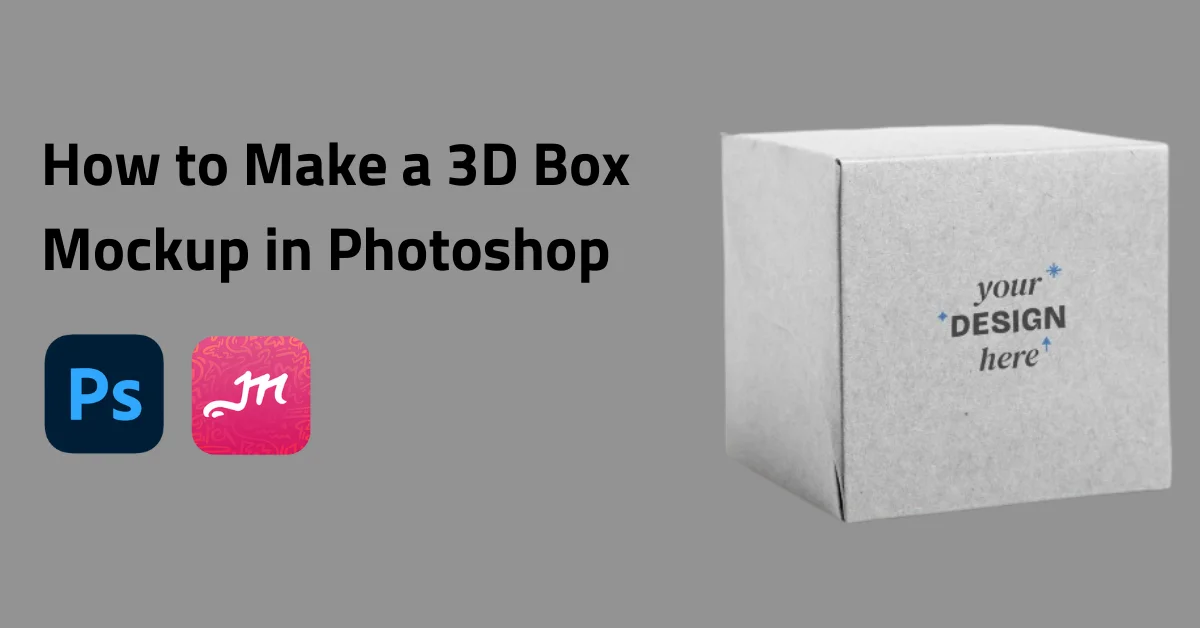
Making a 3D mockup to show off packaging designs helps designers stand out. When done right, mockups enhance the design and give clients a clear view of how it will look in real life.
In this guide, we’ll show you how to make a 3D box mockup in Photoshop.

What is a 3D Box Mockup?
A 3D box mockup shows what a box design will look like before making a sample. It helps clients and designers:
- Match the brand’s style
- See how the box will look in real-world settings
- Visualize the design before printing
How to Make a 3D Box Mockup in Photoshop – Step-by-step Guide
Here is a step-by-step guide on how to make a 3D box mockup in Photoshop from scratch. We took the idea from 99designs.
Step 1: Insert the Files
To prepare for the mockup, we designed the box foldout in Illustrator and saved each side as a jpeg.
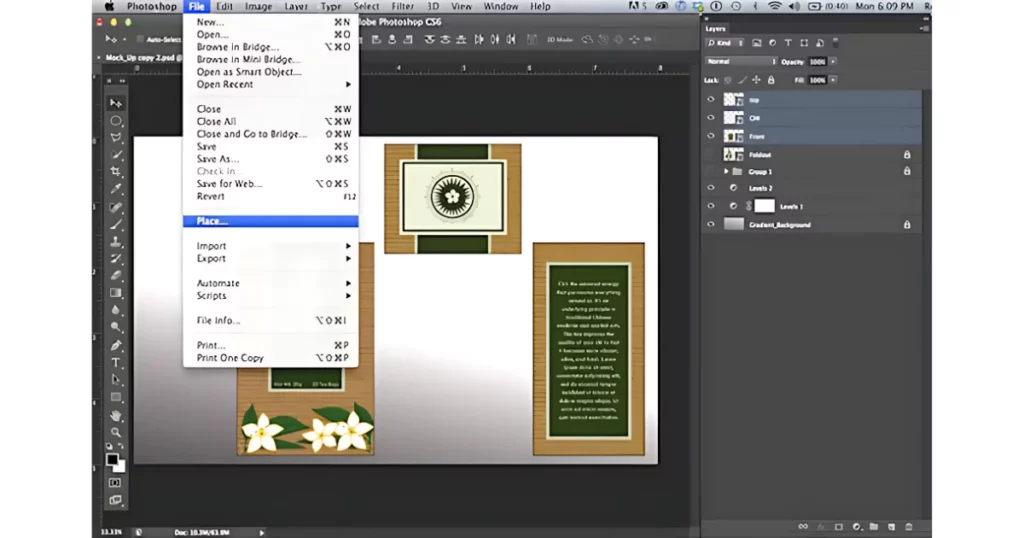
Now, we’ll add three jpg files (Front, top, and right side of the box) to our Photoshop document. To do this, go to File > Place, choose each jpg file, and press Enter when they appear in the document.
Step 2: Rasterize the Files
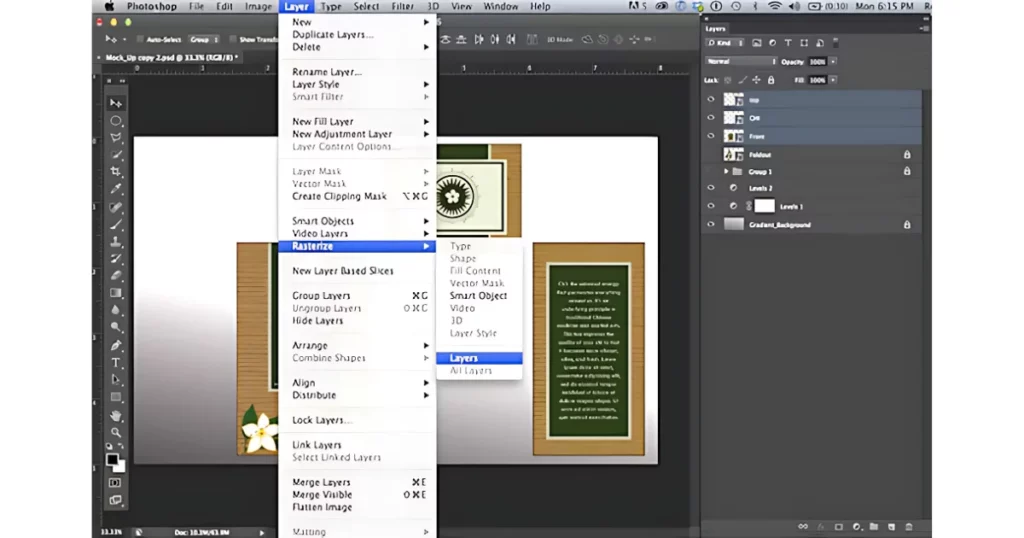
In Photoshop, after loading all three files, you’ll need to rasterize them for editing. Just select the three layers, then go to Layers > Rasterize > Layers.
Step 3: Use the Free Transform Feature
In this step, we’ll adjust the three sides of the box to make it look 3D.
First, select the front side by going to Edit > Free Transform. You will see a selection box on the screen. Hold the Command key (Mac) or Control key (PC), click the middle dot of the side you want to adjust, and drag it slightly upward to create an angled effect.
Repeat this process for the top and right sides by going to Edit > Free Transform, holding the Command/Control key, and dragging the edges until the corners line up.
Step 4: Trim the Back Corner
Now that your box shape is ready, let’s add a few effects to enhance it.
To make it look more realistic, we’ll trim the back corner. Use the Rectangular Lasso feature to select a small part of the top’s left and back side, then press Delete. After that, go to the “Select” tab and click “Deselect.”
Step 5: Include the Drop Shadow
To create a drop shadow under the box, follow these steps:
- Use the rectangle tool to draw a black square.
- Hold Command (on Mac) or Control (on Windows) to distort the square.
- Move the new layer below the box layers.
- Go to Layer > Layer Styles > Drop Shadow, adjust the settings, and click OK.
Step 6: Add a Reflection
In Photoshop, first duplicate the right and front side layers by going to Layer > Duplicate Layer. Then, rotate these duplicated layers upside down using Edit > Free Transform > Rotate, placing them below the originals.
To create a reflection effect, apply a gradient to fade the bottom of these layers. Select the reflection layer, tap the “Layer Mask” button, then use the “Gradient” tool and drag over the edge. This will create a fading reflection.
Step 7: Final Touch with the Brush Tool
In Photoshop, select the Brush Tool and use a soft, dark gray brush to add a subtle shadow behind all the layers. Repeat this for the back side of the box to complete the mockup.
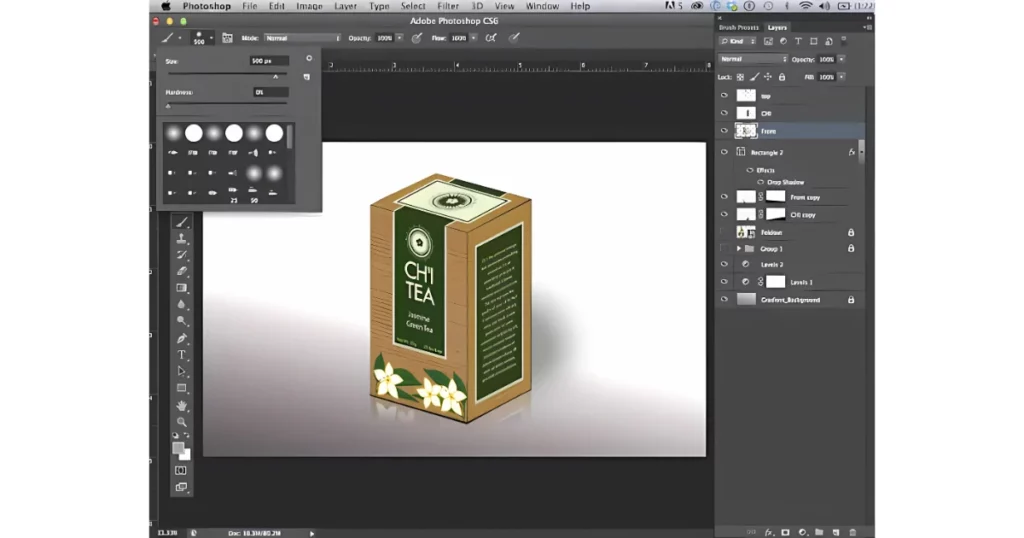
There are many ways to enhance 3D mockups with fancy backgrounds and effects, but even this simple approach greatly improves the presentation.
That’s it. We have covered how to make a 3D box mockup in Photoshop. Now we recommend you to use Mockey instead of Photoshop.
Photoshop Alternative to Make a 3D Box Mockup
Mockey.ai is the best mockup website for creating 2D and 3D mockup designs. Follow the steps:
1. Go to Mockey.ai, sign up there, select “Mockups,” then “Packaging,” and choose “Box.”
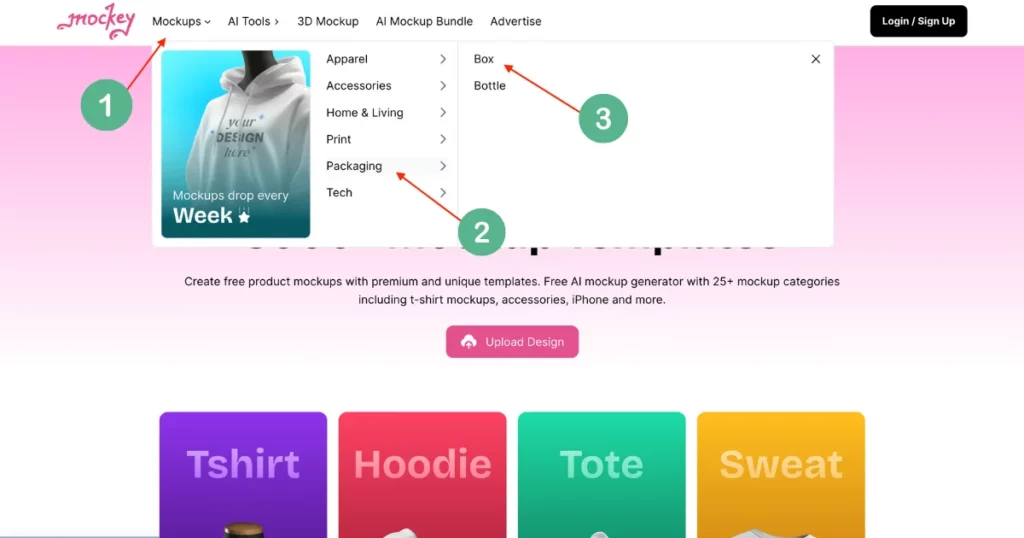
2. On the next page, pick the “3D” option from the box template.
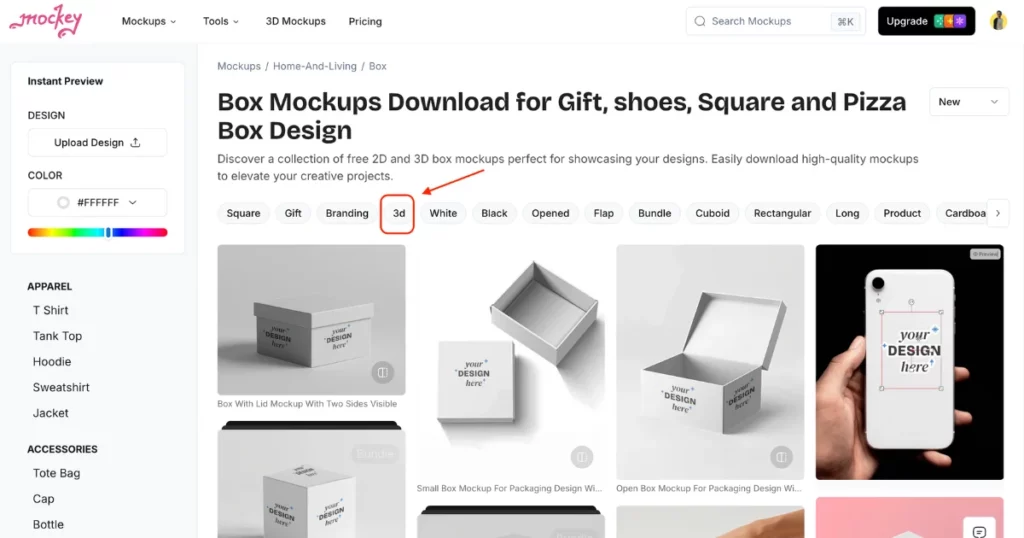
3. Click “Add Design” to upload your logo or image, and customize it with a background or colors.
4. Once done, click “Download” to save your 3D box mockup for free, without a watermark.
Conclusion
To summarize, we have thoroughly explored the process of how to make a 3D box mockup in Photoshop. By following the steps outlined, you can easily craft a professional and realistic 3D box design using a template.
If you’re looking for a simpler and more affordable alternative to Photoshop, consider using Mockey.ai mockup generator. It offers easy editing options and is less expensive, making it a great choice for those who need to create box mockups without the complexity or cost of Photoshop.
FAQs
How to create a 3D mockup box?
To create a 3D mockup box on Mockey.ai, go to Mockups and select 3D Box. Choose a box template, upload your design by clicking Add Design, and customize the colors, sizes, and angles. When you’re done, download your 3D box mockup.
How do you make a 3D box in Photoshop?
Open Photoshop, start a new document and use the Rectangle Tool to draw box shapes. Change the angles with Free Transform, add depth with Layer Styles, and then merge the layers. Your 3D box mockup is done!
How to make a packaging mockup in Photoshop?
Open Photoshop, start a new document and add a packaging template. Place your design, use Free Transform to adjust the perspective, and add effects like shadows and textures. Save your packaging mockup in your desired format.
How do you make a square look 3D in Photoshop?
To make a square look 3D in Photoshop, start by drawing the square with the Rectangle Tool. Then, use the Polygonal Lasso Tool to add perspective by creating extra planes. Next, apply shading and gradients to give it depth. Finally, adjust the lighting and shadows to enhance the 3D effect.
Related reading:
