If you want to have more fun in your Discord conversations, you can discover how to make stickers on Discord mobile. Making your own stickers in Discord can let you show off your personality while chatting.
Stickers for Discord can either be static or animated images. Let’s explain all you should understand about how to make Discord stickers on mobile.
Table of Contents
Quick-Step to Make Stickers on Discord Mobile
The quick steps on how to make stickers on Discord on mobile.
- Visit the Discord official website on a mobile Chrome browser.
- Click the three dots and tick the Desktop Site box.
- Then, click on the login button.
- On the next page, untick the Desktop Site box.
- On your server, click the down arrow option and click the Server setting option.
- Then, click Stickers.
- Now click Upload Sticker and add your sticker.
How to Make Stickers on Discord Mobile in Brief
Full guide on how to make stickers on Discord mobile.
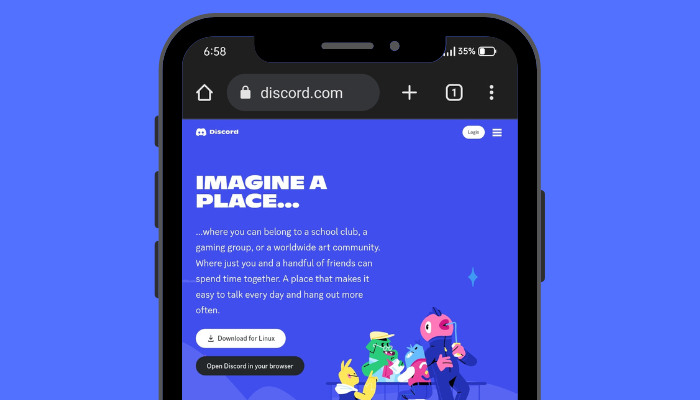
1. Visit the Discord Website
Open up your mobile Chrome browser and go to the official Discord website. You have the option to use other web browsers.
2. Tick the Desktop Site Box
Look for 3 dots at the top right corner of the screen. Tap on them. A menu will appear. In that menu, find and tap on an option that says Desktop Site.

3. Click on the Login Button
First, look for the login button in the top right corner of the screen. If you’re already logged in, you’ll see “Open Discord.” Just give that a tap. When you do that, you’ll be taken to the main Discord page.
4. Untick the Desktop Site Box
On the next page, you should find a box that says “Desktop Site.” Make sure to click or tap on it to remove the checkmark. The reason for doing this is to make the experience feel more like using an app rather than a website.
5. Tap the Server Setting
Now, all you need to do is tap on the server you made. You’ll notice a little arrow pointing downwards.
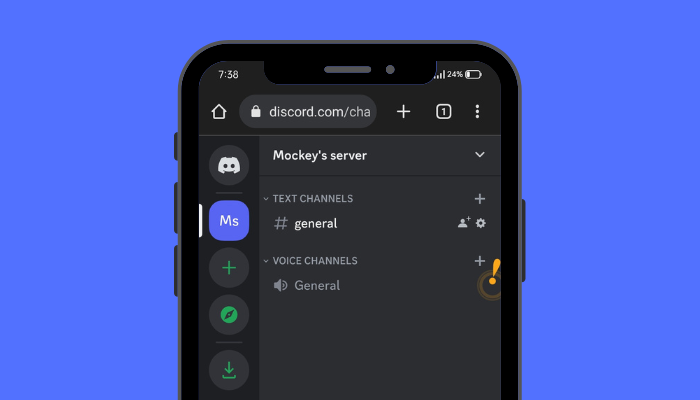
Give it a tap, and you’ll see a bunch of choices. Go ahead and hit “Server Settings.”
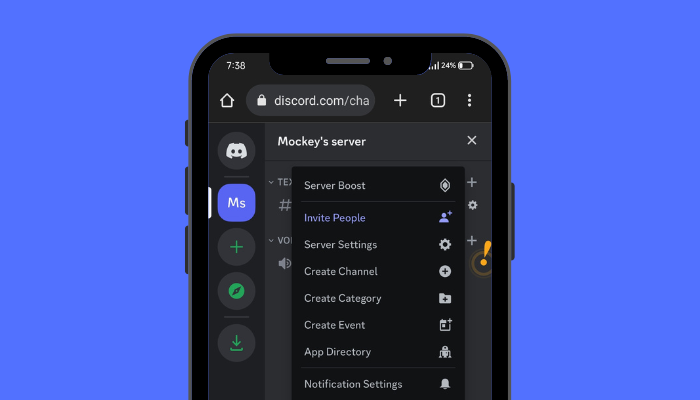
6. Click the Stickers Option
Click on the “Stickers” option, and then you can upload your own stickers.

7. Upload Your Sticker
Once you’ve done what we talked about earlier, you’ll find a page where you can add stickers to Discord. All you need to do is click on the ‘Upload Sticker‘ button, and you can start adding your stickers to Discord.
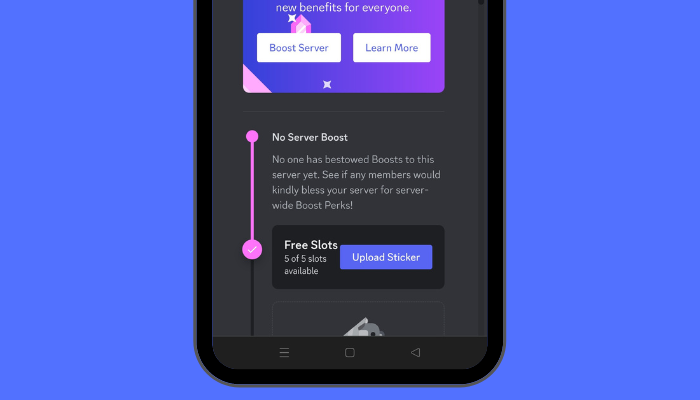
The more you boost the Discord server, the more slots you get to add cool custom or DIY stickers. Boosts are like a special way to pay and unlock extra features for your server.
If you’re using Discord, you have the option to boost your server by paying a fee. Boosting your server comes with some cool benefits, like being able to upload more and more stickers.
- No Server Boost (5 slots)
- Level 1 (15 slots)
- Level 2 (30 slots)
- Level 3 (60 slots)
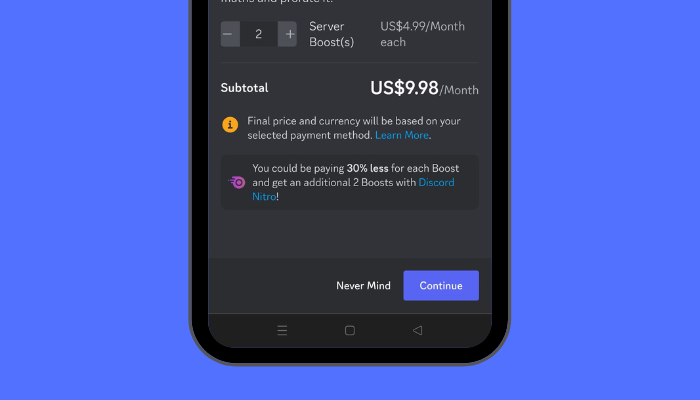
Note: It’s important to remember that if the server lowers its level, you might not be able to use the extra sticker slots anymore.
The button will take you to the uploading page, allowing you to add stickers. You’ll need to type your sticker name. Pick an emoji that corresponds with the sticker. For screen readers, you can add a description.
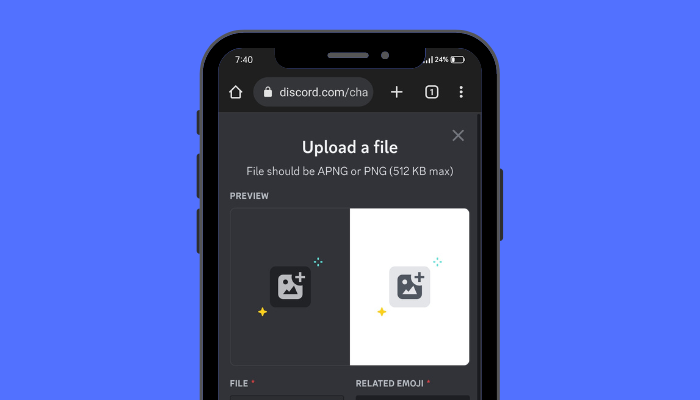
After you finish, just tap the upload option in that same area. Once you’ve added your stickers, just hover your mouse over the image to create any changes. To edit the custom stickers, click the pencil icon.
That’s it. This is the seven step-by-step guides on how to make stickers on Discord mobile. On the Discord app, the Stickers option is not available right now. This is the only way to make stickers on Discord on mobile.
Now, if you don’t know how to create a Discord server, follow the steps carefully which we are going to tell you now.
How to Create Your Discord Server
So, before you learn how to make stickers on Discord mobile, you must have your own server. We will discuss step-by-step how you can create a Discord server on mobile easily.
1. Sign in to the account and find a circular icon with the “+” sign in the menu at the upper left corner. Hit it to create a server.
2. A small window will appear, and it’ll ask if you want to make your own server or join one. Just tap on “Create My Own.”
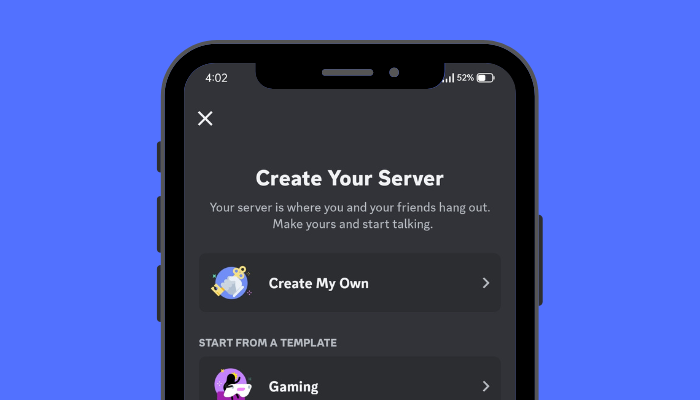
3. This leads you to the page where you can share more about the server. Here, pick between these two options.

4. The next step is that, on the following page that appears, type in the Server’s name and add an icon. Finally, press the Create button.
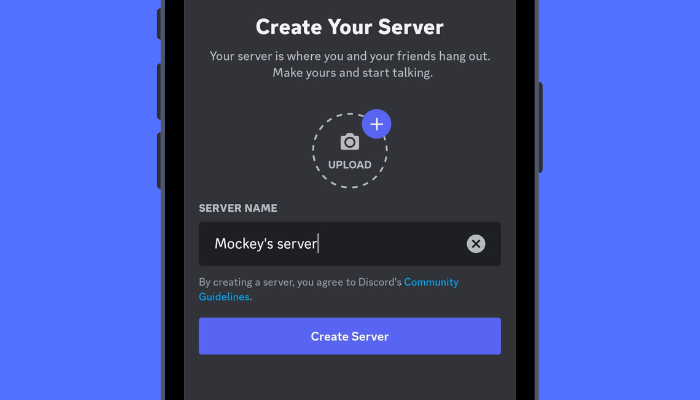
5. After making your server, you can ask other people on Discord to come to the channel by clicking the server icon and choosing the “Invite People” option.

You have learned to create a Discord server. The next guide is in order for a sticker to be effective; it must meet the following criteria.
Create the Stickers With These Conditions
You need to have the image you want to turn into stickers ready. You can either use a picture you already have or start with a blank canvas. Then, make any changes you like, such as rotating, resizing, or cropping the image.
You can put text on a picture and change how they look, like its color, style or font. If there’s something in the image you don’t want, you can make it disappear. After you finish making your picture, save it on your computer.
Follow these conditions when creating stickers:
- PNG file types are required
- The format of animated files should be APNG
- Picture dimensions: 320px x 320px
- 512KB is the maximum file size
Make sure your sticker meets these requirements while uploading it to the server.
Use Discord Stickers on Mobile
Stickers in Discord work for everyone, whether you’re using the free version or have Nitro. If you have Nitro, you can use special Nitro stickers made by Discord, as well as stickers from other servers. The Discord sticker can also be used in Discord DMs by users who use Discord Nitro.
Follow these methods to share stickers with channels:
1. Visit Discord and find the server where you wish to share your special Discord stickers.

2. If you’re on a computer, look for the Sticker symbol next to the Emoji and GIF buttons in the chat box. When you click it, you’ll see different stickers you can use. Just pick one, and you can start sharing stickers with your friends in the chat.
3. If you use the Discord app, specify Stickers by clicking on the emoji smiley face.

How Do You Allow Stickers on the Discord Server
If you run a server and wish to let your members make their custom Discord stickers, follow these methods:
1. Head to Server Setting
Head to the Server setting, and in the drop-down menu, click Roles. Next, just tap the “Default Permissions.”
2. Tap the Default Permission Arrow
On the Permission option, keep scrolling until you find the chance to Manage Emojis and Stickers. This tab lets members put in or take out stickers or emojis from the channel.
3. Click the Save Changes Button
By clicking the slider, you will enable the feature, and you can save your changes once you have enabled it.
What Is the Need for a Unicode Emoji
When you include a matching emoji with your custom sticker, it helps your sticker appear in the sticker suggestions. This makes it simpler for users who have access to the custom stickers to discover and send them. It includes:
- Sticker suggestions on mobile.
- Type the matching emoji with :name: in chat:
- Search for stickers in your drawer.
Optional: Add a Description
We highly suggest adding a brief and clear description for every custom sticker. The stickers will appear on screen readers without the user having to see them. A good sticker description is brief and what feeling it shows.
Great Sample Description: A happy pink flower character moves gently across the net with a peaceful smile.
Bad Example Explanation: A moving flower comes out from a circle in the sky with green surroundings and clouds.
Edit and Delete Uploaded Stickers
Editing: When a sticker is hovered over, click the pencil symbol.
Deleting: To remove a sticker, just move the mouse over it and then click the “X” symbol that appears.
Note: Once you’ve uploaded the sticker, you can’t make changes to it. If you wish to use a different sticker, you’ll have to delete the current one and upload another!
How to Get Discord Sticker Idea
Before you go ahead and upload your stickers on Discord, it’s important to have an idea of what kind of stickers you want to create.
This way, you can make custom cute stickers to share with your friends on your channel. It’s a good idea to check out our article for some inspiration on Discord sticker ideas.
Once you’ve completed this step, you can use Mockey to make mockups of your stickers. This helps you see how your stickers will appear on your products.
Conclusion
In summary, we’ve discovered a straightforward 7-step guide on how to make stickers on Discord mobile.
This makes it easy for you to add stickers to your mobile device without needing to use an app. Discord even helps you do video chat, which is completely safe. It’s not similar to Omegle; users can stay anonymous on Discord.
Also, we discussed how to set up a server for your channel, what are the rules you need to keep in mind when making stickers, and a great way to come up with ideas for your sticker designs.
FAQs
How do you make stickers on Discord app?
If you want to add your own stickers on Discord, you have to create your Discord server. The Create Expressions feature allows users to add a sticker, and the Manage Expressions feature allows you to edit and delete expressions.
How do you make stickers on Discord Android?
You can add stickers to Discord on mobile without using the app. For that, you can visit Discord’s official website and tick the Desktop site box on your browser. Once you log in to your Discord, untick the Desktop site box and upload your stickers easily.
What is the best app to make Discord stickers?
If you want to create a Discord sticker online with ease, Kapwing is the top choice. Just like how the company made a tool for emojis on Discord, Kapwing has also made a template for you. You can change the size of your picture and use features like adding text or changing the color of the background if you want.
