Do you want to learn how to create 3d mockup in Photoshop? Don’t worry. We can assist you.
Anyone can design all types of products or marketing materials with Photoshop.
Photoshop has many advantages for making mockups. You can easily add logos, colors, and designs from past projects to make sure that all your designs look the same and fit together well with the Creative Cloud Library.
But do you want to create a 3d mockup right now for free? Visit Mockey’s 3d mockup generator to start making mug, bottle, and can mockups.
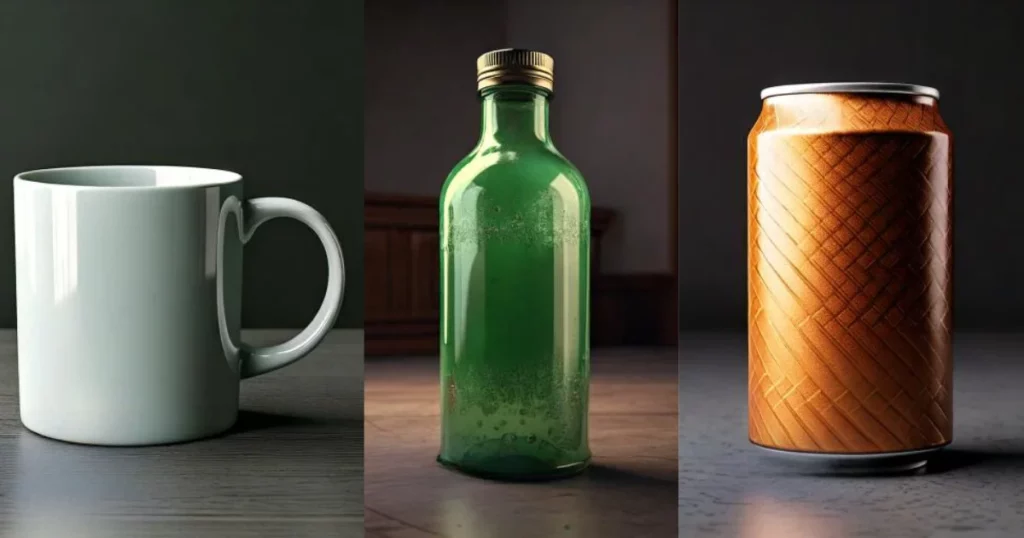
Table of Contents
What are 3d Mockups?
What is a 3D mockup? A 3D mockup is a digital model of a product or object made to look three-dimensional. It shows what the design will look like in real life, helping people see and understand it more clearly.
How to Create 3d Mockup in Photoshop – A Quick Guide
Here is a quick guide on how to create 3D mockup in Photoshop.
- Use the Pen tool to outline one side of a bottle shape and cap, adjusting paths with the Direct Selection tool.
- Go to “3D” > “New 3D Extrusion from Selected Path,” set the extrusion preset to cylindrical, and adjust depth.
- Export the model as an OBJ file and open it in Adobe Dimension.
- Import the model, apply materials, and adjust lighting and background.
- Render it as a PSD, open it in Photoshop, and apply a logo with blending adjustments.
Step-by-step Guide
Here is a step-by-step guide on how to make 3d mockup in Photoshop.
Step 1: Draw the Bottle Shape Using the Pen Tool
In this quick tutorial, we will show you how to create a 3d mockup in Photoshop using a bottle.
So we’re going to take the pen tool and draw a shape along the contours of this reference image that we have in Photoshop.
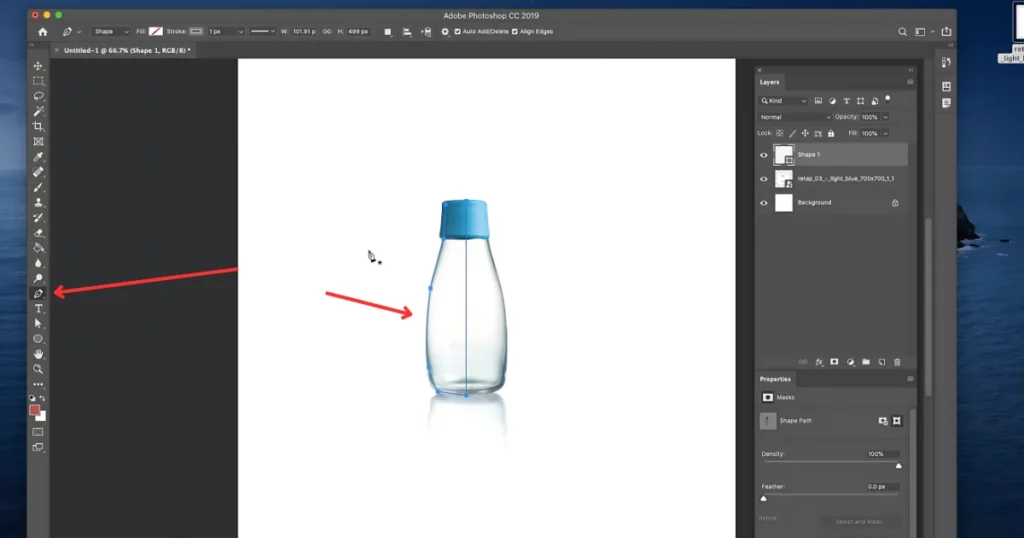
We’re going to close it (Opacity = 15%) so you only have to draw it on one side.
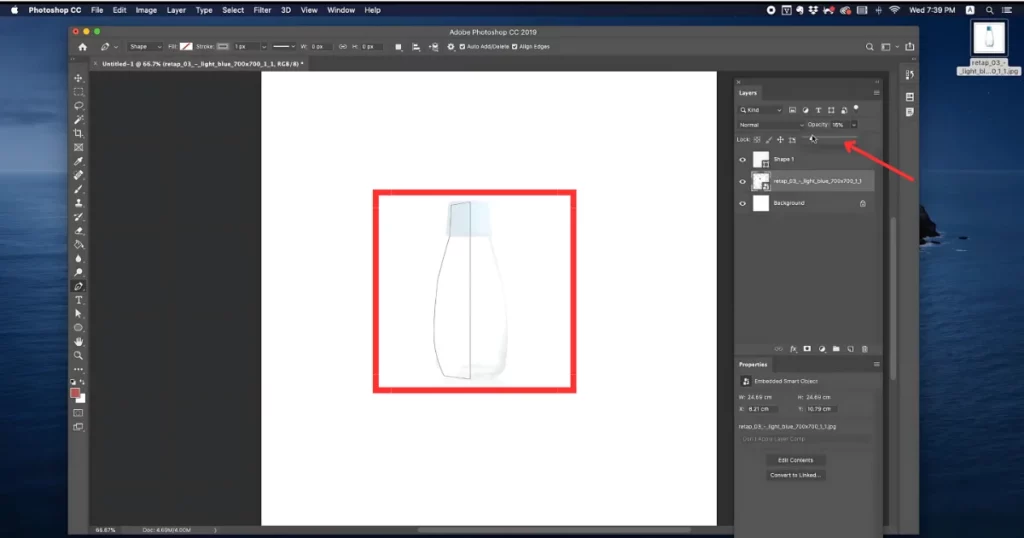
After the pen tool, we can use the direct selection tool to correct the path that you have and you can modify them if you require.
Step 2: Draw the Bottle Cap Shape
So once we have this shape ready we’re going to draw another shape for the cap so we can trace the cap using the pen tool just like how we did one side of the bottle. We’re going to use the pen tool to trace the cap.
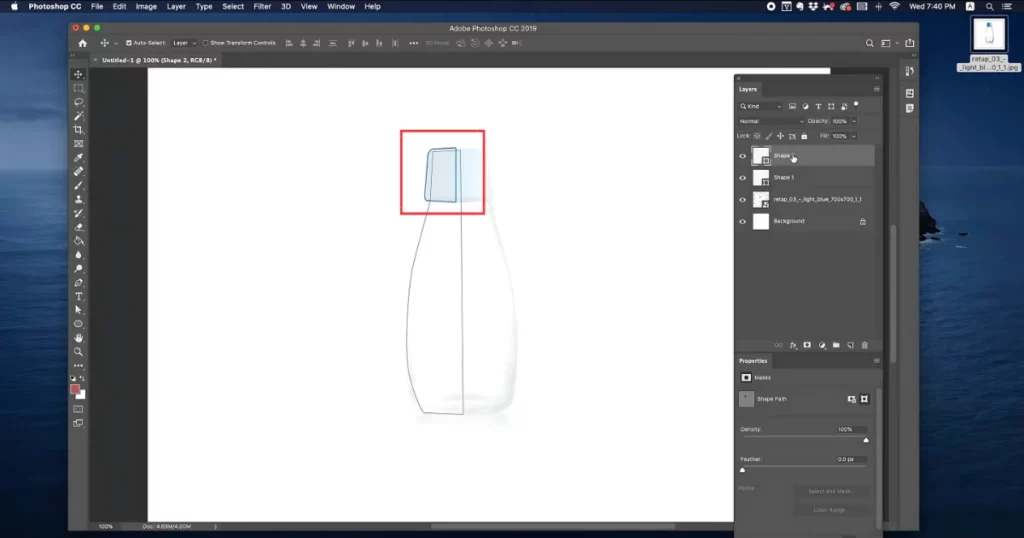
Step 3: Make 3D Extrusion
Now after the the drawings have been made, we can select the first layer which is the bottle trace we can go to “3d” and click the “New 3d extrusion from Selected path“.
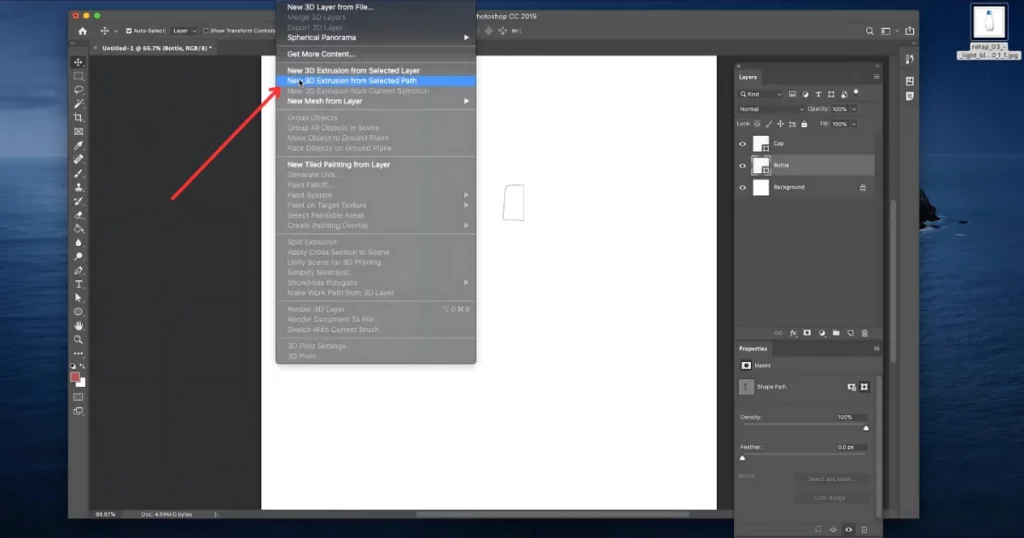
It’s going to extrude it but it’s not the right extrusion. So we’re going to go to the “Properties” we’re going to change the extrusion preset to cylindrical from here.
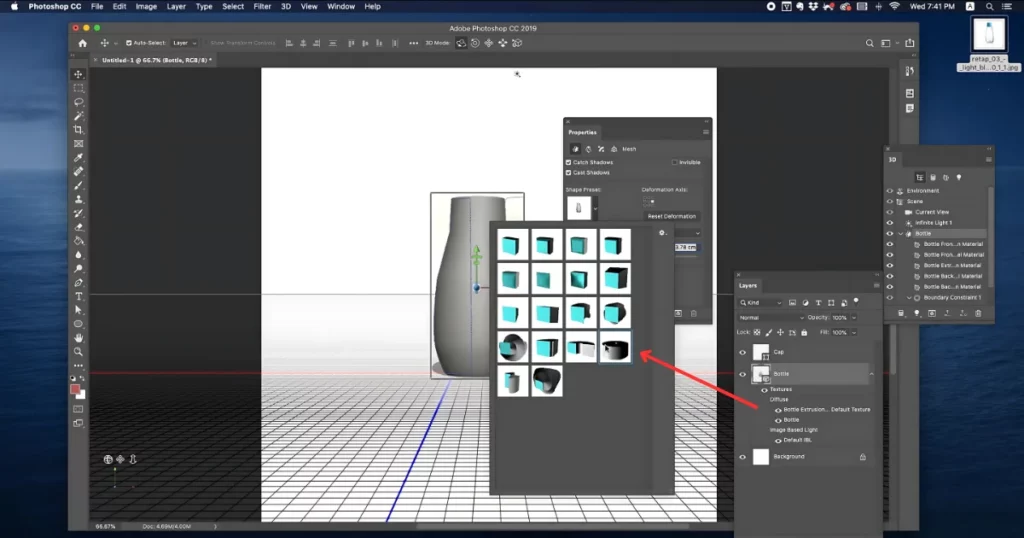
We can also reduce the extrusion depth if you want the radius of the bottle to be less.
Step 4: Create 3D Extrusion for the Cap
So we can do the same thing for the cap. Head to 3d, and pick New 3d extrusion from Selected path.
We now have the scene.
Step 5: Export the 3D Model
We can now go to “3d” and choose “Export 3d layer” to share this model that we just made in our Photoshop.
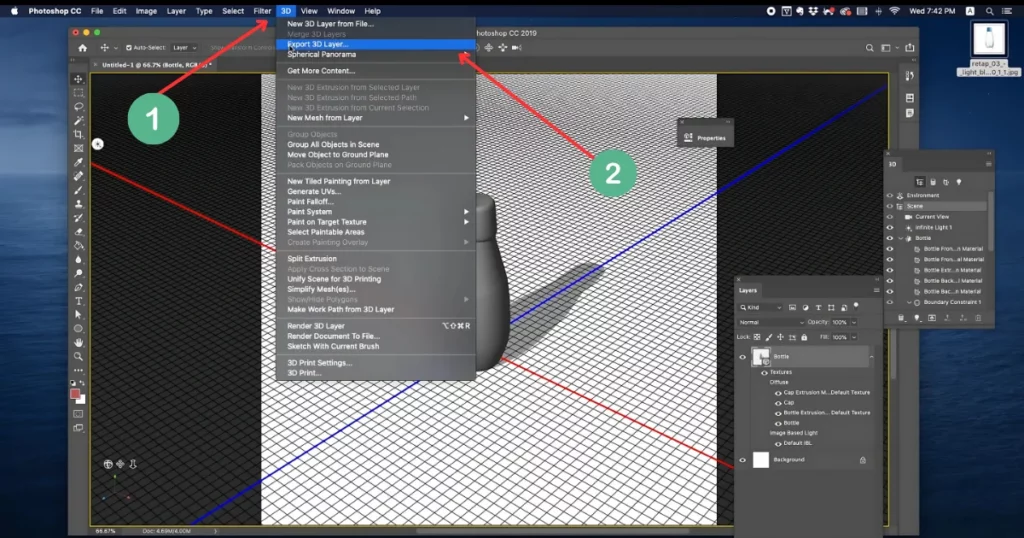
So we can choose the “Wavefront obj” file and click ok to export the model that we just made into our desktop.
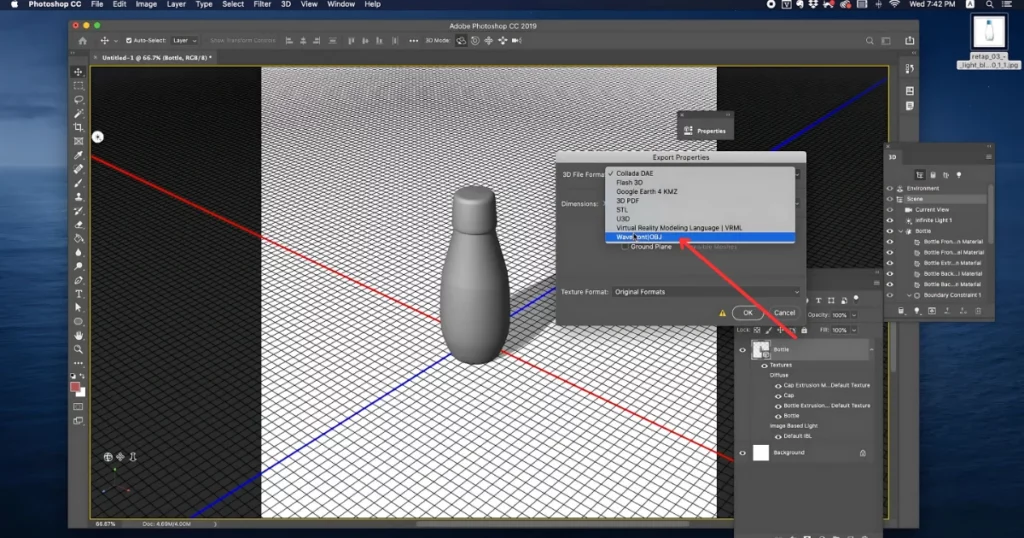
So we’re saving it in a folder called Bottle. Now the file is saved.
Step 6: Launch the Model in Adobe Dimension
We’re going to for the second part of this tutorial we’re going to open Adobe Dimension. We can hit Create New to build a new scene.
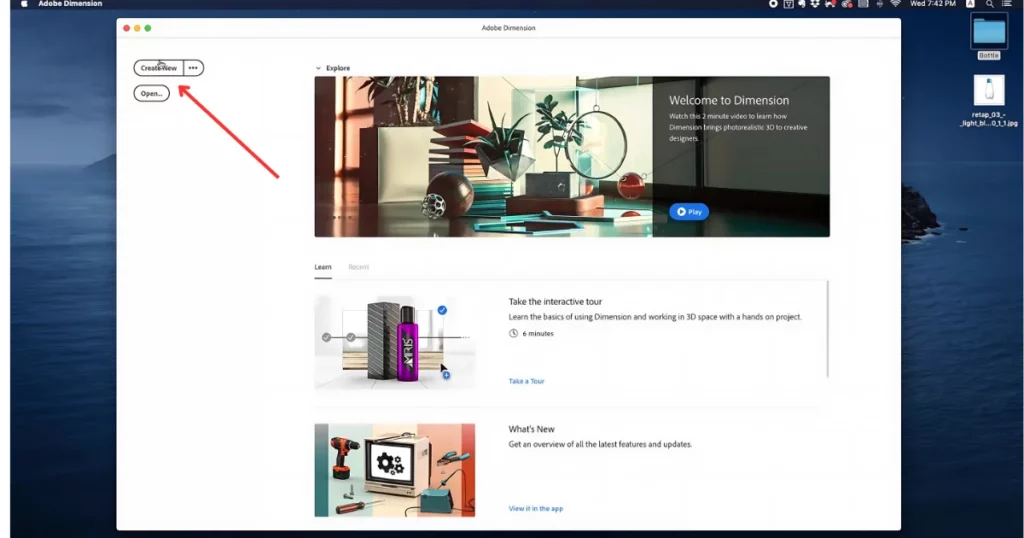
So we’re going to go here to go to files and click on import and click 3d model and choose the bottle model that we just exported out of Photoshop.
You can click on this button to center our model.
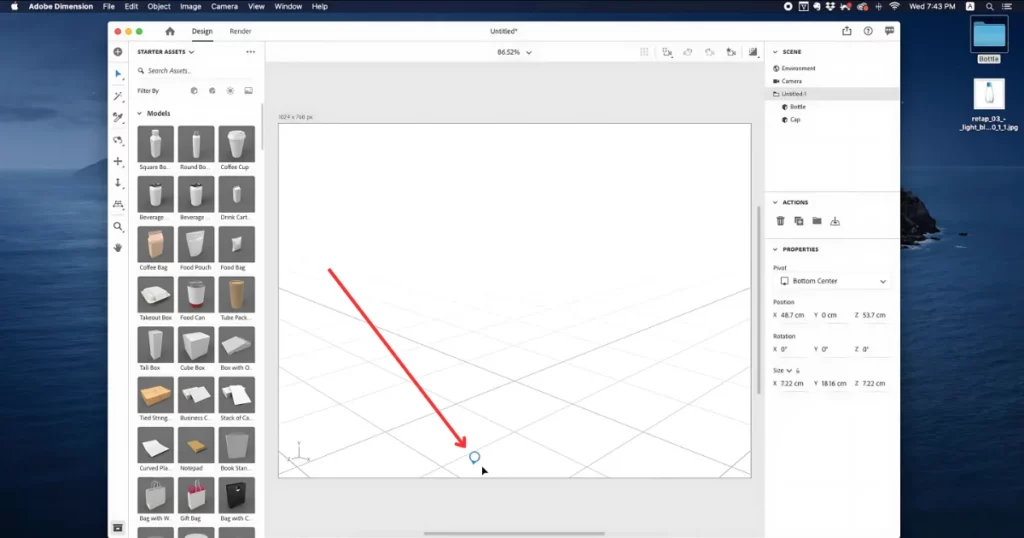
We can now see the 3d modelling dimension.
Step 7: Apply Materials to the Model
We can go to the materials on our left panel and we can choose materials and drag and drop them to each one of these sections that we have and the material will instantly be applied to the objects.
So in this case we’ve applied a metallic texture to the cap and we’re going to apply a frosted glass effect to the bottle.
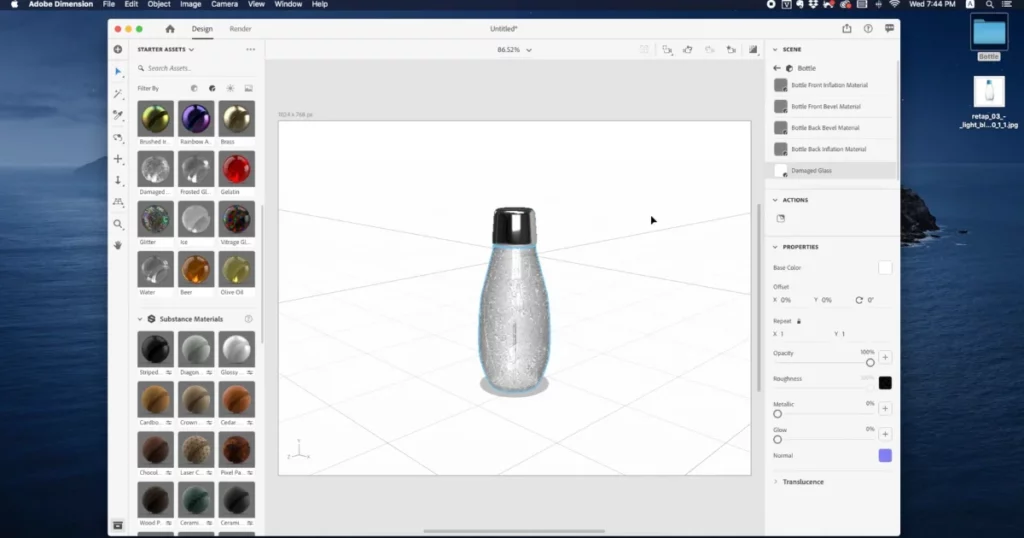
At the moment, we have both.
Step 8: Adjust Lighting
We can go to the lighting panel and choose the appropriate lighting required for the scene.
Step 9: Set the Background Image
We can now go to the background image and choose an image to set it in the background.
So to match the perspective we can tap on the match image button. We don’t need to match the light so we’re going to turn off the lights and click “OK” to match our model with the image that we have.
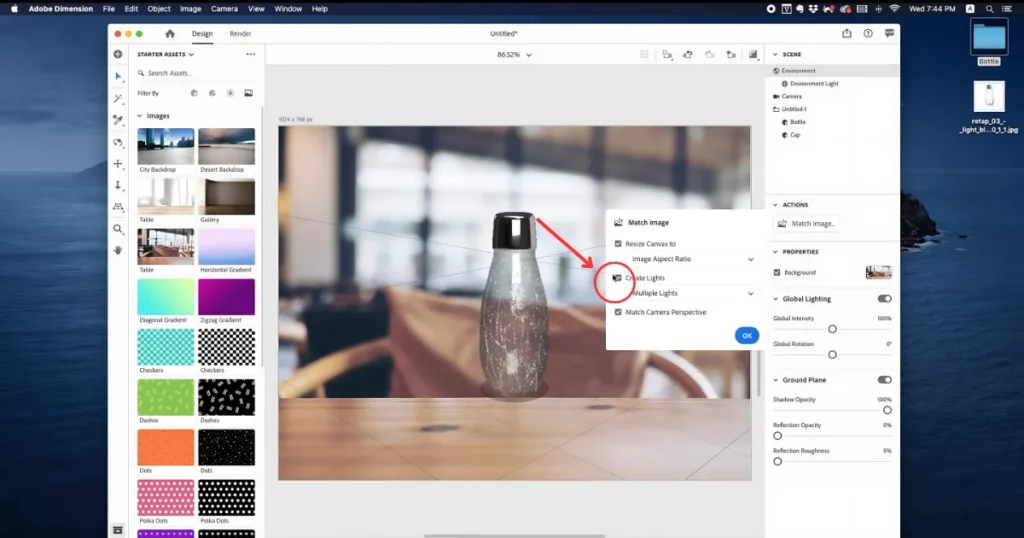
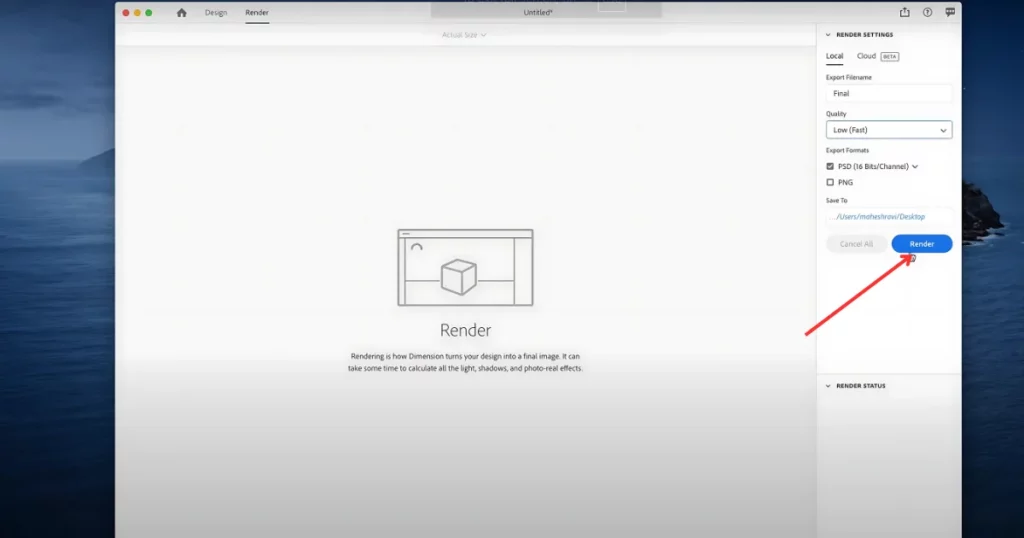
Step 10: Render and Export
Now if you’re happy with the quality you can go to the “Render” button and you can give your file name. Change your quality if you want. But we’re going to render this at low and we are exporting this as “PSD“.
So once the rendering is complete you will have a psd file like this.
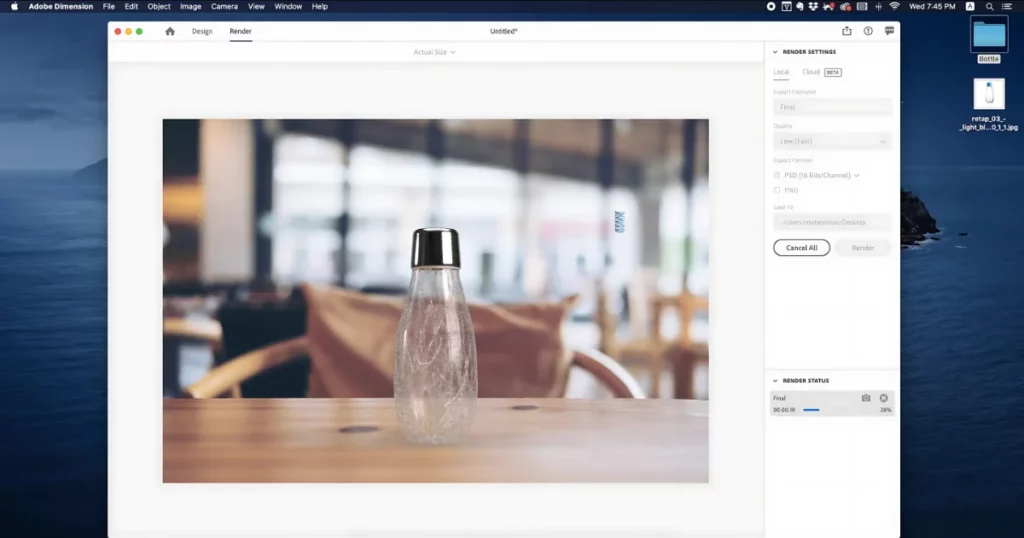
Let’s open that PSD file in Photoshop and we have it. so you can see all the layers that are exported from a dimension we can see every individual layer.
Step 11: Apply the Logo
So let’s look out for a logo and then take that logo.
Go to “Adjustments“, and then click “Invert“.
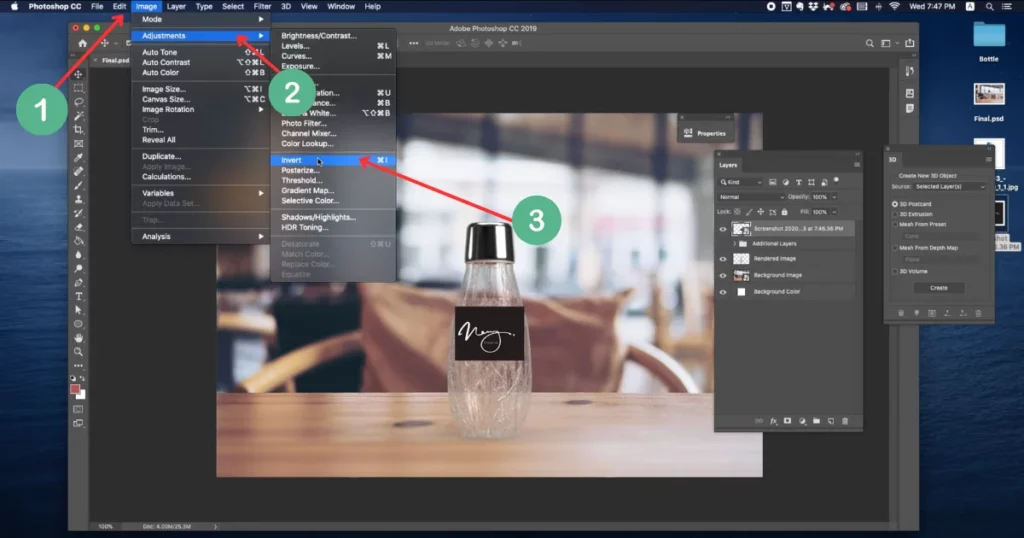
So that we can apply a multiply blending mode and sort of blend with the bottle.
You can adjust the levels a little bit. So you have a custom bottle that is designed out of Photoshop. Hope you enjoyed this simple tutorial on how to make a 3d mockup in Photoshop. We took this idea from Mahesh Ravi’s channel.
Best 3D Mockup Generator
Mockey AI is the best website for making 3D mockups, even better than Photoshop.
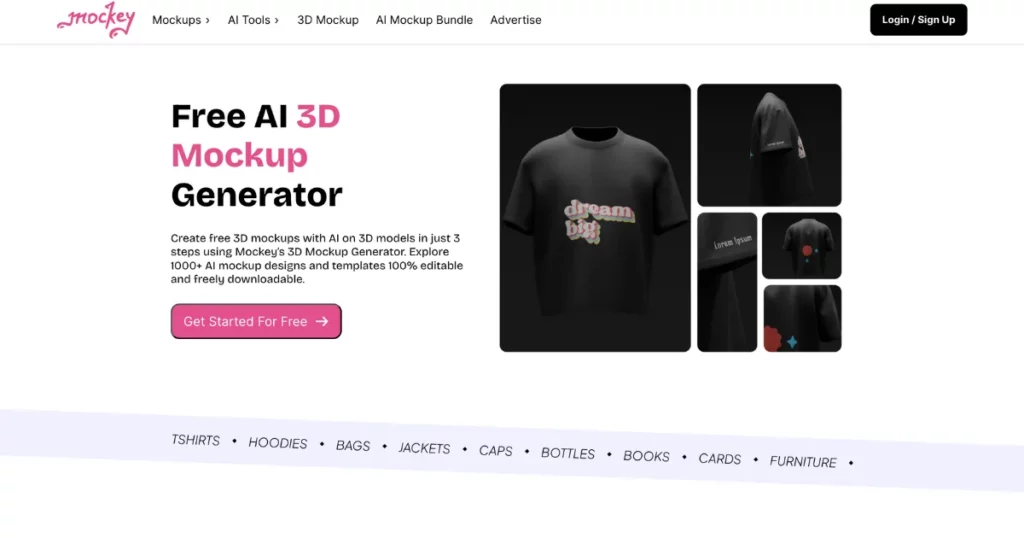
Here’s why:
While Photoshop has great tools for mockups, it can be complicated and time-consuming. Most people just want an easy way to choose a template and add their own style, without all the complexity.
That’s where Mockey comes in. Steps to make a 3D Mockup in Mockey:
We will use a 3d water bottle mockup.
Step 1: Sign Up and Click 3d Mockup Tool
First, sign up on Mockey.
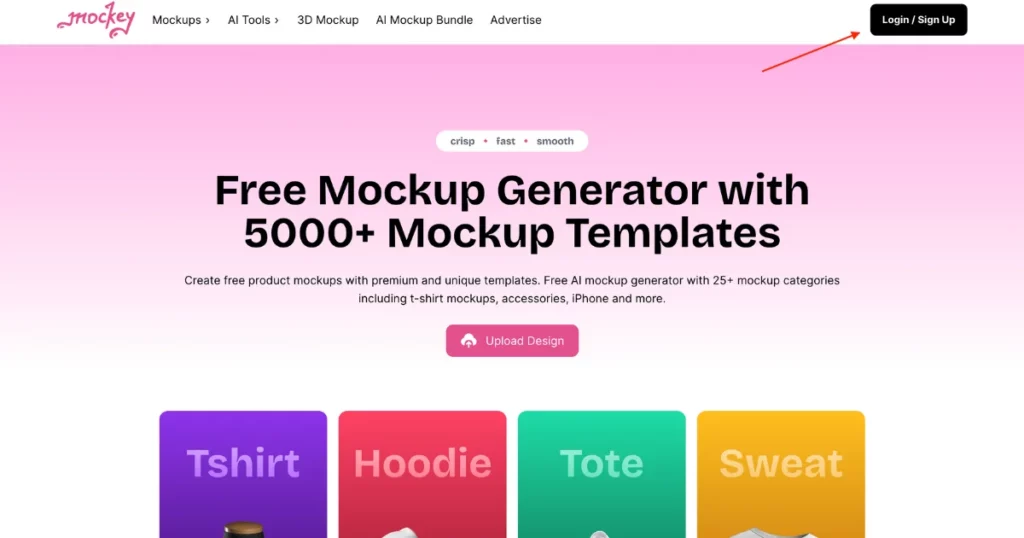
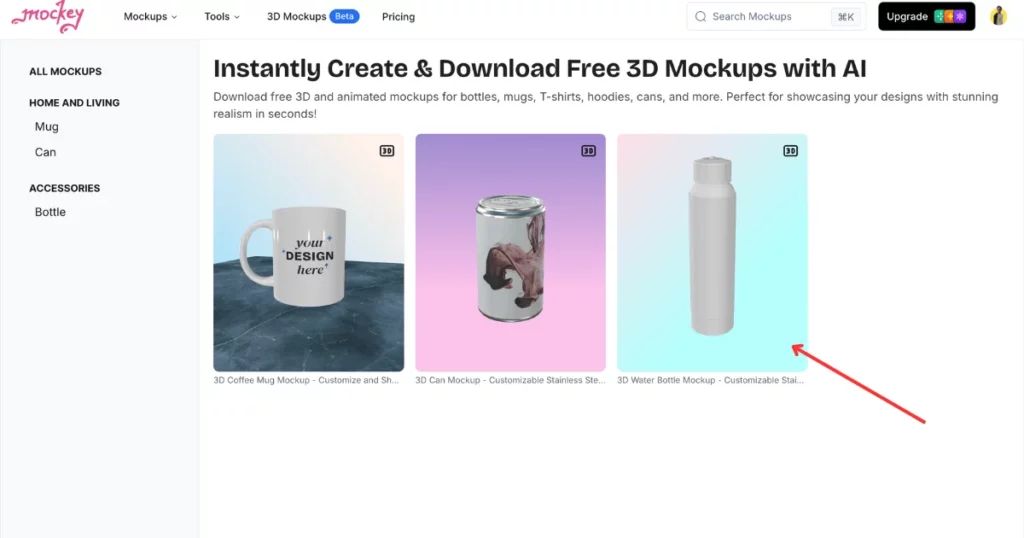
In the top menu, select “3D Mockup” to quickly create and download 3D mockups with AI.
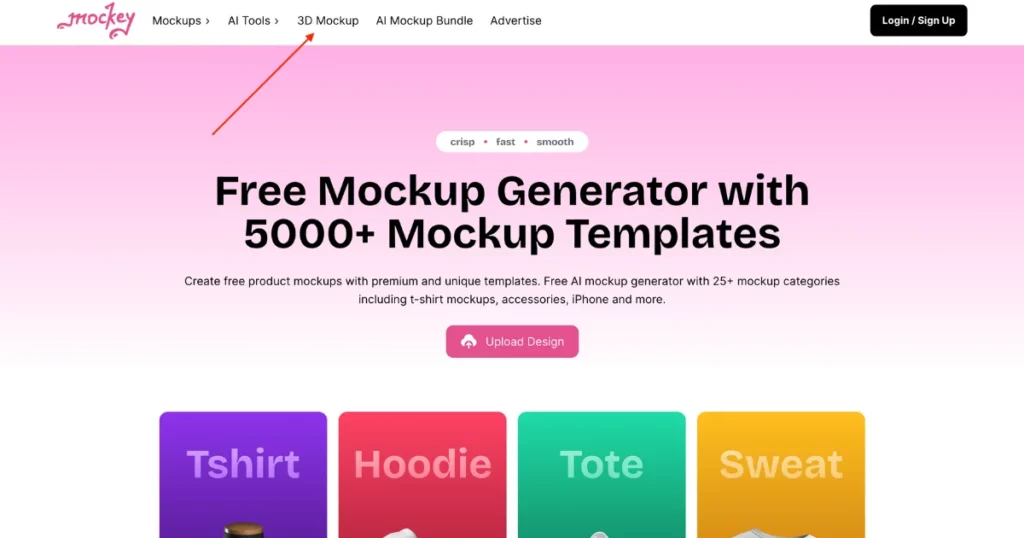
We’ll use a water bottle mockup for this example.
Step 2: Choose Your Product Mockup
Click on the 3D Water Bottle Mockup template.
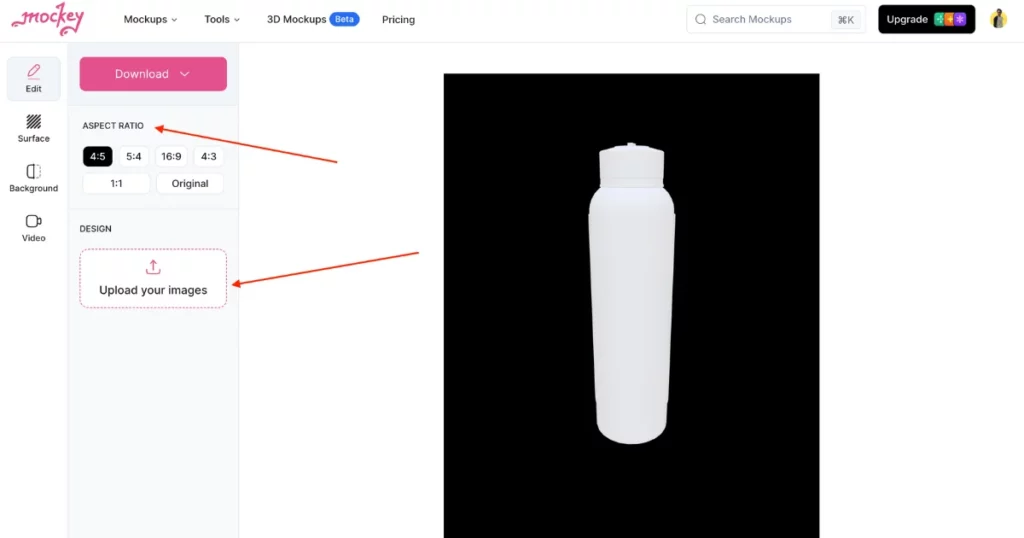
Step 3: Customize it with Background and Texture
Adjust the template’s aspect ratio if needed. Tap Upload Your Images to add the design, or just drag and drop it in.
You can resize or expand the photo to fit the bottle.
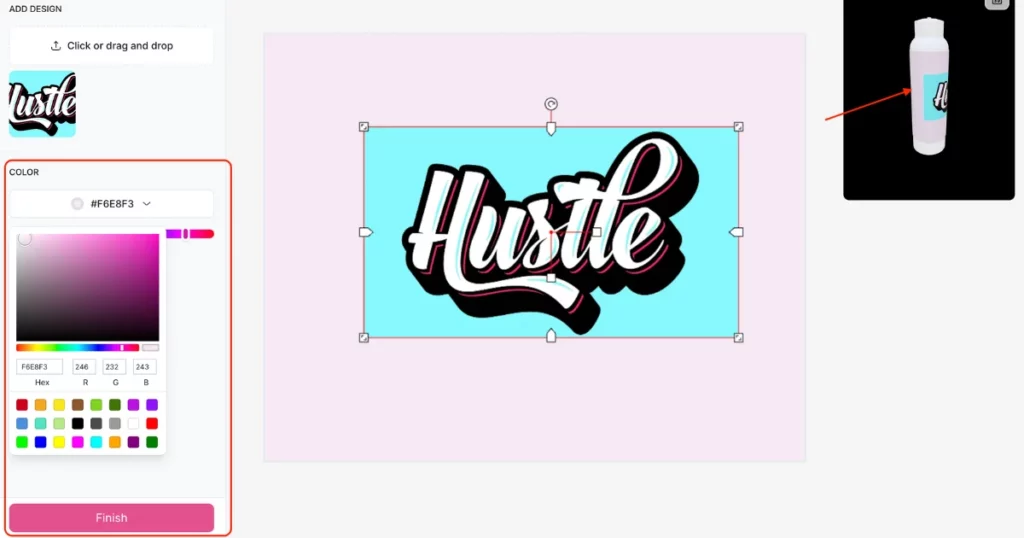
modify the color of the bottle’s design area if you like.
- Edit the Texture: Go to the “Surface” section to adjust the bottle’s texture.
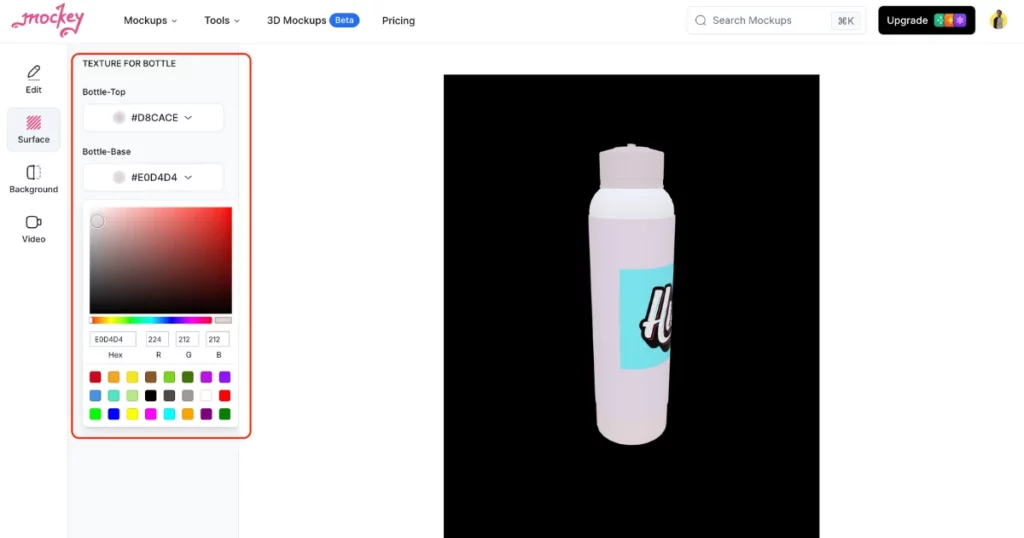
- Choose the Background: In “Background,” you can pick a solid color, a gradient, or even a natural background.
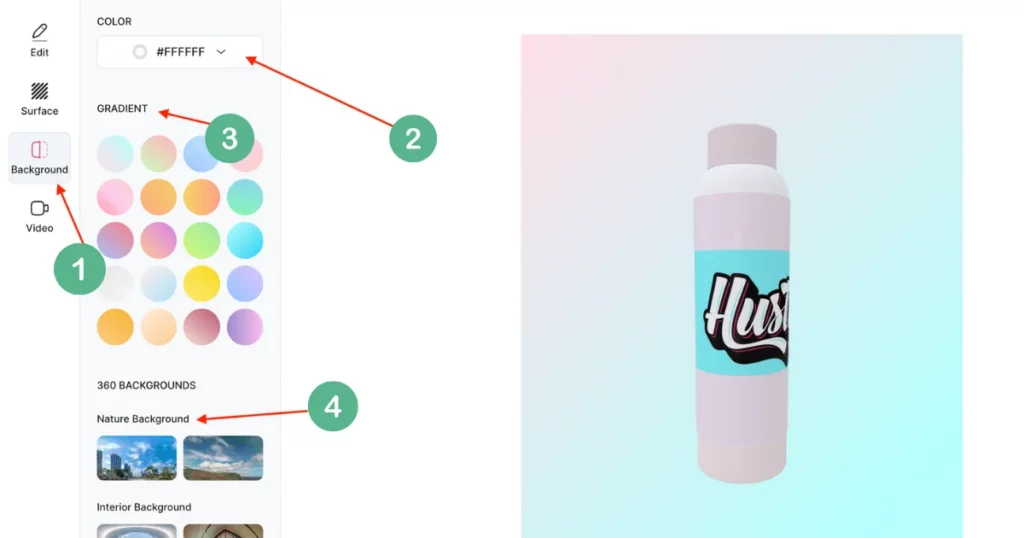
- Coming Soon: A “Video” feature will be available soon!
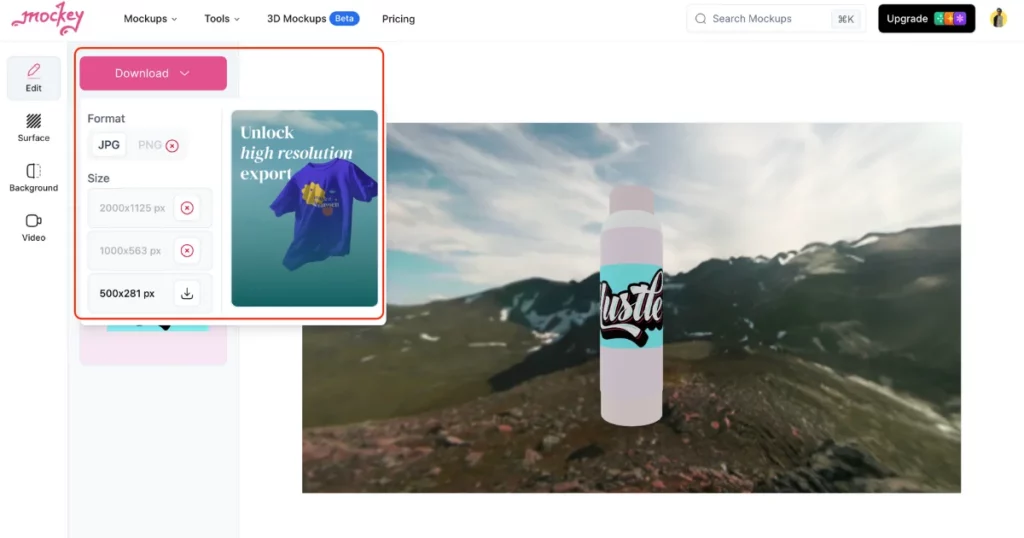
Step 4: Download Your 3D Mockup
Hit “Download” to save the 3D bottle mockup in any format once you’re satisfied with it.
To Conclude
In conclusion, we’ve covered the steps on how to create 3D mockup in Photoshop and explored the top 3D mockup generator for effortless, high-quality results. Follow our guide to craft outstanding 3D mockups with ease.
Sign up now in Mockey to start creating 3d mockups for free.
FAQs
How to create a Photoshop 3D mockup?
To create a 3D mockup in Photoshop with ease, start by using the Mockup Baker plugin. First, download a compatible PSD mockup and open it in Adobe Photoshop. Launch Mockup Baker, choose the design layer, insert your design, and click Bake it to quickly render your design onto the 3D object.
How to create a 3D mockup?
To create a 3d mockup, visit Mockey AI, click 3d mockup, and then pick a product template such as a mug, can or bottle. After that, start customizing it by adding texture or background. Lastly, hit the Download button to save the 3d mockup.
How to create 3D in Photoshop?
To make a 3D effect in Photoshop, start by opening an image or a new file. Pick the layer you want to turn 3D, then go to the 3D menu and select New Shape From Layer to choose a shape. In the 3D panel, you can adjust things like lighting and materials to get the look you want before finishing up with rendering.
Related reading:
