Have you ever thought about how to blur the background of a picture? It’s called bokeh, and it happens when the camera settings are just right.
It focuses sharply on the subject and blurs out the background, giving it a dreamy look.
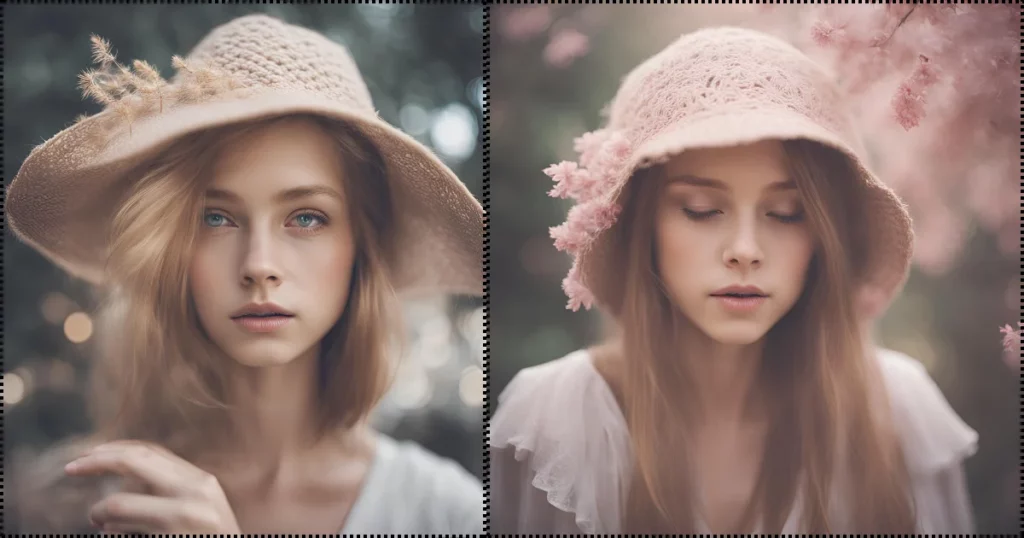
You can blur the background of a picture with fancy lenses, but those can be pricey.
However, there’s another option: using Mockey to edit your pictures. We’ll explain how can we blur the background of a picture in this article!
Table of Contents
What Is Background Blur?
Photographers have been using background blur for a long time to make their main subject stand out. The goal is to make the main thing stand out by getting rid of busy elements in the background.
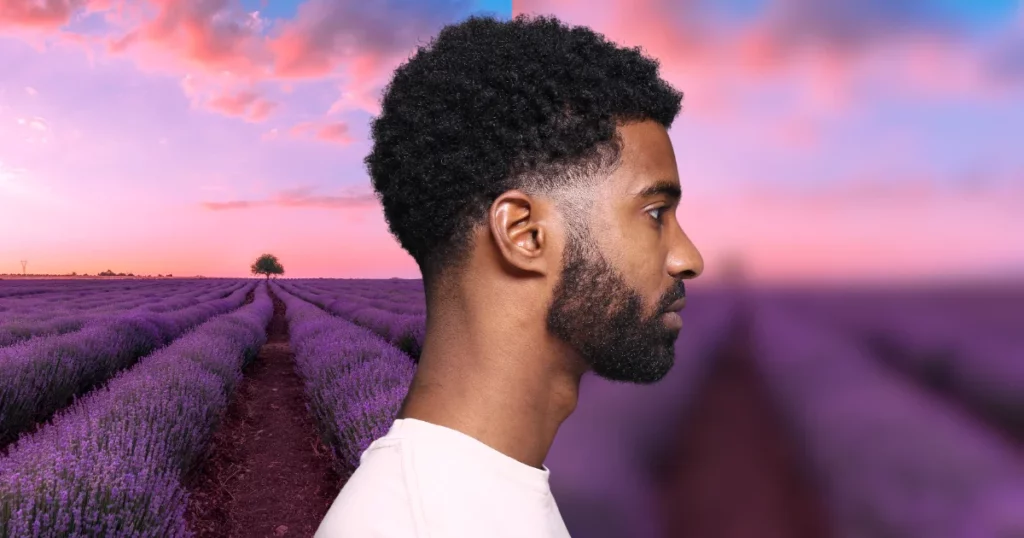
How to Blur the Background of a Picture Using Mockey
Mockey is one of the best apps that blur the background of a picture. The new “Blur Background” feature blurs your background quickly.
A guide on how to blur the background of a picture using Mockey – with step-by-step instructions.
- Click the link for AI blur background to go directly to the page.
- Before using the blur background feature, make sure you Sign up there and Upgrade to Max plan to use this feature.

- Now, upload your picture.
- Start by clicking “Blur Background“.

- You can also use the customization setting to modify your picture.

- Lastly, hit “Download” to save your picture in high quality.
How to Blur the Background of a Picture on Photoshop
Step-by-step methods to blur the background of a picture in Photoshop:
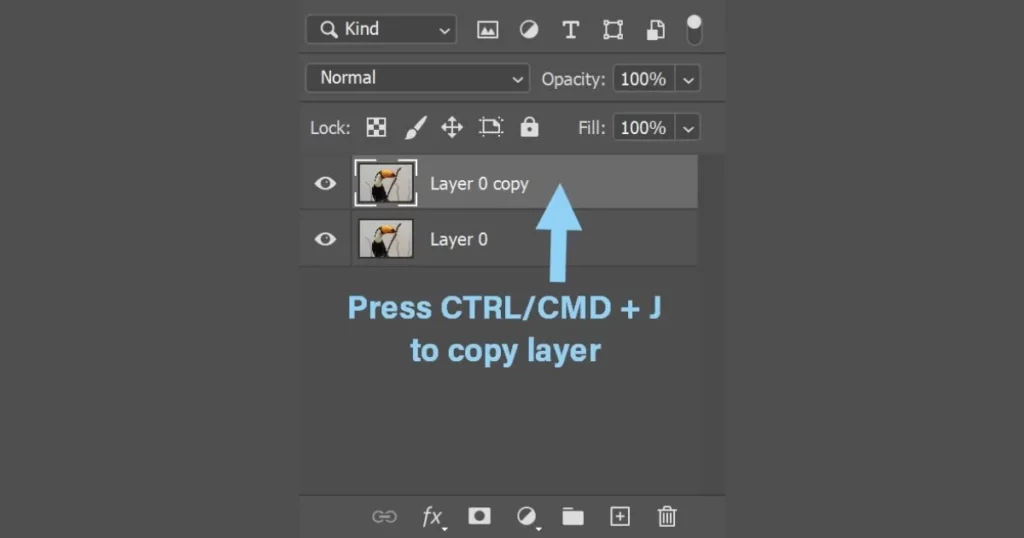
- Right-click the image layer and select “Duplicate Layer” or press Ctrl+J (Windows) / Command+J (macOS). Rename it “Foreground” or “Subject“.
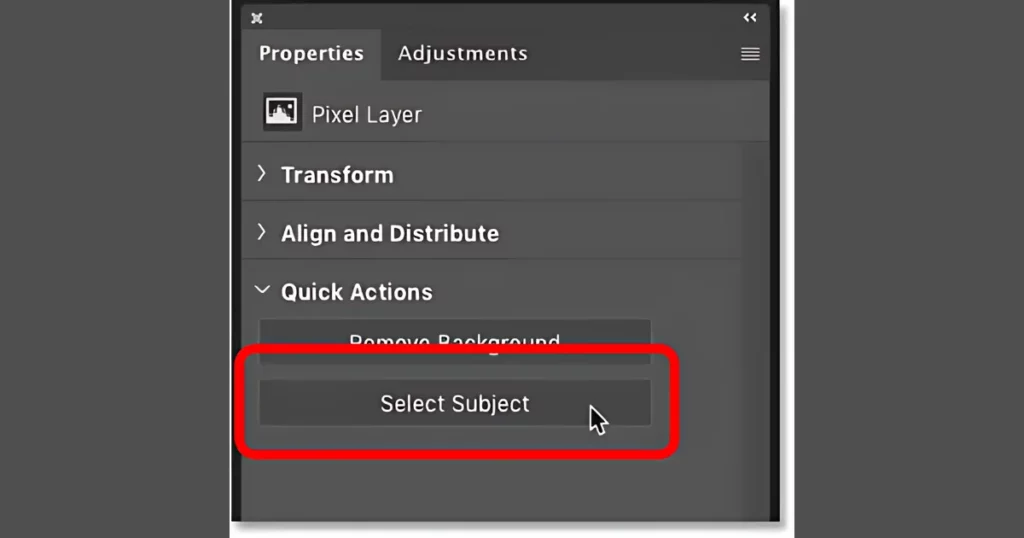
- Click “Select Subject” from the Taskbar or go to “Select > Subject” to automatically select the main subject.
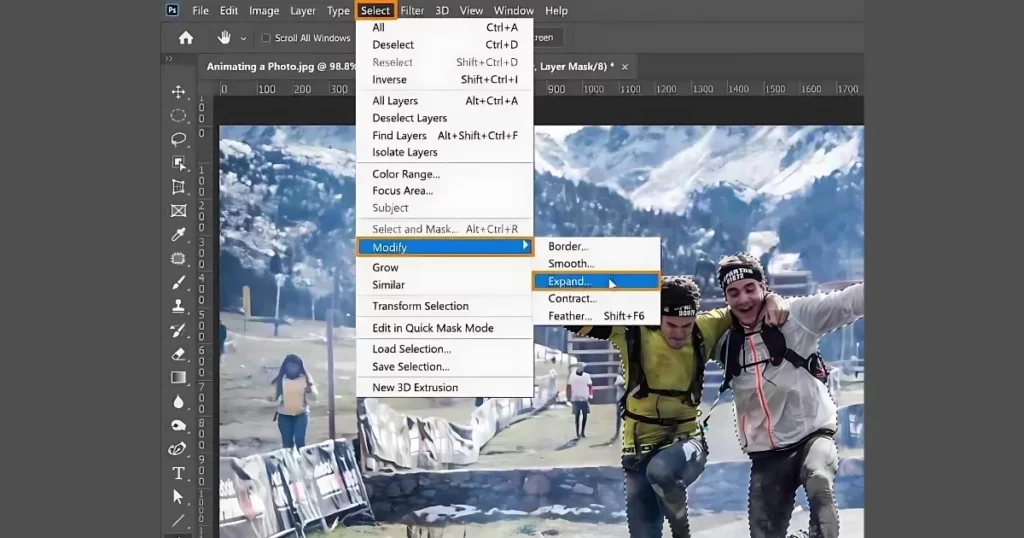
- Use “Select > Modify > Expand” to make space between the selection and the subject’s edge.
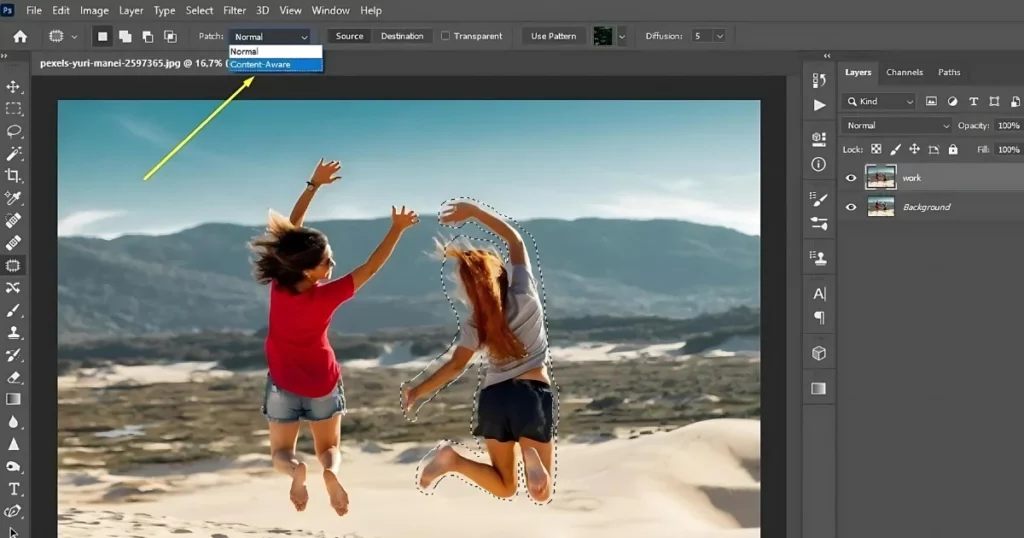
- Remove the background using “Generative Fill“. Alternately, use “Content-Aware Fill“.
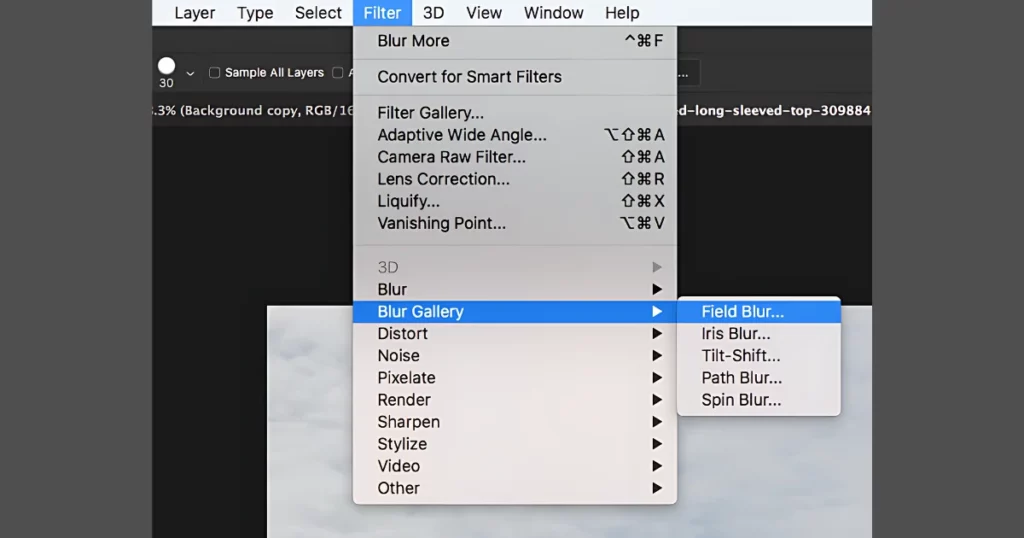
- Convert the background layer to a Smart Object if needed. Then, go to Filter, and then Blur Gallery, and click the Field Blur option.
- Use the Brush feature with white to reveal and black to hide pixels, refining the layer mask for a natural look.
- Blacken stray pixels with a Layer Mask. Create a new layer for the hair, use the Brush tool, and the Eyedropper tool to sample hair colors for a realistic effect.
How to Blur the Background of a Picture in Powerpoint
To blur the background of a picture in PowerPoint, follow these steps:
- Open your PowerPoint presentation.
- Click on the picture you want to blur.
- Choose “Picture Format” from the ribbon.
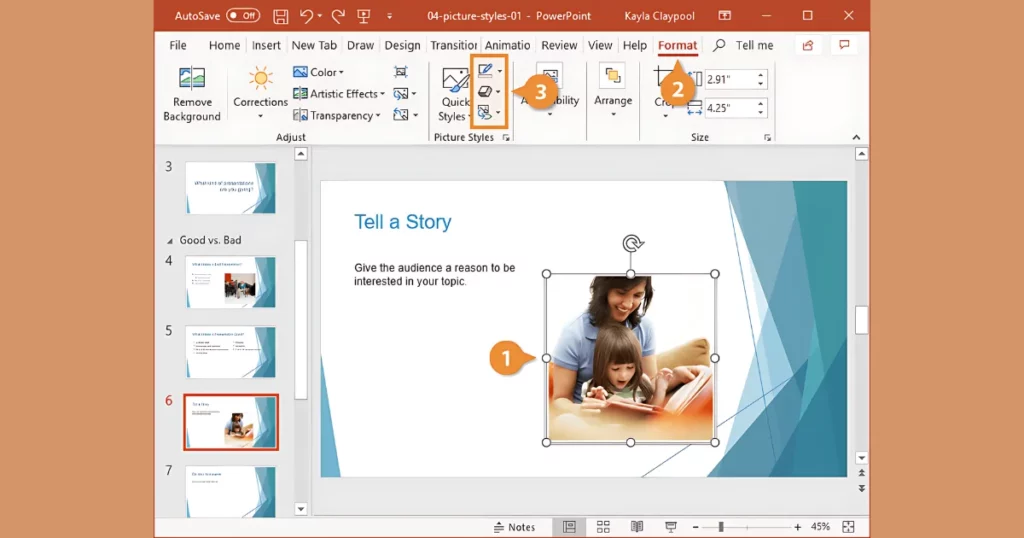
- Select Artistic Effects.
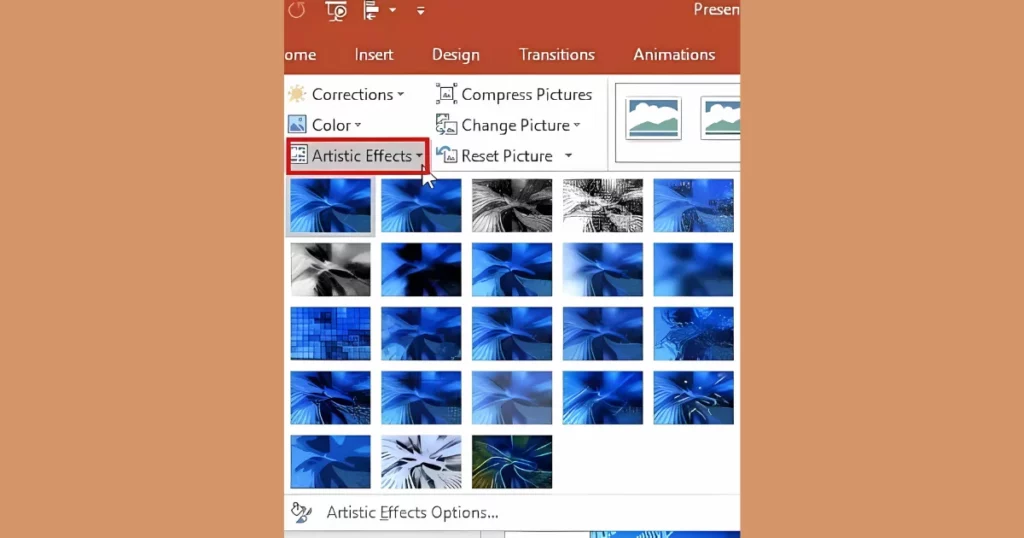
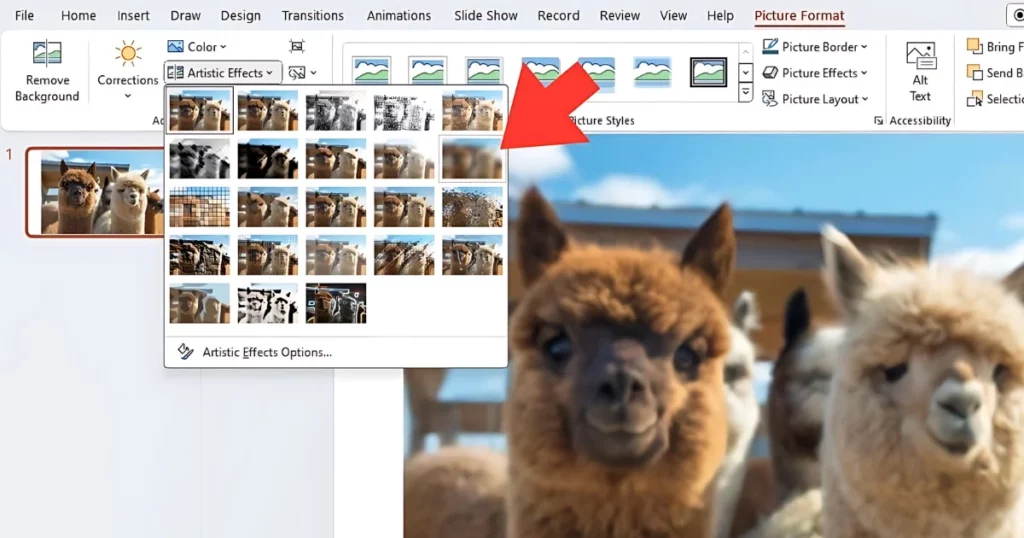
- From the drop-down menu, select Blur.
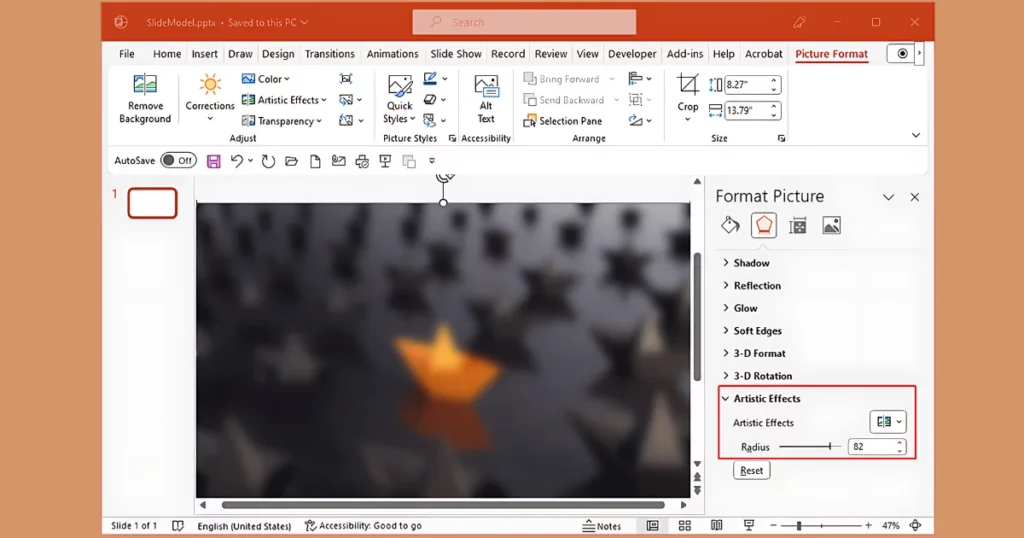
- To change the blur, go to Artistic Effects Options and move the Radius slider to make it more or less blurry.
How to Blur the Background of a Picture on Instagram
To blur your Instagram picture background:
- Open Instagram on your phone.
- Swipe right to make a new Story.
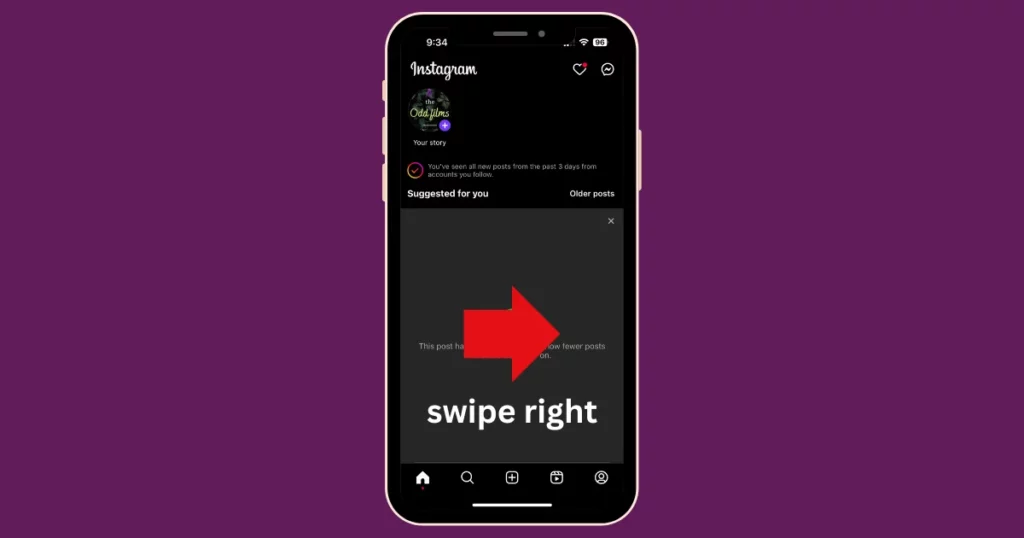
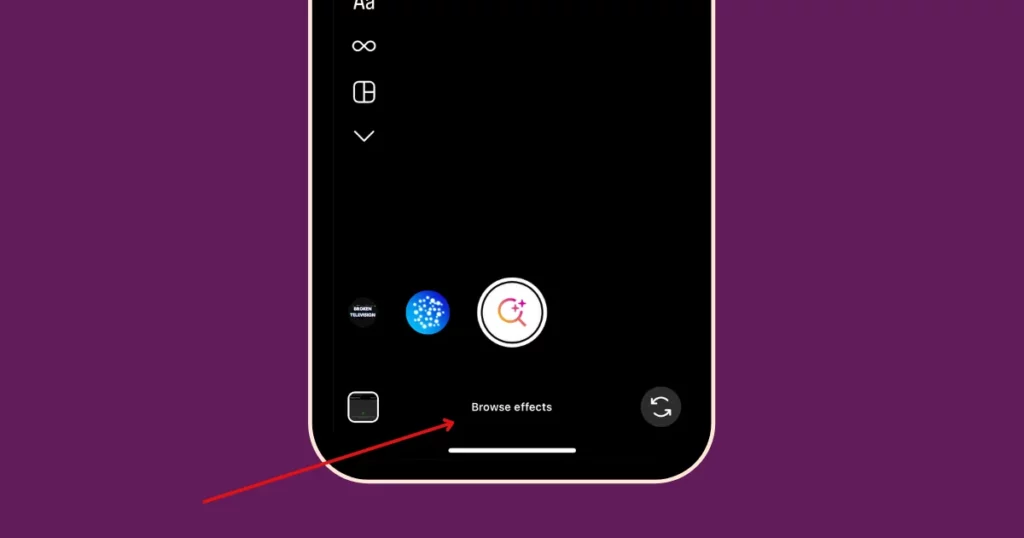
- At last you will see the “Browse Effects” option.
- In the search bar, search for “blurred background“
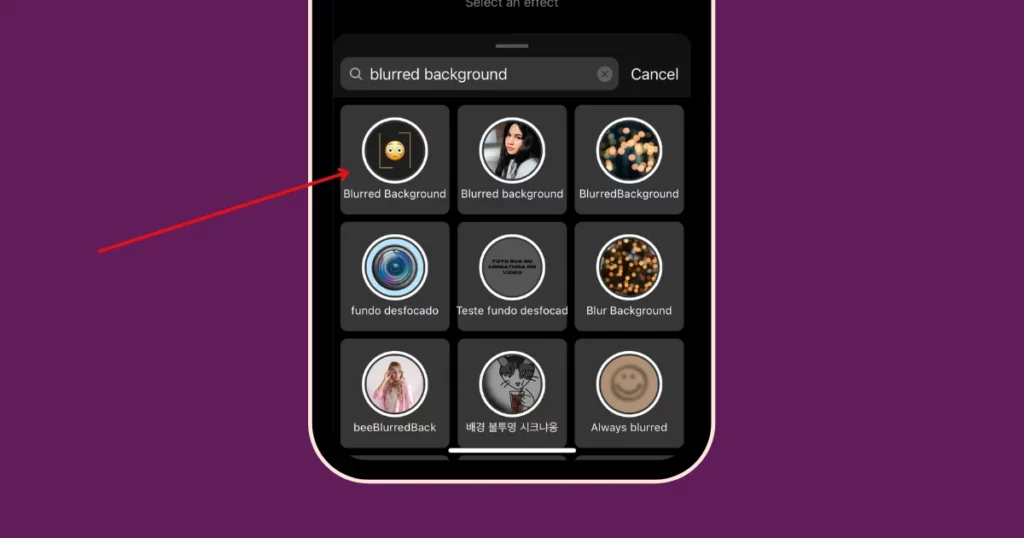
- Choose a blur effect.
- Apply it and save.
- Edit if needed.
- Post your creatively blurred picture.
How to Blur the Background of a Picture in Lightroom
To blur a picture’s background in Lightroom:
- Open the image in Lightroom’s Develop module.
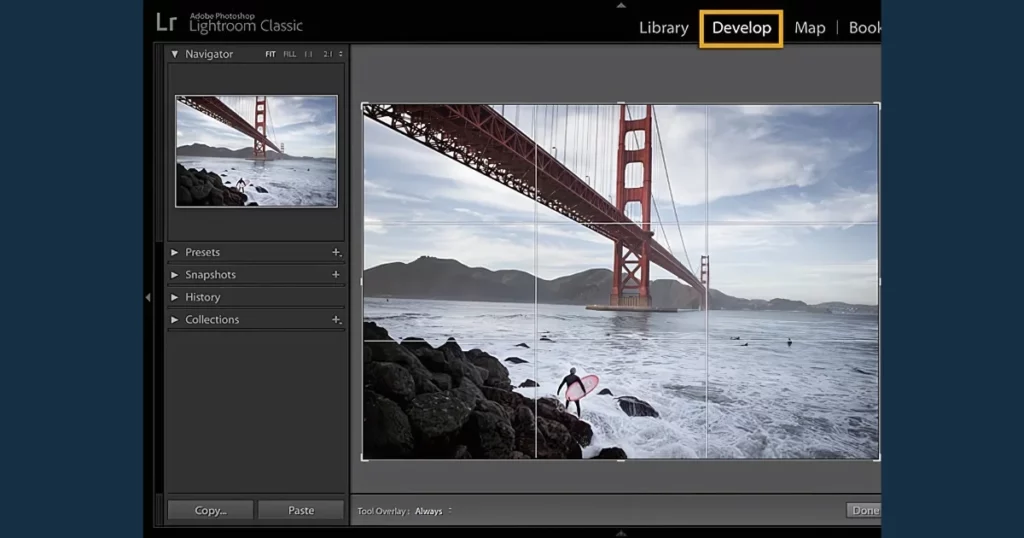
- Click on the Brush tool.
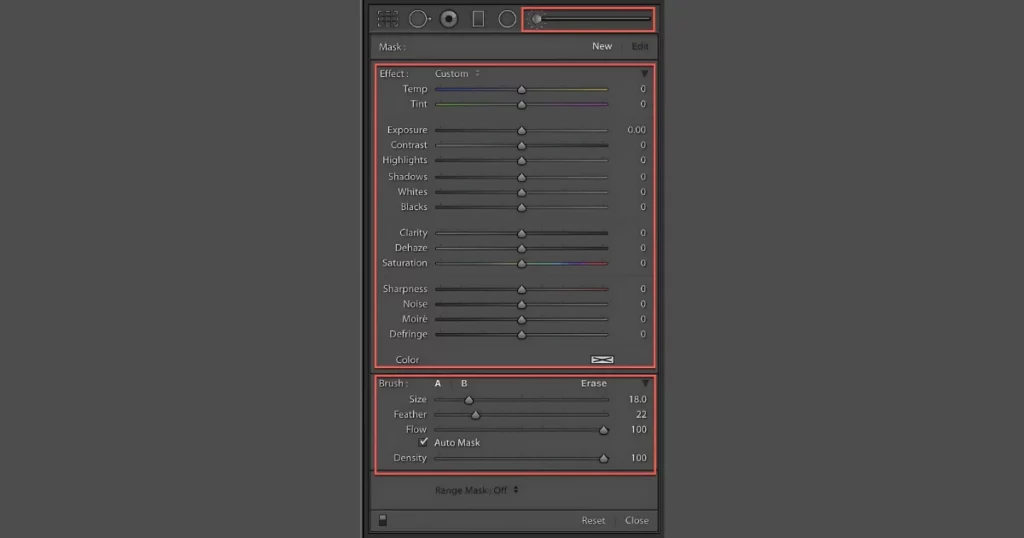
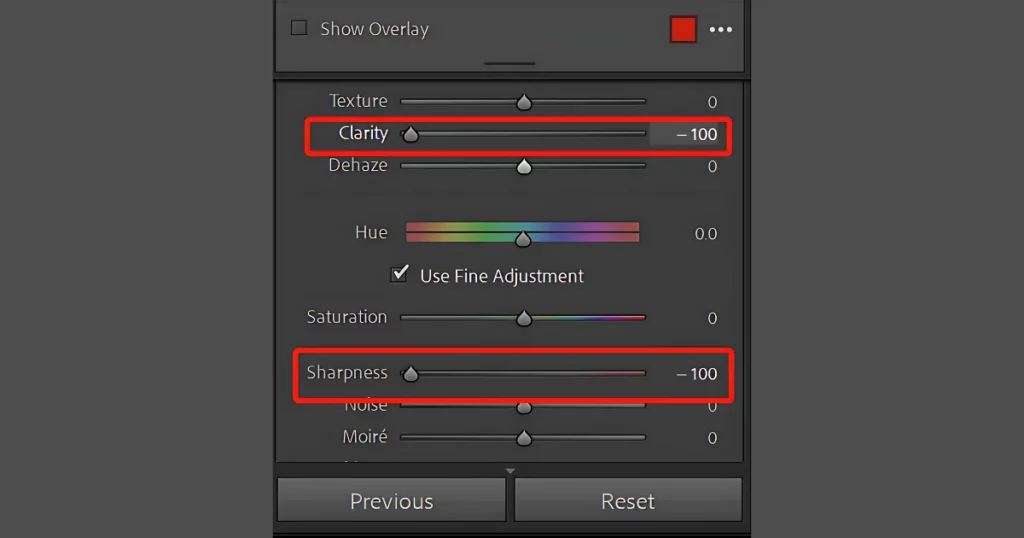
- Decrease Clarity and Sharpness.
- Adjust brush size, feather, and density.
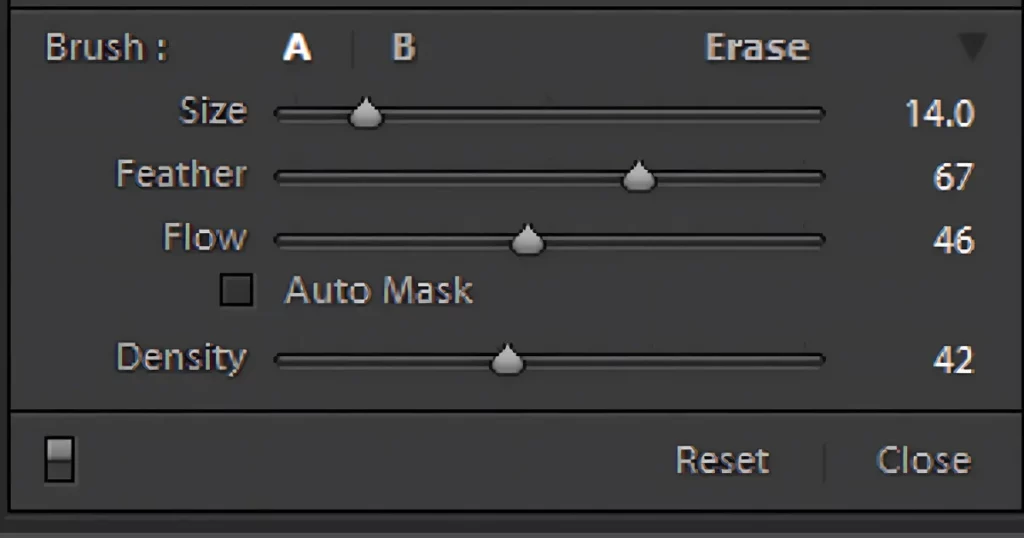
- Brush over the background.
- Tweak settings until you’re happy with the blur.
How to Take a Photo With a Blurred Background?
Many different factors contribute to blur backgrounds.
1. Aperture
The aperture controls the amount of light reaching your camera’s sensor, measured in f-stops. A lower f-stop number allows more light in and creates a shallower depth of field, resulting in a blurry background.
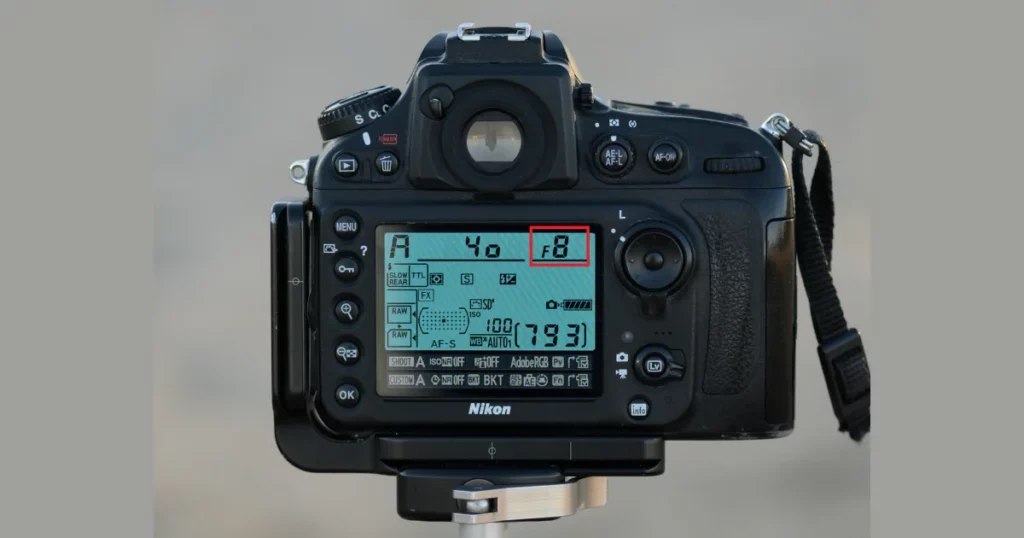
To blur the background of a picture, use Aperture Priority mode (AV mode) on your camera and select the lowest f-stop number available for your lens. Different lenses offer different f-stop ranges. For a shallow depth of field, we typically shoot between f1.4 and f2.8, but this can vary based on other factors.
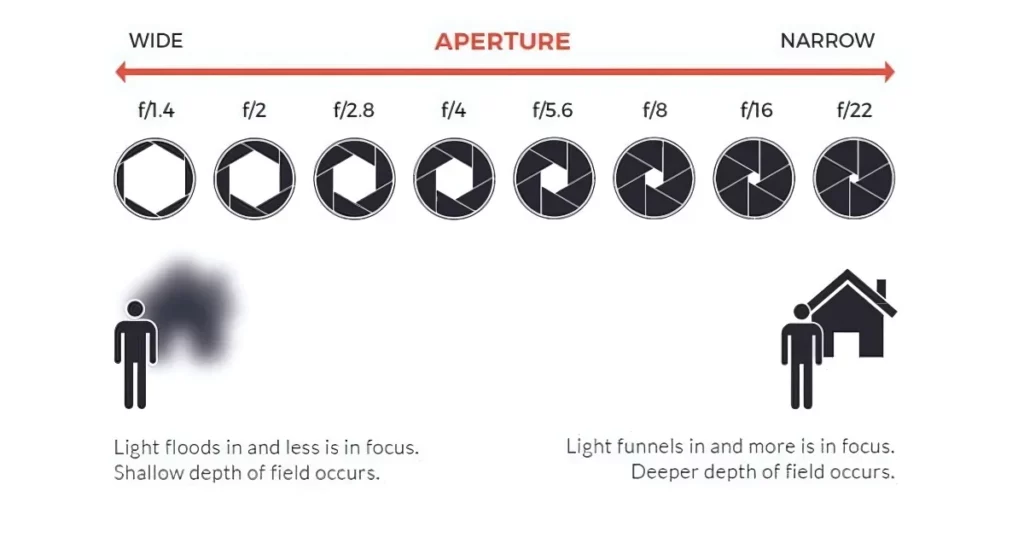
Be aware that some lenses may produce softer, less sharp images at their lowest f-stop. To ensure sharpness, try taking the same shot at different f-stops and compare the results later. It’s frustrating to find out later that none of your photos are sharp enough (We’ve been there!).
2. Focal Length
The focal length of your lens, measured in millimeters, affects how much of the scene you capture and how large your subject appears. Short focal lengths give you a wider view, while long focal lengths provide more magnification.
As the focal length increases, the depth of field (the area in focus) becomes shallower. Conversely, shorter focal lengths increase the depth of field, bringing more into focus.
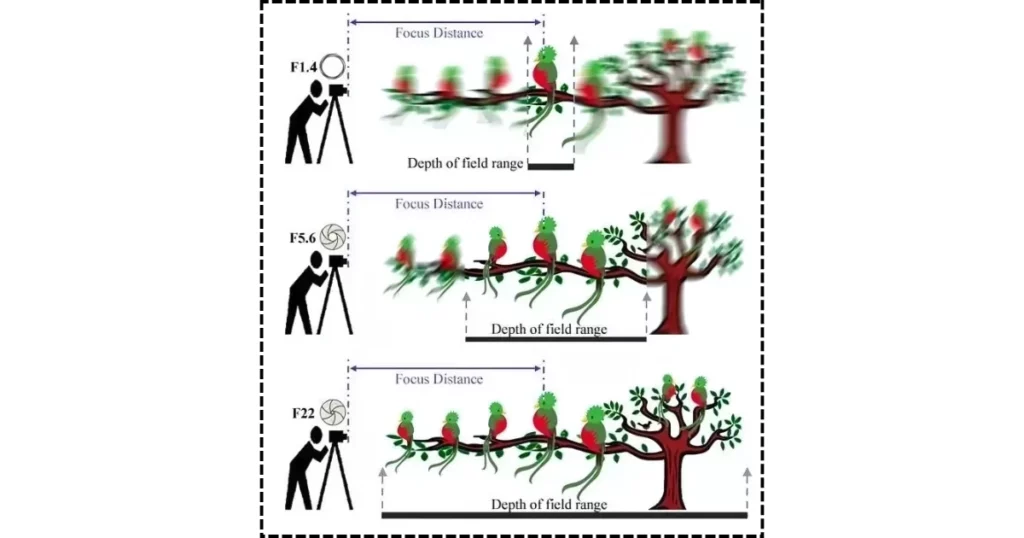
To blur the background of a picture, use a longer focal length and a low f-stop number. For example, a 100mm macro lens at f2.8 or a 50mm lens at f1.4 will give a very shallow depth of field. For landscape photos where you want everything in focus, use a wide-angle lens like a 17-40mm at f11.
3. Distance Between the Object and Camera
When you move closer to your subject, the background becomes blurrier. When you move further away, more of the image will be in focus.
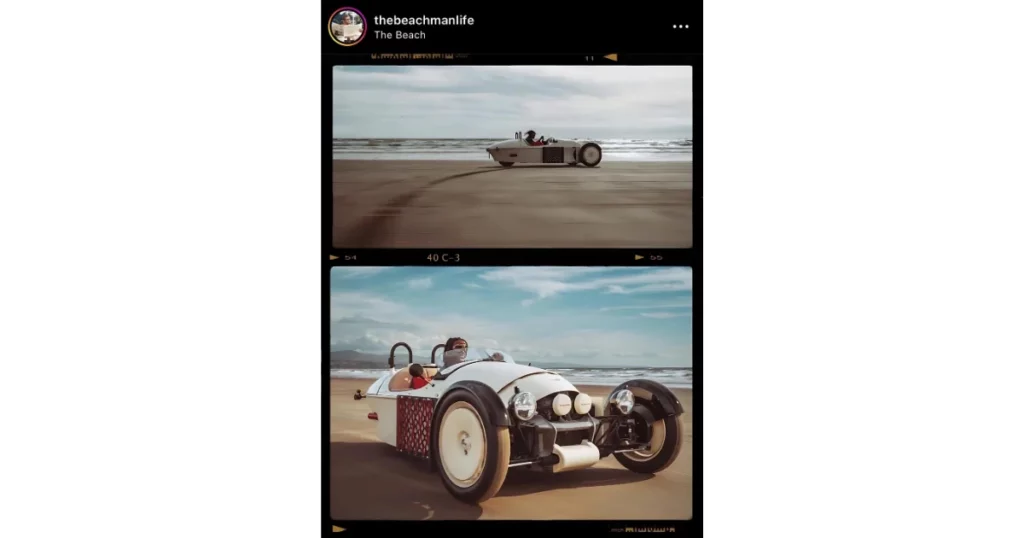
Every lens has a minimum distance it can focus. If you try to get closer than this distance, the camera won’t be able to focus.
4. Distance Between the Background and the Subject
Distance from the background blurs the background. If the background is close to the subject, more of it will be in focus.
Consider how busy or contrasting your background is. Even blurred busy backgrounds can be distracting. Simple backgrounds work best for making your subject stand out in photos with a shallow depth of field.
At home, you can use a plain card or ironed fabric. Outdoors, change your position or move your subject to find a better background with complementary colors. Sometimes, the right background can enhance your photo, as shown in the example below.
5. Camera Sensor
Simply put, larger camera sensors create more background blur. Camera sensors vary widely, and we’re not experts, but this is important to mention.
The sensor in an iPhone camera is very different from those in compact zoom cameras or DSLRs. With an iPhone, even if you’re shooting at f2.2, the short focal length and unique sensor make it hard to achieve background blur.
Compact zoom cameras usually don’t have low f-stop numbers unless they’re high-end, and even then, their small sensors make it difficult to get background blur.
To blur the background of a picture, you need a DSLR or a micro-four-thirds camera with interchangeable lenses. DSLRs with full-frame sensors create more blur than those with crop-frame sensors.
Conclusion
So, now you know how to blur the background of a picture in Mockey, Photoshop, PowerPoint, Instagram, and Lightroom in just a few simple steps.
These tips should help you make your photos look more professional. But that’s not all! You can try out lots of other cool edits and even change the backgrounds of your pictures. Don’t be afraid to try new things and have fun with your images.
We have also covered how to blur on Canva in our previous article. You must check it out.
FAQs
How to blur the background of a picture on Mac?
The Mac Photos app lets you edit cinematic mode videos by double-clicking them. After that, click Adjust in the toolbar and move the Depth slider to change the blur in the foreground and background.
How to blur the background in photos?
To Blur the Background in Photos:
Open Mockey.
Head to blur background feature.
Upload your photo.
Blur the background.
Edit your image.
Download and share.
How to blur background in photo on iPhone?
Tap on any photo taken in Photo mode to view it full screen. Then click edit, followed by Portrait. Adjust the Depth Control slider to change the background blur. Tap Done.
How do you blur the background of a picture on mobile?
Use portrait mode to blur the background of a picture. Many newer Android and iPhone phones have cameras that include a portrait mode feature. This mode uses software to blur the background, making the subject stand out sharply while the background appears blurry.
How do I blur part of a picture?
Use a brush to add a blur effect. To make some areas softer and highlight your subject, use the Blur part in Photoshop. Pick a brush tip and strength, then drag it over the parts you like to blur. You can do this in Lightroom too.
Related reading:

