Want to learn how to make a mockup in Photoshop in 2025? Make top-notch mockups in Photoshop for your industry. Whether it’s merchandise, marketing materials, or products.
Let’s dive in.

Table of Contents
What is a Product Mockup?
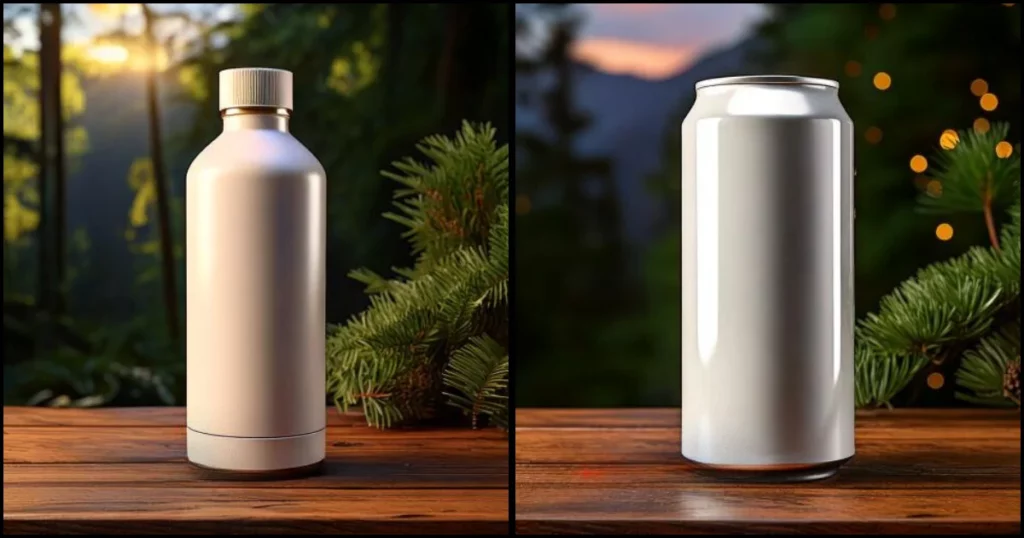
A product mockup visually represents how your finished product will appear. These mockups are often used to showcase the final design in a realistic setting. They allow you to gather feedback on a product idea before mass production or use them in presentations to executives, investors, or stakeholders.
Can You Make Mockups in Photoshop?
Adobe Photoshop makes it easy for anyone to design realistic mockups. You can make designs for all kinds of products, like mugs, posters, and t-shirt mockups then put those designs into real-world settings using mockups.
Use the Creative Cloud Library to pull in logos, colors, or fonts from your past projects. This keeps all your designs looking like they belong together.
Photoshop lets you layer your design onto photos of products. You can use your own pictures or pick from Adobe Stock to get professional-quality images.
Your mockups will look sharp and realistic, making it easy to show off your designs.
Is Photoshop Better for Mockups?
Yes, Photoshop is often seen as the top design tool for creating mockups, mainly for professionals who want detailed and realistic designs.
But if you’re looking for something quicker and easier, tools like the Mockey AI mockup generator might be a better fit.
Here are some Photoshop features that help you make mockups easily:
- Creative Cloud Library
- Textures
- Smart object layer
- Blend modes
- Distortion and filtering
How to Make a Mockup in Photoshop?
Follow these steps on how to make a mockup in Photoshop:
- Select the Subject
- Duplicate the Layer
- Insert your image
- Apply Clipping Mask
- Adjust the Blend Modes
- Group the Layers
- Adjust the Base Layer
- Customize the Solid Color Layer
- Save and export your mockup.
Let’s discuss these steps in detail.
Step 1: Select the Subject
Click “Select” and choose “Subject“.
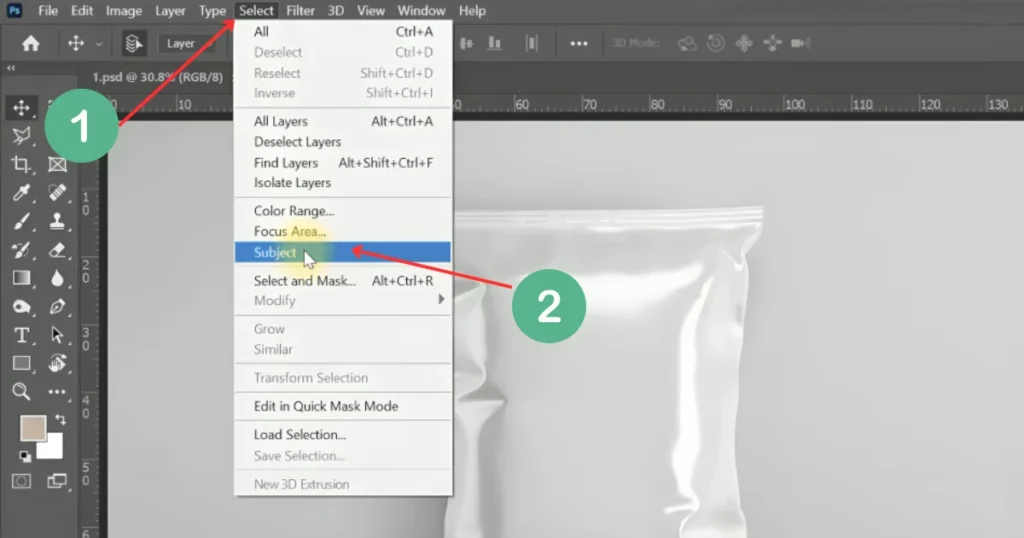
Step 2: Duplicate the Layer
Press “Ctrl + J” four times to create four copies of the layer.
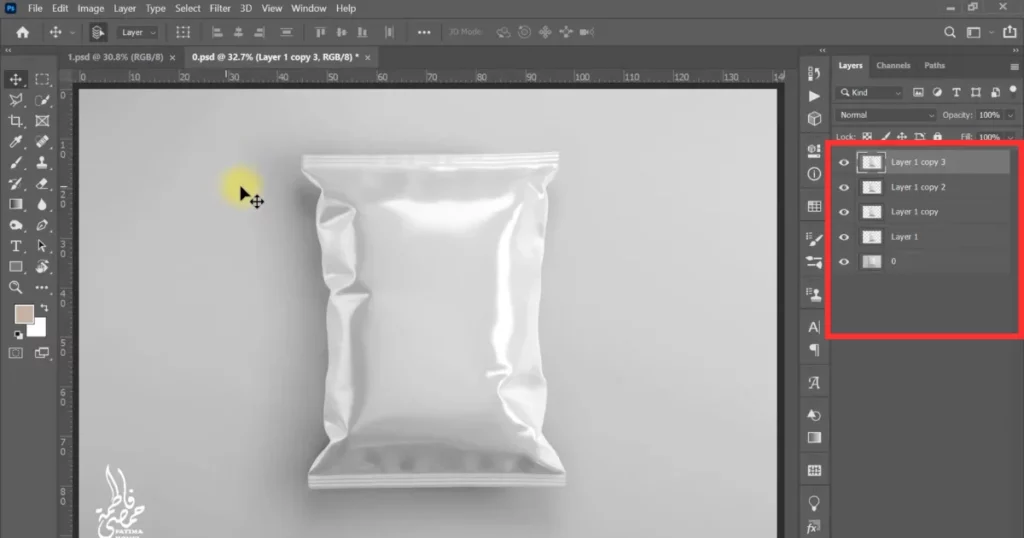
Step 3: Insert Your Image
Drag your image into Photoshop. Modify its dimensions and placement, then click the checkmark (✓) to make sure.
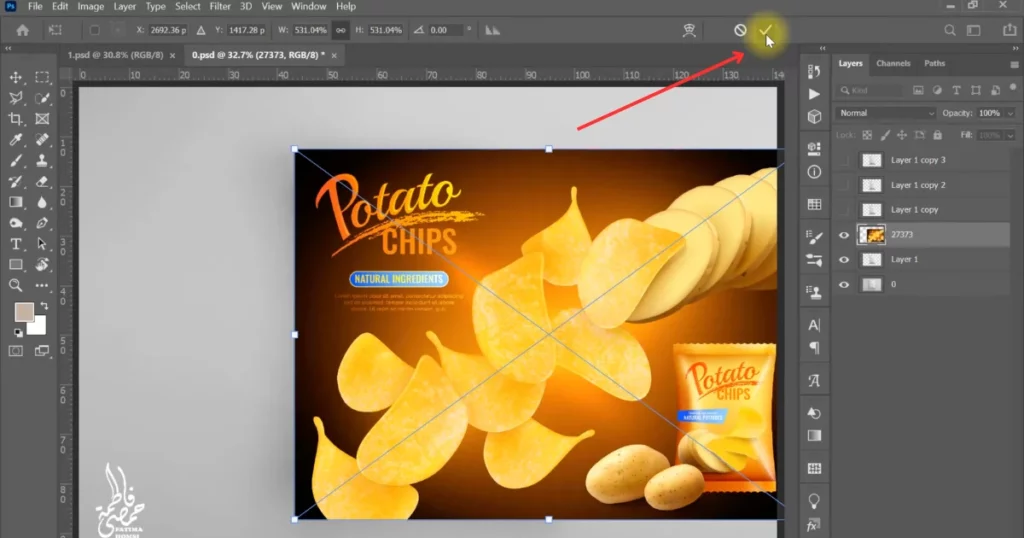
Step 4: Apply Clipping Mask
Select your design layer with a right-click in the “Layers” window. Select “Create Clipping Mask“.
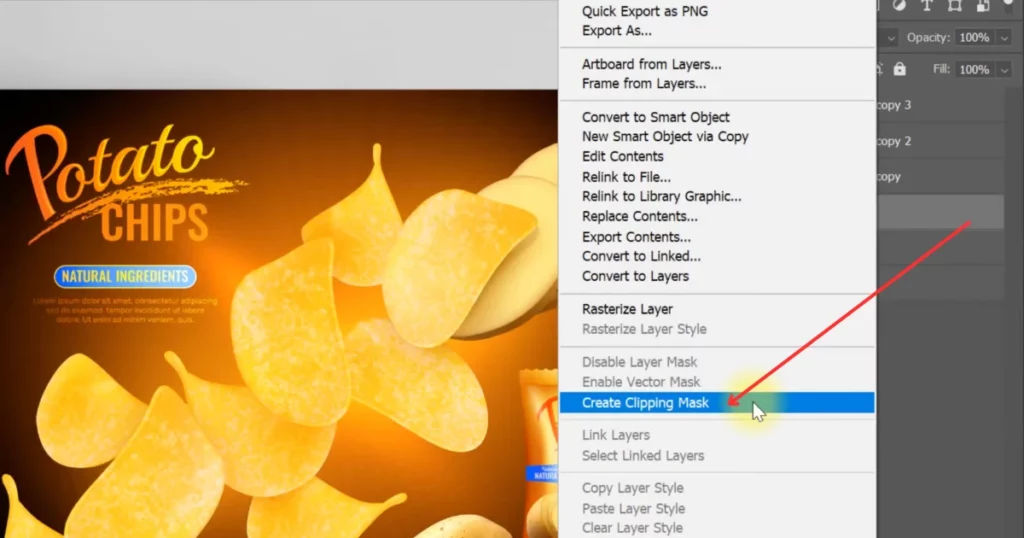
Step 5: Adjust the Blend Modes
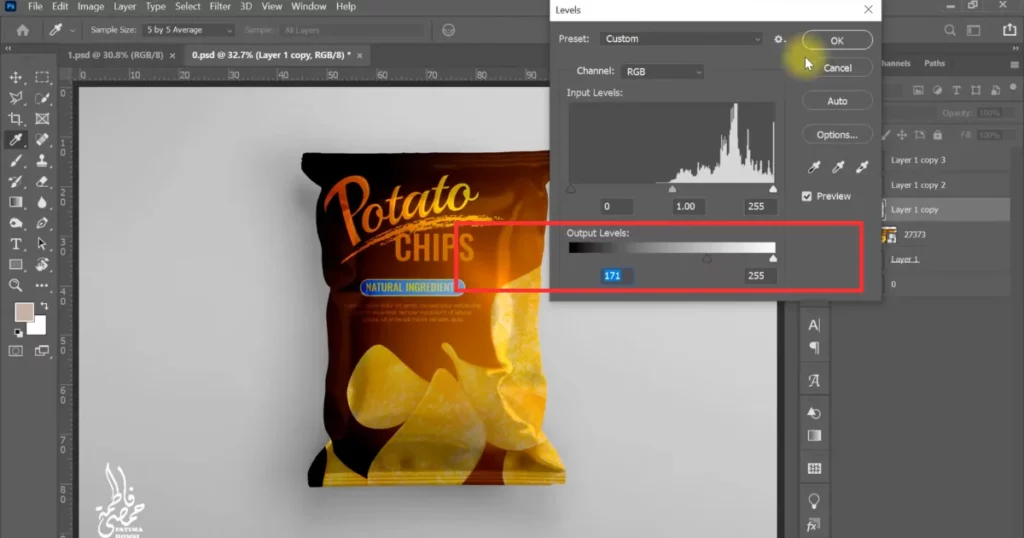
For Layer 1 Copy: Change the blend mode from “Normal” to “Linear Burn“. Press “Ctrl + L” to open the “Levels” adjustment. Modify the “Output Levels” and press “OK“.
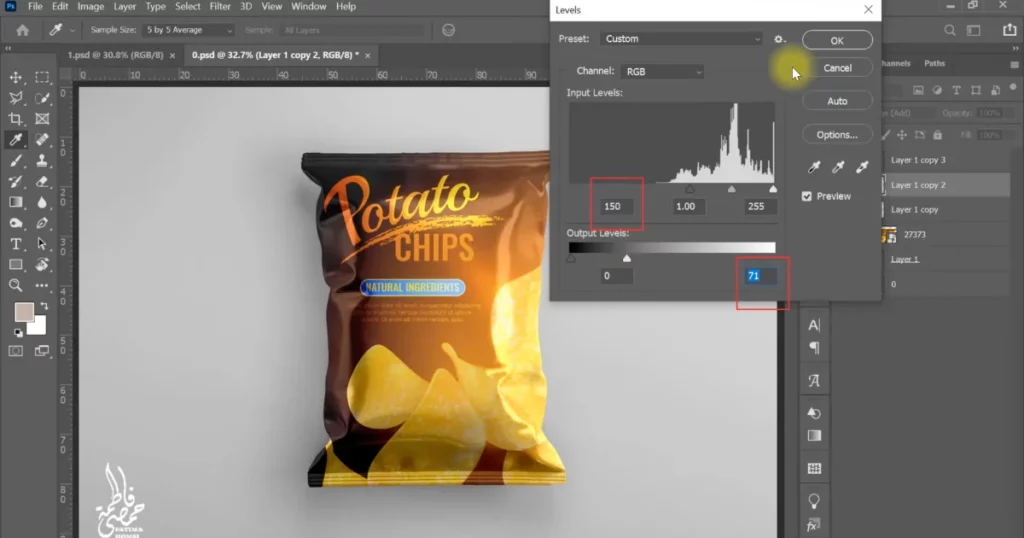
For Layer 1 Copy 2: Change the blend mode to “Linear Dodge (Add)“. Press “Ctrl + L“, adjust the “Input Levels“, and press “OK“.
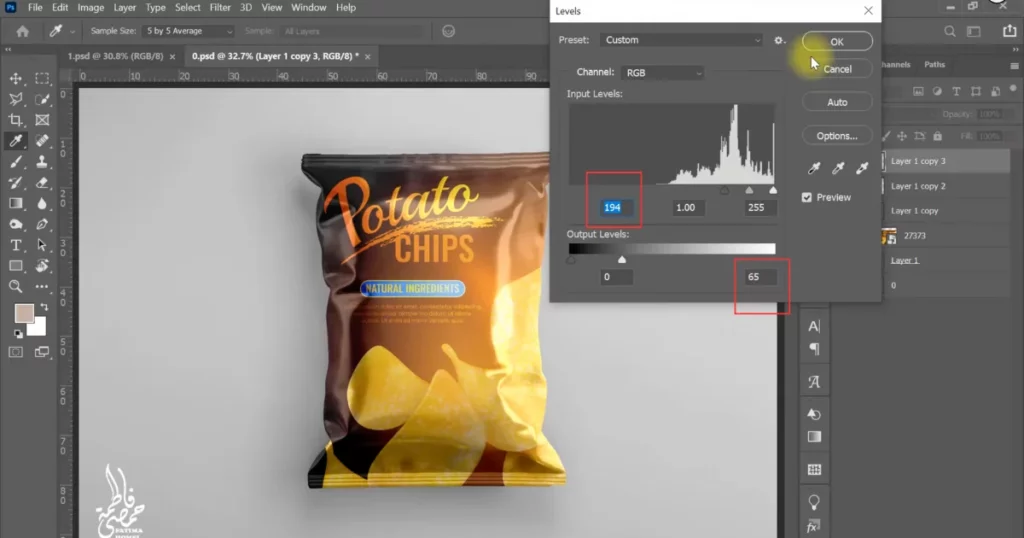
For Layer 1 Copy 3: Change the blend mode to “Screen“. Press “Ctrl + L“, adjust the “Input Levels“, and press “OK“.
Step 6: Group the Layers
Group the 3 copy layers. Group them by pressing “Ctrl + G“.
Step 7: Adjust the Base Layer
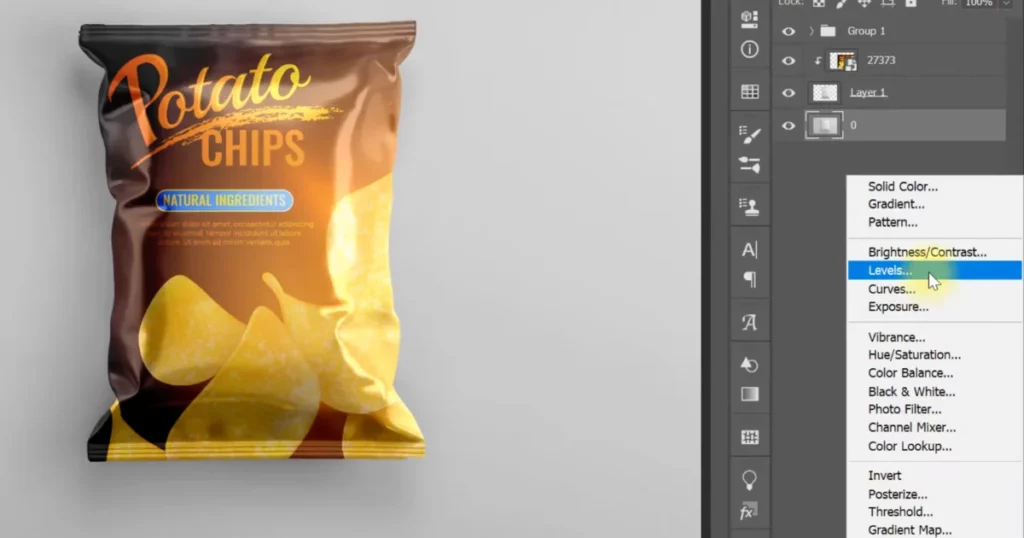
Choose the “O Layer” and adjust its “Properties” as necessary.
Step 8: Customize the Solid Color Layer
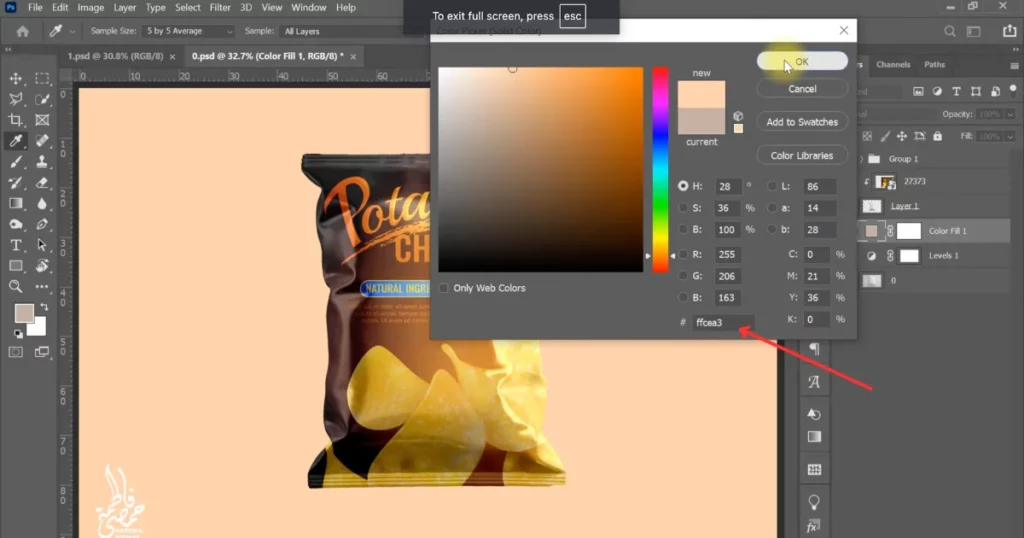
Click on the “Solid Color Layer” and change the color to “#FFCEA3.” Then, set its blend mode to “Multiply.”
Step 9: Save and Export Your Mockup
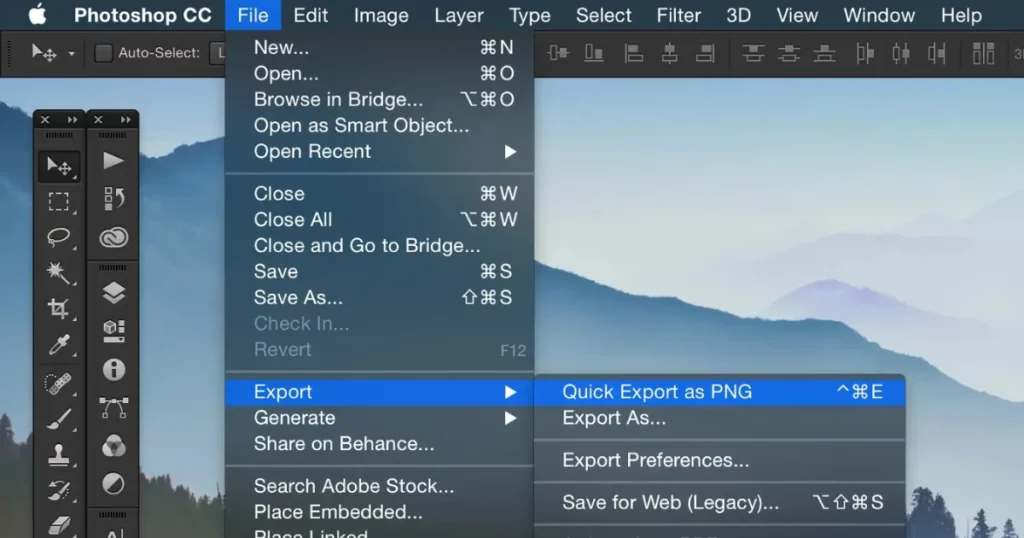
To save your finished mockup, click “File“, then choose “Export“, and select “Quick Export” as PNG or JPEG.
That’s it. You now know how to create a mockup in Photoshop. We got this idea from the channel of Fatima Homsi.
How Can I Make Various Photoshop Mockup Types?
These Photoshop tutorials will show you how to make mockups that highlight your products in the best way. This helps customers see clearly what they’re buying.
1. Isometric Map Mockups
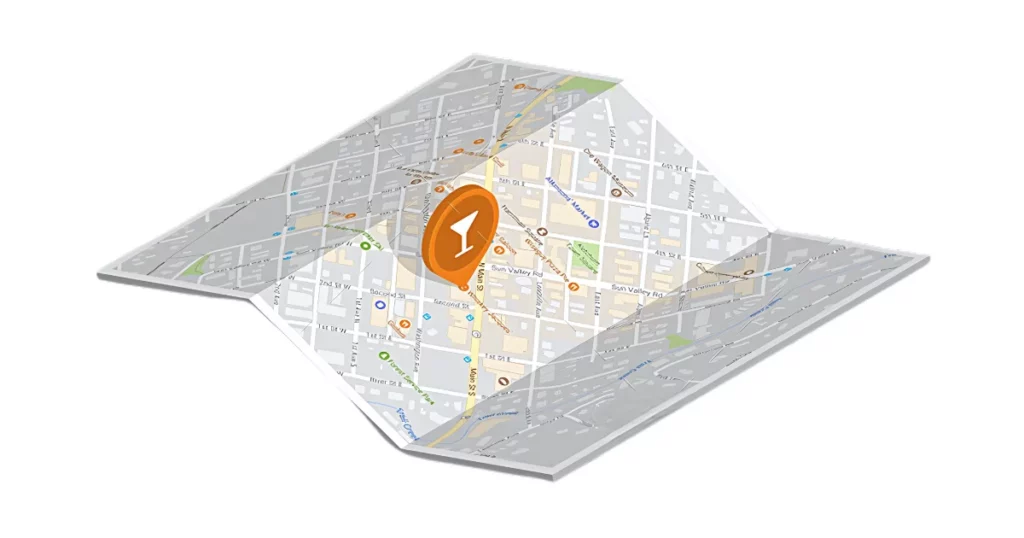
Here’s a quick guide to making an isometric map mockup in Photoshop:
- Set up an isometric grid using guides.
- Draw and transform elements into an isometric perspective.
- Use textures and patterns for a realistic look.
- Enhance with shadows, highlights, and small details.
- Adjust colors and export the final isometric map mockup.
2. Apparel Mockup
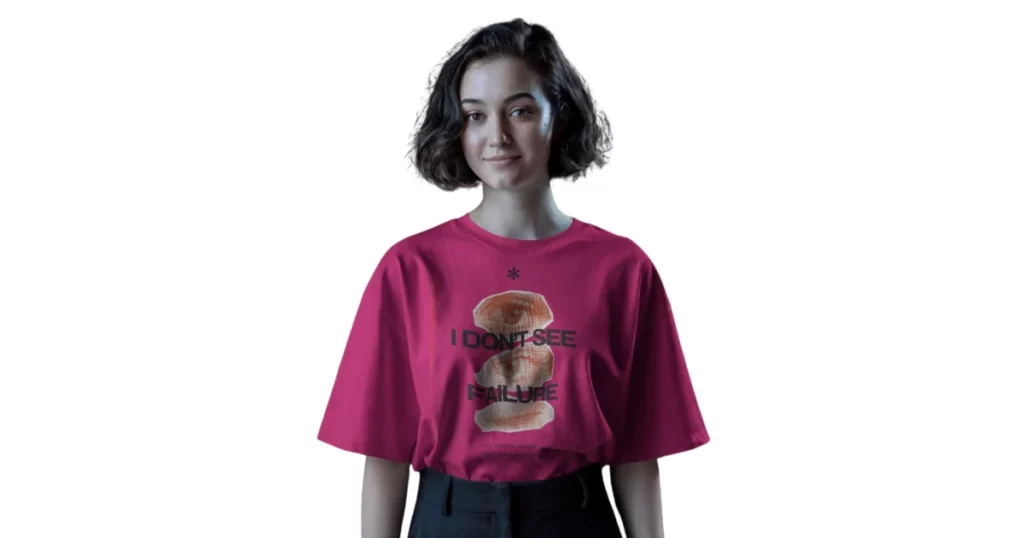
Here are the steps to create apparel mockups in Photoshop:
- Open a new file for apparel with appropriate dimensions.
- Use a high-quality image of a blank garment.
- Place your design on the garment.
- Adjust the design’s size and placement to fit the clothing.
- Use blending modes for your apparel to integrate the design with the garment texture.
- Enhance realism for apparel with shadows and highlights.
- Make any final adjustments and save your apparel mockup.
3. Surface Studio Mockup
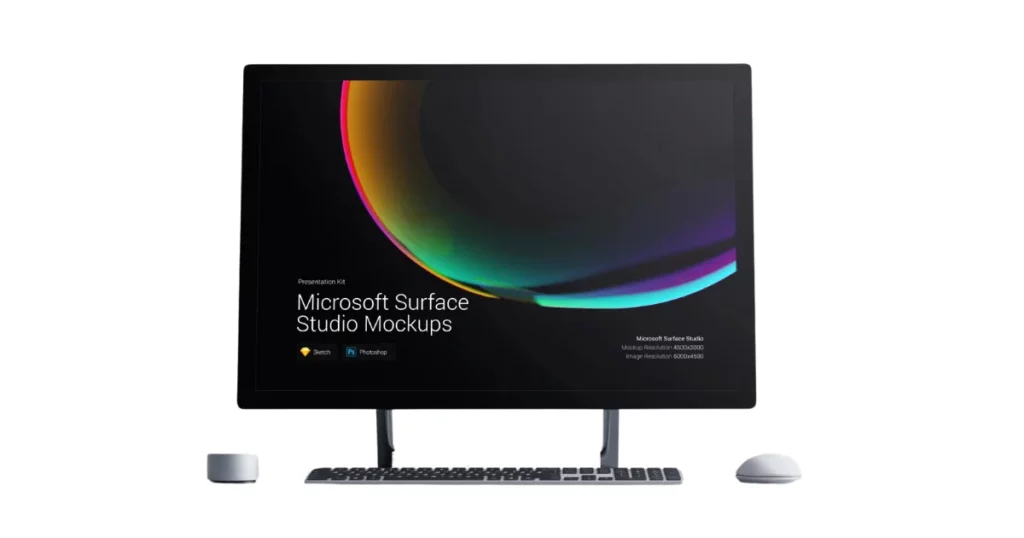
To create Surface Studio mockups in Photoshop, follow these steps:
- Download a Surface Studio template from sites like Mockey AI.
- Launch Photoshop and open the template file.
- Double-click the Smart Object layer to add your image.
- Drag your design or screenshot into the Smart Object, save it, and close the window.
- Export your final surface studio mockup as a PNG or JPEG.
4. Text Portrait Poster Mockup
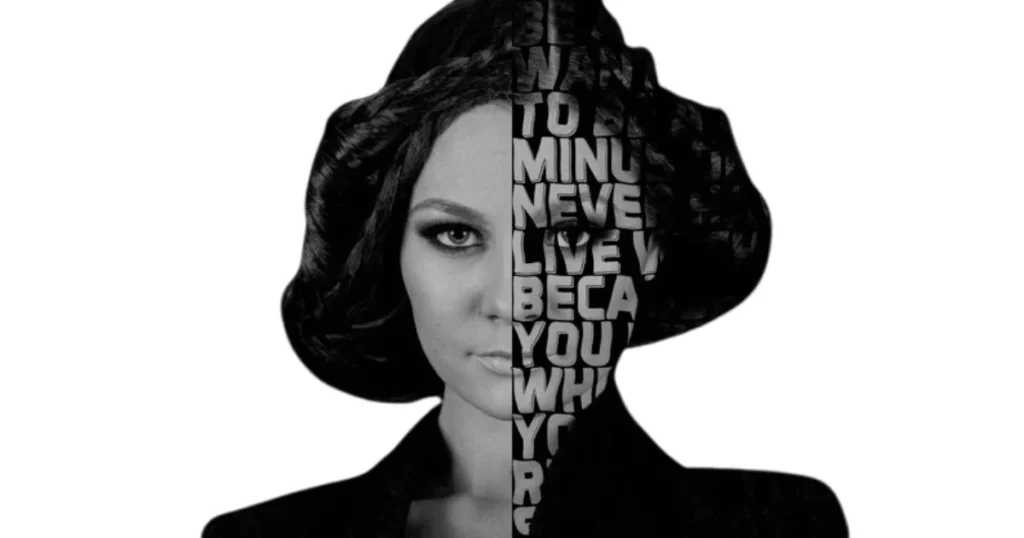
To make a text portrait poster in Photoshop:
- Start with a headshot photo in Photoshop.
- Make a copy of the photo layer to keep the original safe.
- Use the “Convert to Smart Object” option when you right-click the copy.
- Use the Text Tool to fill a big text box with quotes, lyrics, or any words you like.
- Go to Filter > Distort > Displace. Use a map to make the text follow the face’s shape.
- Add shadows, tweak colors, or any effects to make it pop.
5. Packaging Mockup
To make packaging mockups in Photoshop:
- Open Photoshop and create a new document (3000×3000 pixels, 300 DPI).
- Go to File > Place Embedded to insert your packaging photo.
- Use the Select menu to highlight the packaging and duplicate it.
- Import your design, position it on the packaging, and use CTRL + T (or CMD + T on Mac) to adjust it.
- Add adjustment layers to tweak colors and textures.
- Go to File > Export your packaging mockup and save it as PNG or JPEG.
How Can I Add a Photo in a Photoshop Mockup?
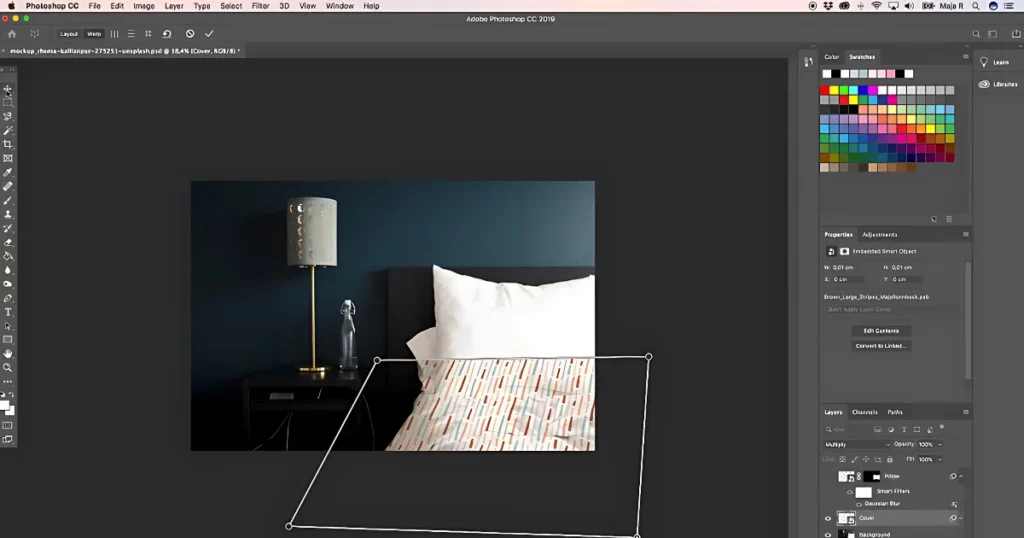
How to fit an image into a mockup in Photoshop? To add a picture into a mockup using Photoshop:
- Open the mockup file in Photoshop.
- Find the Smart Object (a layer thumbnail in the bottom right) and double-click it.
- A new tab will open with a blank background.
- Drag your image onto this blank background.
- Resize it if needed.
- Click Save and close the tab.
- Your image will now show up in the mockup.
- Select File > Export to export your finished mockup.
How to Use Mockup in PSD?
Open the website Mockey.ai to start creating your mockup designs. Browse through the trendy mockup templates available and pick the one you like best. Download the template in PNG format when you’ve made your selection.
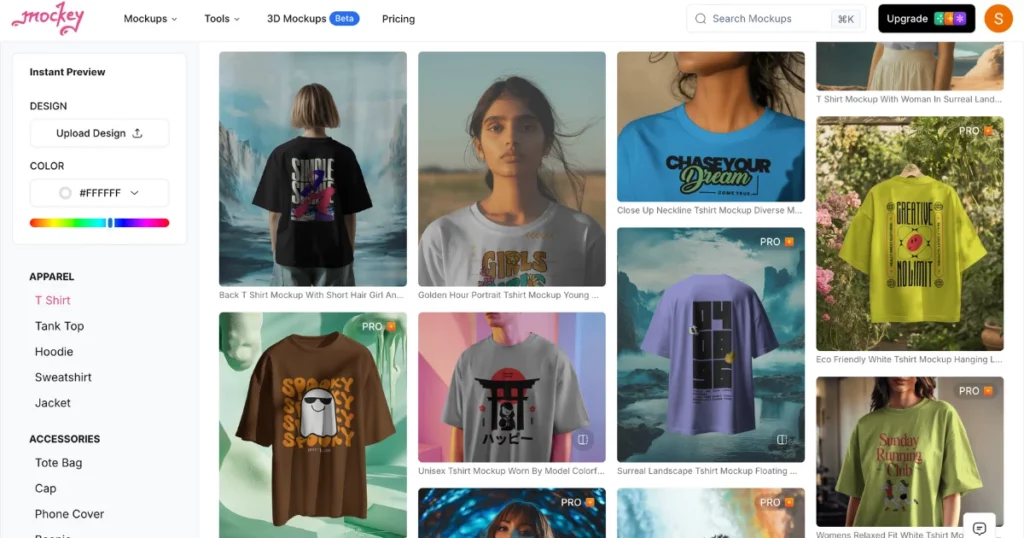
After downloading, you can easily change the PNG file to a PSD format using a software. This is great if you want to edit it further in design software like Photoshop.
Why Use Mockey.ai?
- Free Templates: You don’t need to pay to access awesome designs.
- Trendy Designs: Mockey offers modern, eye-catching templates to help your project stand out.
How Do I Make a Mockup Without Photoshop?
Creating a mockup is super simple with Mockey AI! Their free online tool simplifies template customization, surpassing Photoshop. Here’s how it works:
Step 1: Upload Your Image
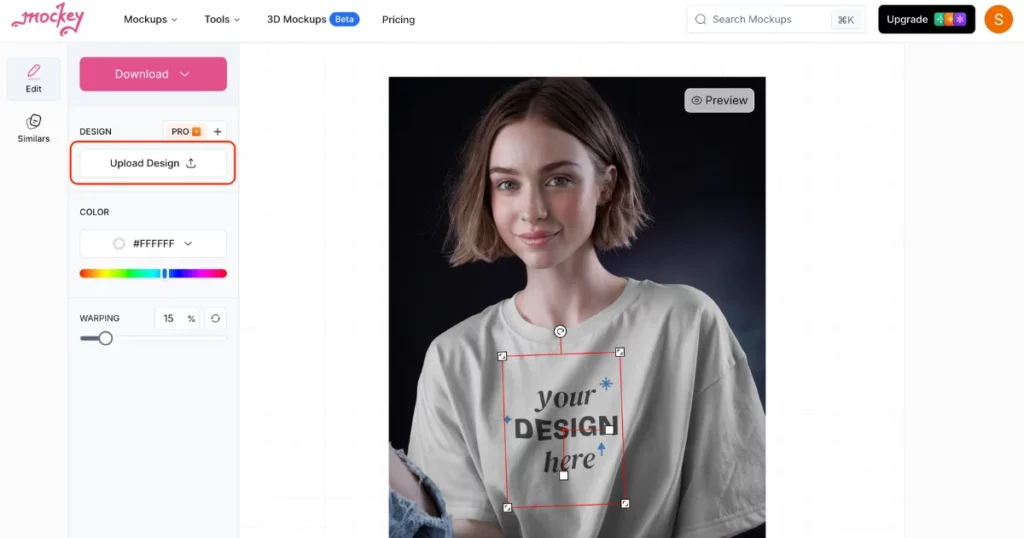
Start by uploading your image. It could be anything, like a logo, artwork, or a unique graphic you’ve made.
Step 2: Customize the Mockup
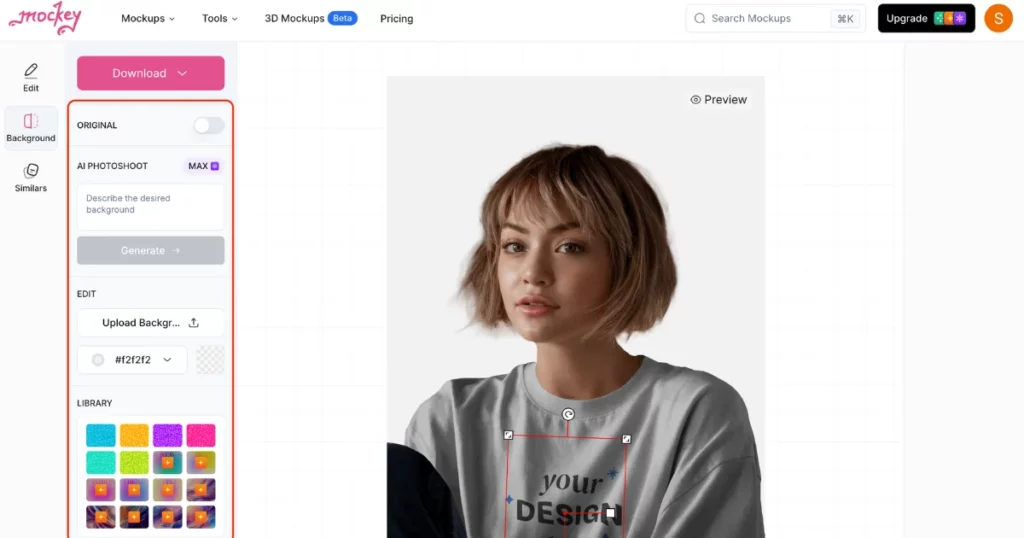
Once uploaded, you can place your design on different products. Like to witness your design on a T-shirt? Or maybe on a phone case, poster, or even a tote bag mockup? Mockey AI lets you choose!
Step 3: Preview the Final Look
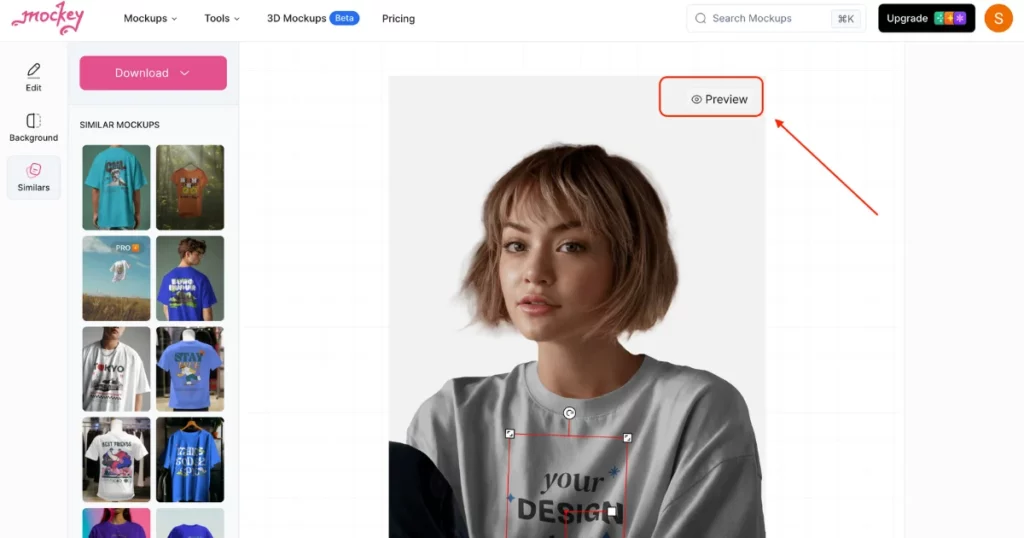
After placing your design, Mockey AI shows you exactly how it’ll look. This is great for making sure everything fits and looks just right before printing or sharing.
Step 4: Make Quick Changes
Not happy with the placement or size? No problem! You can easily adjust your design until it’s perfect.
With Mockey AI’s best mockup website, designing mockups is fast, fun, and hassle-free!
Conclusion
That’s it, everyone! We have learned how to make a mockup in Photoshop and create different types of mockups. With Mockey AI’s free templates and the powerful editing tools in Adobe Photoshop, anyone can learn this easy technique.
Mockey AI gives you ready-made templates that are easy to use, even if you’re just starting out. Adobe Photoshop lets you customize your work.
Once you get the hang of this skill, you’ll be ready to take things further.
FAQs on How to Make a Mockup in Photoshop
How to design a mockup in Photoshop?
To create a mockup in Photoshop, start by choosing a good photo that fits your project. Crop the picture to the proper size in Photoshop after opening it. Then, add your design or logo to a new layer. You can adjust the colors and textures to match your style. Once everything looks perfect, save your final mockup in the format you need.
How can I make my own mockups?
To make your own mockups on Mockey.ai, start by logging in and picking the type of product. Next, choose a unique template that matches your idea. Then, upload your photo and adjust the template however you like. Once you’re happy with it, export your mockup for free without any watermarks.
How do you make a mockup look real in Photoshop?
To make a mockup look real in Photoshop, add textures with blending modes and layer masks, tweak shadows and highlights for depth, and use filters like Gaussian Blur to create a blurred background effect.
Related reading:
