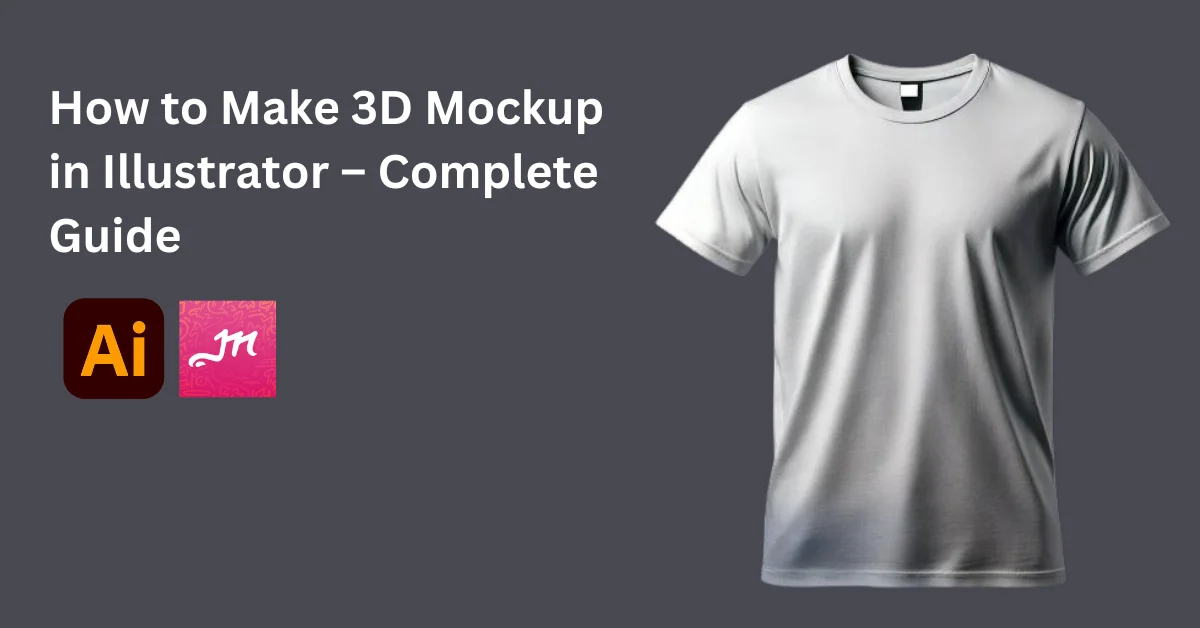
Ever wondered how to make 3D mockup in Illustrator? This guide will show you how! Plus, you’ll learn about an easy-to-use 3D mockup tool that works even if you have no design experience.
Still want to design 3d mockups now, upload your images in the Mockey 3d mockup generator and customize it in minutes.
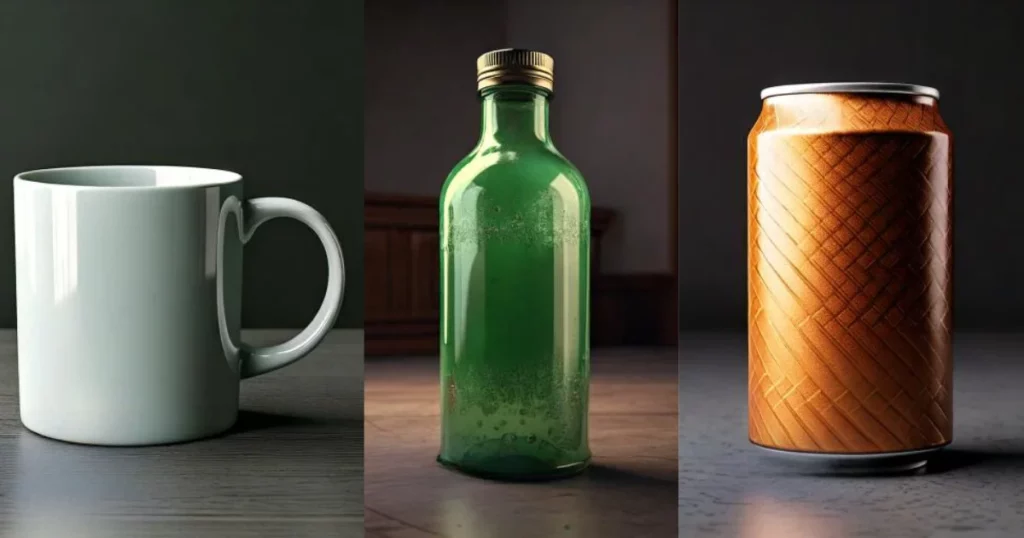
Table of Contents
Is It Good to Use Illustrator for 3D Mockups?
Adobe Illustrator is great for making simple 3D mockups, especially when you need clear, sharp designs using vector graphics. It has a “Mockup” feature that lets you put your designs on 3D objects like boxes, t-shirts, or mugs.
But if you need to create really detailed or complicated 3D scenes, a special 3D design program would work better.
Why Should I Use Illustrator for 3D Mockups?
Using Adobe Illustrator for 3D mockups:
- Mockup Panel: Import images or pick templates (like clothes or boxes) to preview designs.
- Model Settings: Adjust settings in the Model Settings menu.
- Blending Modes: Mix designs with photos for a realistic look.
- AI Mockup Tool: Auto-detects 3D details and keeps designs sharp.
- Handles: Resize and rotate designs easily.
- Intelligent Features: Automatically adjust to match a photo’s 3D look.
- Import 3D Models: Use File > Import to add 3D objects.
- Repositioning: Move, rotate, and resize without extra tools.
- Create 3D Shapes: Draw, then turn lines into 3D using the 3D panel.
Now, let’s dive in on how to make a 3d mockup in Illustrator.
How to Make 3D Mockup in Illustrator – Step-by-step Guide
Here is a guide on how to make 3D mockup in Illustrator in a step-by-step manner.
Step 1: Creating the Shape
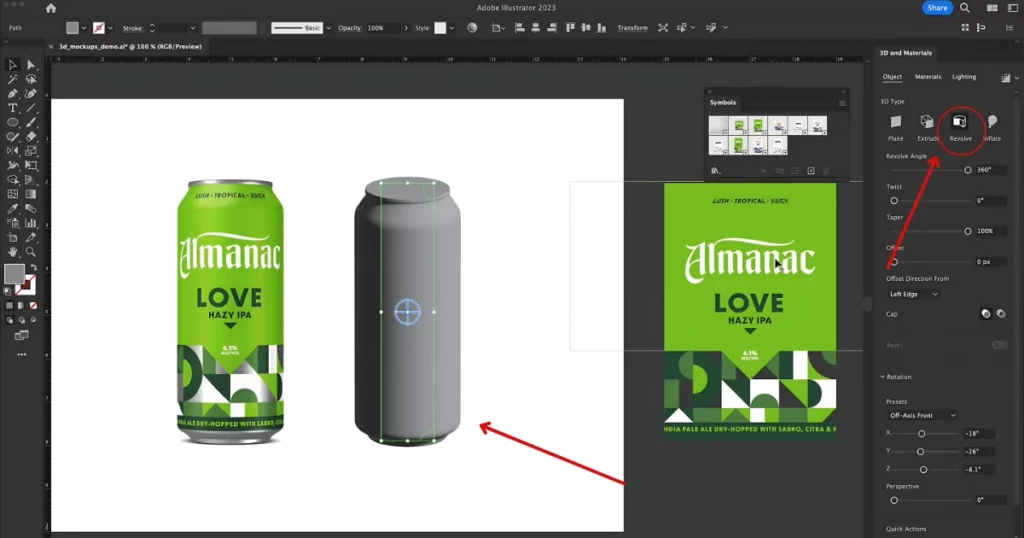
We have used the Can for our tutorial.
This is a 3D mockup using Illustrator‘s native 3D tools. It’s not a photograph. To make this, we started by designing half of a Can shape and then used the 3D tool to complete the model.
In the “3D and Materials” panel, we applied the “Revolve” effect. This revolved around the half-can shape to form a full 3D Can.
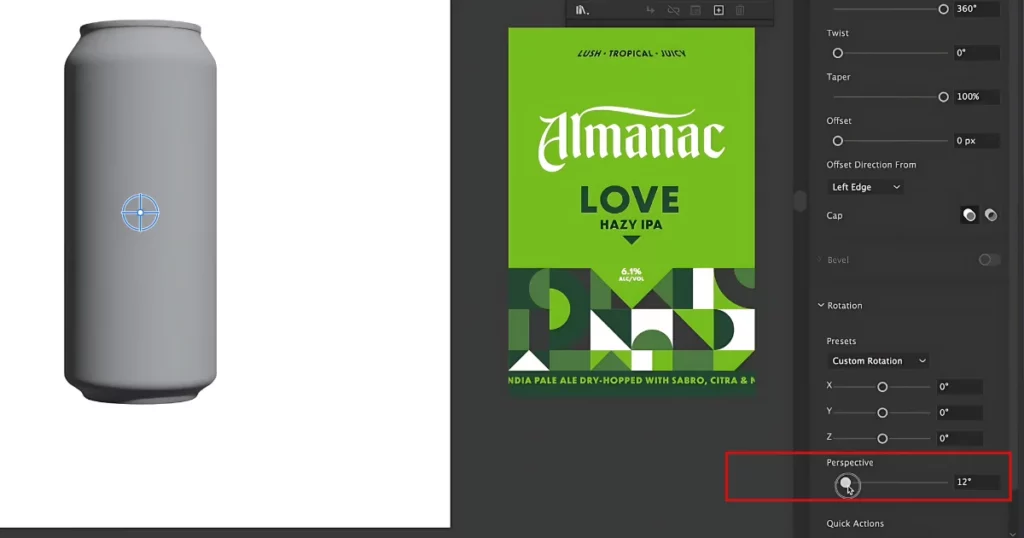
Step 2: Adjusting Presets and Perspective
We adjusted the “rotation” to display the Can straight-on.
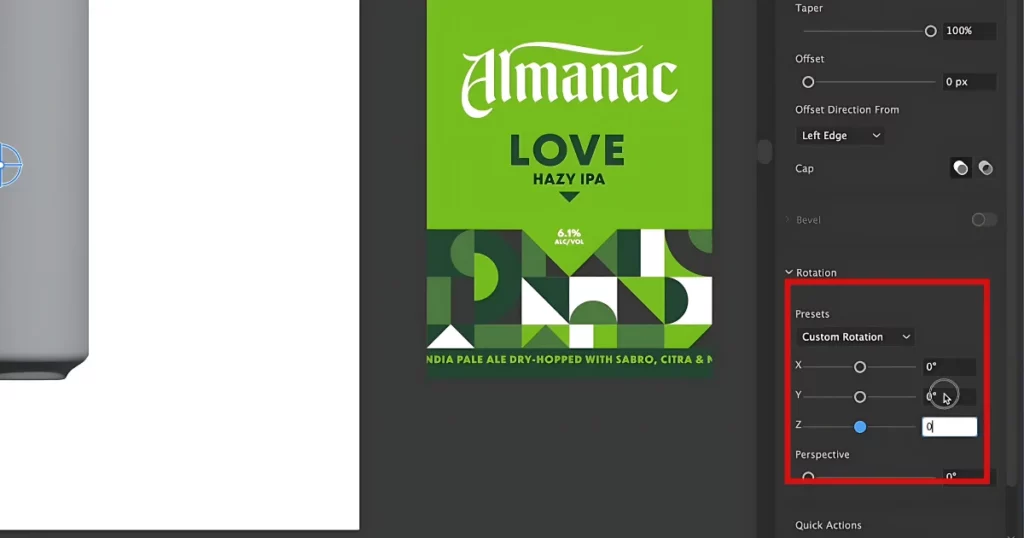
“Perspective” tweaks allowed for subtle rounding on the top and bottom.
Step 3: Adding Metallic Texture
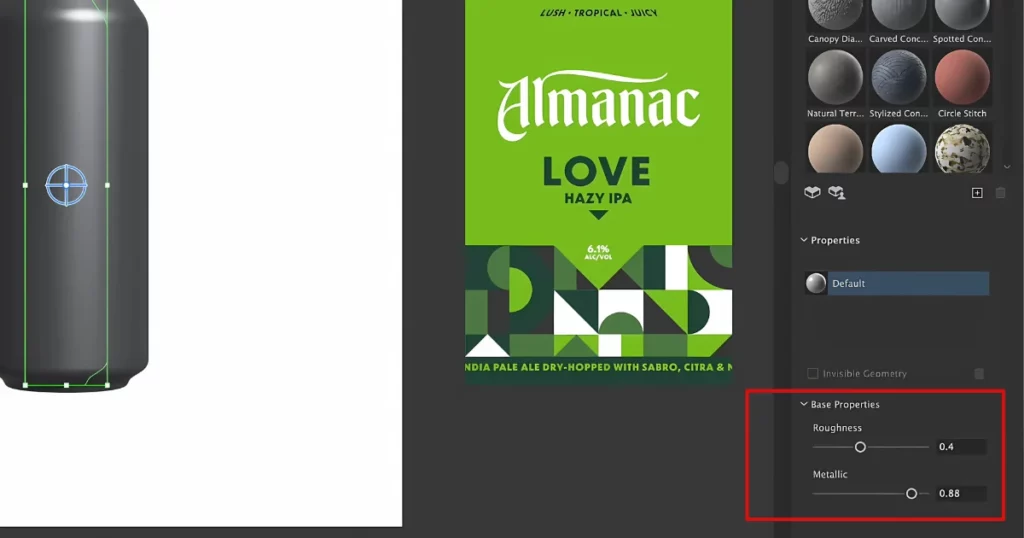
Under “Materials“, we added a metallic finish to achieve the aluminium look.
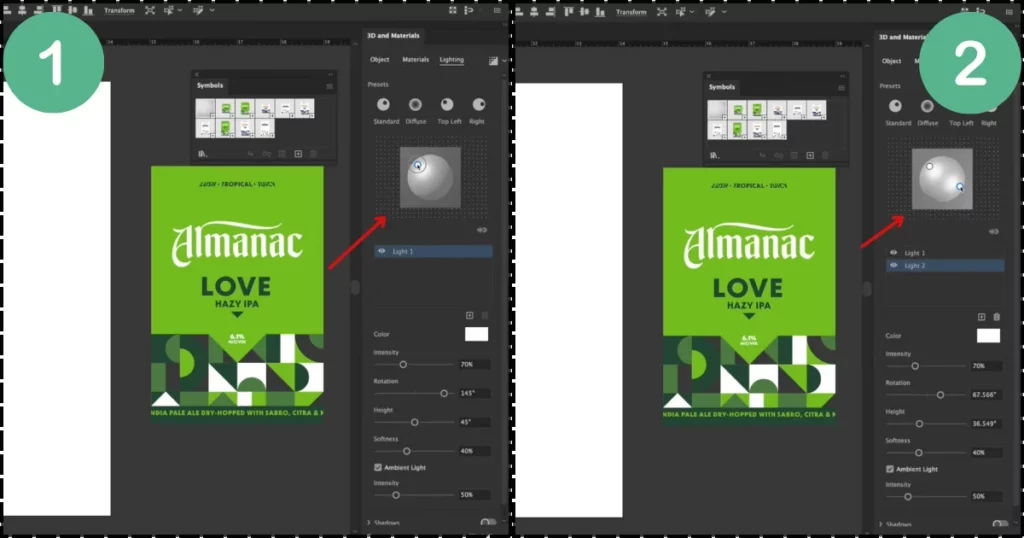
The Lighting settings enhanced realism by simulating light from the top-left. We also added a second light source on the right for more depth.
Step 4: Applying a Custom Label
To add a label, we converted the Can design (in vector format) into a symbol by clicking “New Symbol“.
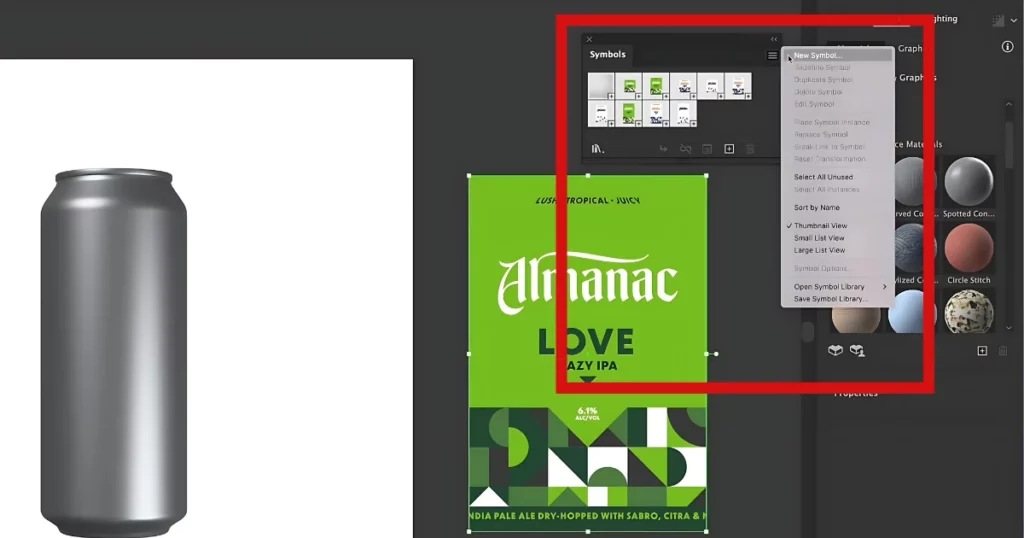
Back in the “3D and Materials“, under “Graphics“, we applied this “New Symbol” as a texture. Adjustments were made to the label’s size and position to align it perfectly.
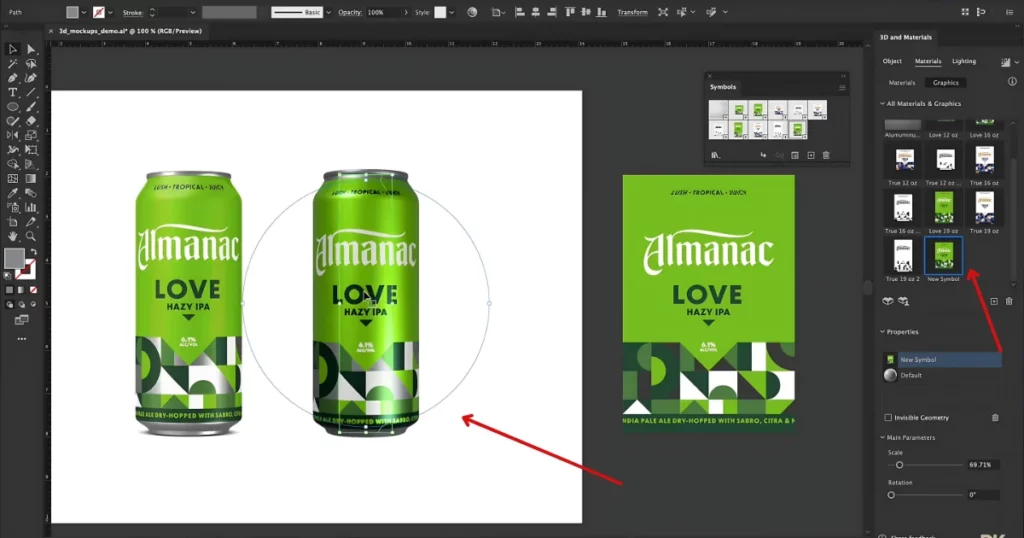
Step 5: Fine-Tuning the 3D Mockup
We reduced the Can’s shininess by increasing the “Roughness” value.
These steps show how to make 3d mockup in Illustrator with the flexibility of Illustrator’s 3D and Materials toolbox, allowing you to create realistic mockups from a single shape. We took the idea from DKNG Studios.
However, there are some limitations to using Illustrator. Let’s discuss this.
Limitations of Using Illustrator for 3D Mockups
The current limitations are:
- Unsupported Elements: Mesh, gradients, placed or non-native art, and raster effects won’t work in mockups.
- Clip Groups: Vector art with clip groups, like patterns, can’t be used.
- No Nested Mockups: You can’t make a mockup inside another mockup.
- Quality Issues: Mockups may look off with shiny surfaces, tiny grooves, or sky images.
- Effects Limitations: Mockups can’t directly apply vector effects. Use symbol editing mode instead.
- Linked Files: Linked Illustrator files need to be embedded to work in mockups.
- Single Image Only: Mockups can’t include multiple images.
- GPU Requirement: A GPU is needed for Mockup to function.
- Multiple Vector Objects: Mockups with many vector objects can’t be added to “Your Mockups.”
Now, let’s show you the best 3d mockup generator to make product mockups in 3d.
Make 3D Mockups in Mockey AI
Mockey AI is one of the best mockup websites to make 3d mockups. Here are the steps:
Step 1: Sign Up for Mockey
Visit Mockey.ai. Click Sign Up on the homepage.

Step 2: Choose 3D Mockup
Look at the top navigation bar. Click 3D Mockup to see different product templates.

Step 3: Pick a Product
You’ll find templates for:
- Coffee Mugs
- T-Shirts
- Books
- Jackets
- Posters
- Phone Covers, etc.
For this guide, choose T-Shirt Mockup.
Step 4: Upload Your Design
Click “Upload Your Images“. Use “Click or Drag and Drop” to include your photo.
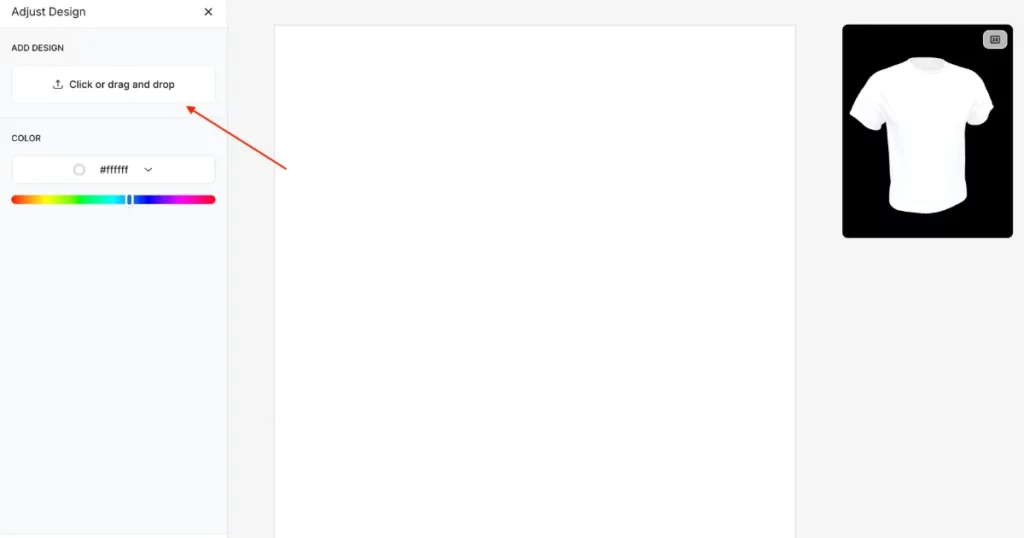
Adjust the image to fit the T-shirt. You can add more images if needed. Click Finish when your design looks good.
Step 5: Final Touches
Adjust the “Aspect Ratio” if you want a different size. Go to the “Surface” section to change the T-shirt’s texture or color.
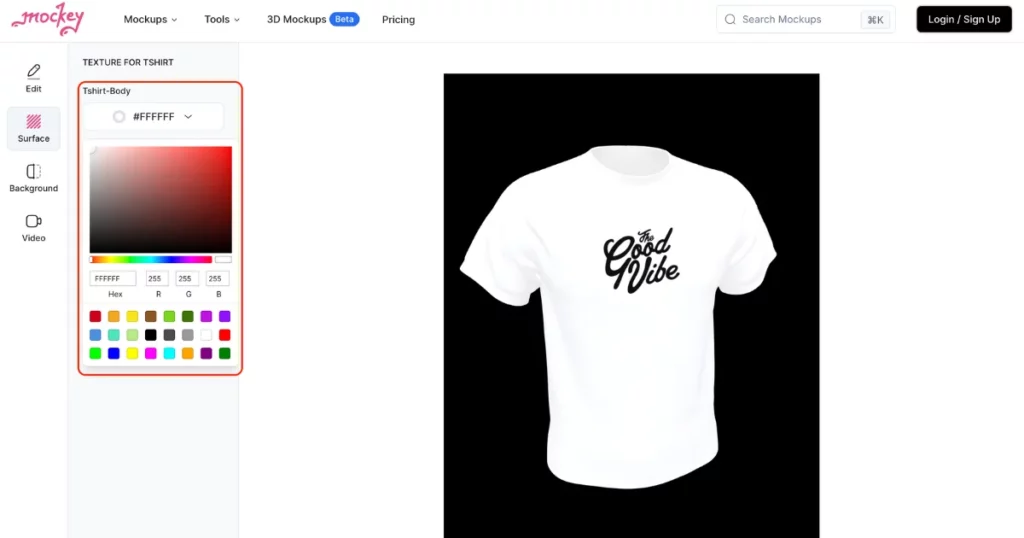
Step 6: Set the Background
Choose a background:
- Single Color
- Gradient
- Nature or Pre-designed backgrounds.
Try the Video Feature: Mockey now has a “Video” option to showcase your mockup in motion!
Step 7: Download Your 3D Mockup
Go to the “Edit” section and click “Download“. Choose your plan:
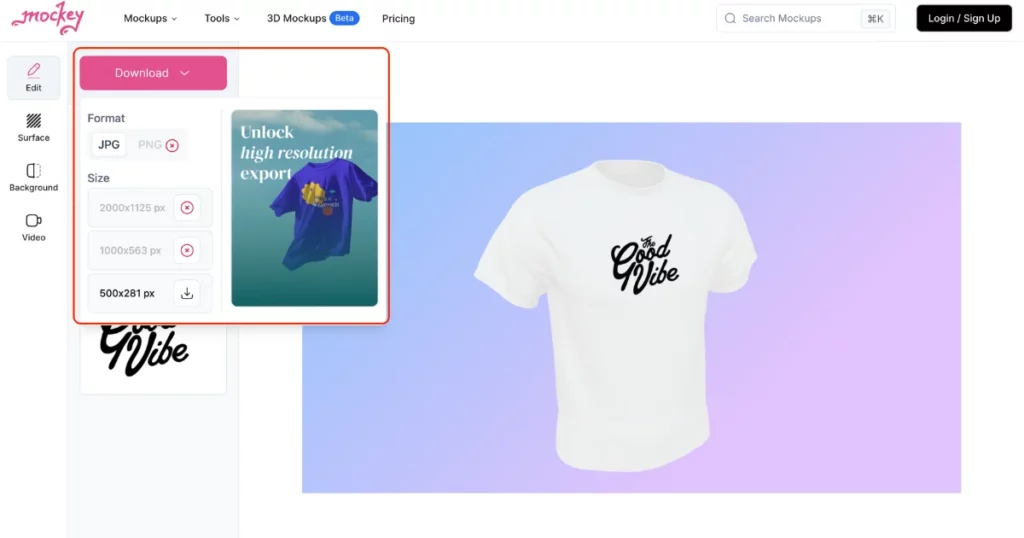
- Free Plan: JPG (400 x 500 pixels).
- Starter Plan ($7/month): PNG (up to 2000 x 2500 pixels).
Conclusion
To sum up, we’ve learned how to create a 3D mockup in Illustrator. While Illustrator has its pros and cons, it also requires a subscription. On the other hand, Mockey AI is a better choice because you don’t need to be a design expert. Even, you can start for free.
So, go ahead and sign up now!
FAQs
How to do a 3D mockup in Illustrator?
To create a 3D mockup in Adobe Illustrator, design your object, create a 3D shape using Effect > 3D > Revolve, and map your artwork via Map Art. Adjust lighting and materials for realism. Finally, render and save your 3d mockup for presentation or further editing.
How to create a 3D mockup?
Create a 3D mockup on Mockey.ai by signing up. Choose a template, upload your design, and customize materials, textures, and backgrounds. Once satisfied, export your high-resolution 3d mockup in your preferred format for easy sharing or presentation.
How to create a 3D design in Illustrator?
To create a 3D design in Adobe Illustrator, set up a new document with a grid, draw basic shapes, apply 3D effects (Extrude, Revolve, Inflate), adjust settings (depth, rotation), customize lighting and materials, then finalize with color tweaks and export your design in your preferred format.
Related reading:
