
How to blur background on iPhone? It might seem tricky, but it’s actually easy with the tips you’ll learn here.
We will discuss:
- ???? How to blur background on iPhone after taking photo
- ???? without portrait mode,
- ???? using Facetime,
- ???? and blur the background of a video on an iPhone.
Table of Contents
How to Blur Background on iPhone
Let’s discuss how to blur out background on iPhone step-by-step.
Step 1: Open the Camera App
- Newer iPhones, even ones from 2017, have a cool camera trick called Portrait mode. It makes your photos look like they were taken with fancy cameras by blurring the background nicely.
- To snap a photo using Portrait mode, just open your Camera and move the mode picker near the shutter option until you see Portrait highlighted.
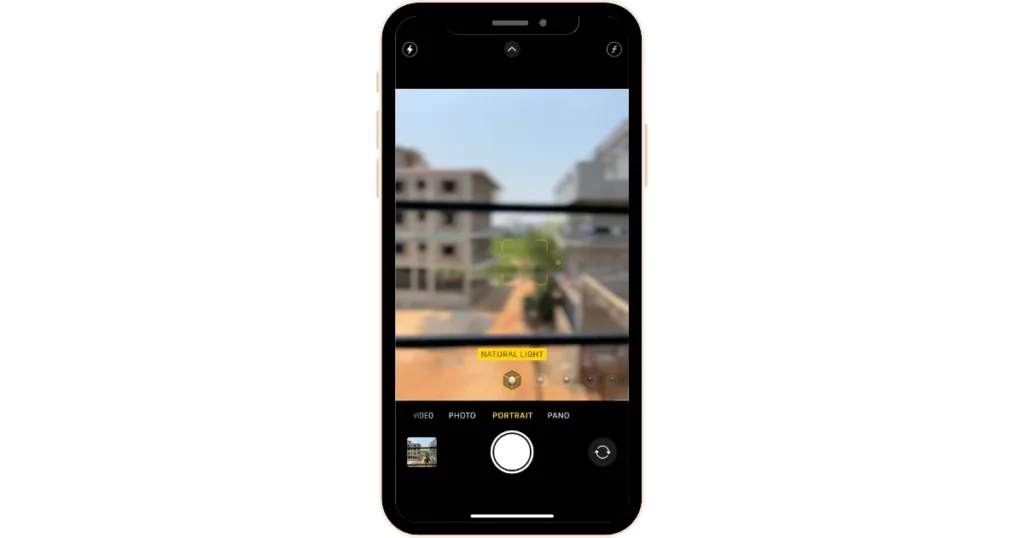
Step 2: Frame Your Subject
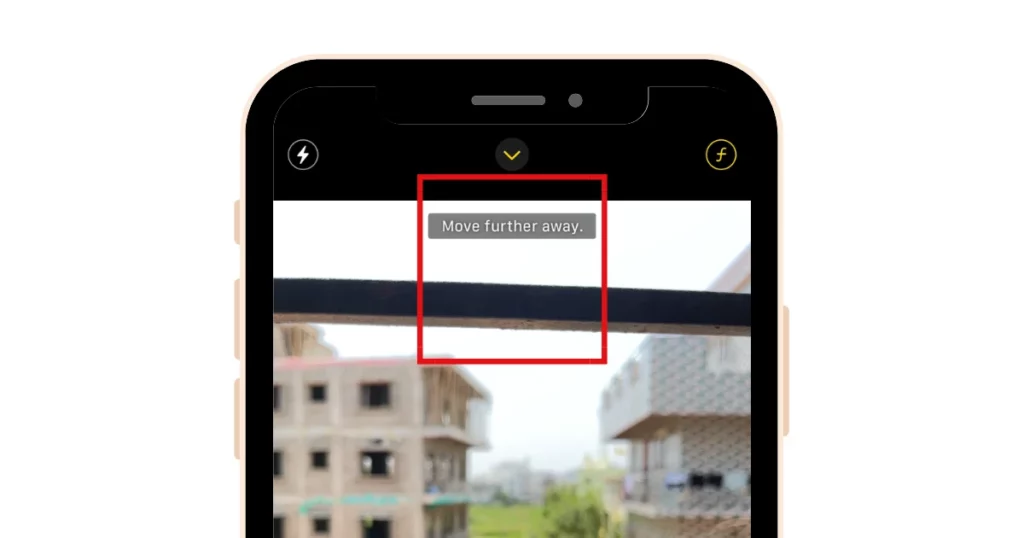
- When you’re new to taking portrait photos, touch the subject to check if you’re far enough for the portrait effect to work.
- If you’re close too much to the subject, your iPhone will tell you to move back for the primary camera and even more for the telephoto camera.
Step 3: Adjust Lighting and Focus
- If there isn’t a warning, just take the photo like you normally would.
- You can move the finger up or down close to the focus target to make the picture brighter, or you can open the options menu to use other tools.
Step 4: Select the Camera Lens (if available)
- If there is a telephoto lens on your iPhone, you can change between the primary camera and telephoto by clicking the camera selector in the bottom left corner that shows options like “1x,” or other zoom levels.
- Usually, the telephoto lens is better for taking portrait photos.
Step 5: Adjust Background Blur
- You can adjust how blurry your picture looks too! To access camera options, swipe up, then click the “f” button.
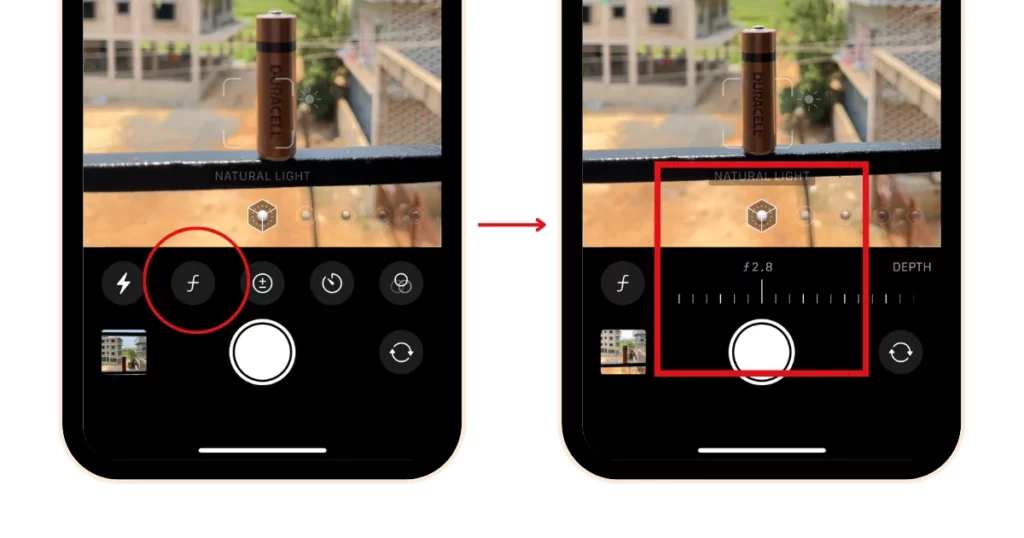
- A slider will pop up where you can change how blurry the background will be. You’ll see the changes in real time on the screen.
Step 6: Capture the Photo
- Once you’re happy with how things look, click the shutter button to take the Portrait photo. You can change the blur level later, so you can quickly capture important moments and adjust the blurriness whenever you want.
How to Blur Background on iPhone After Taking Photo
In two easy steps, you can blur the background of an iPhone photo after you have taken it.
Step 1: Open and Select the Photo
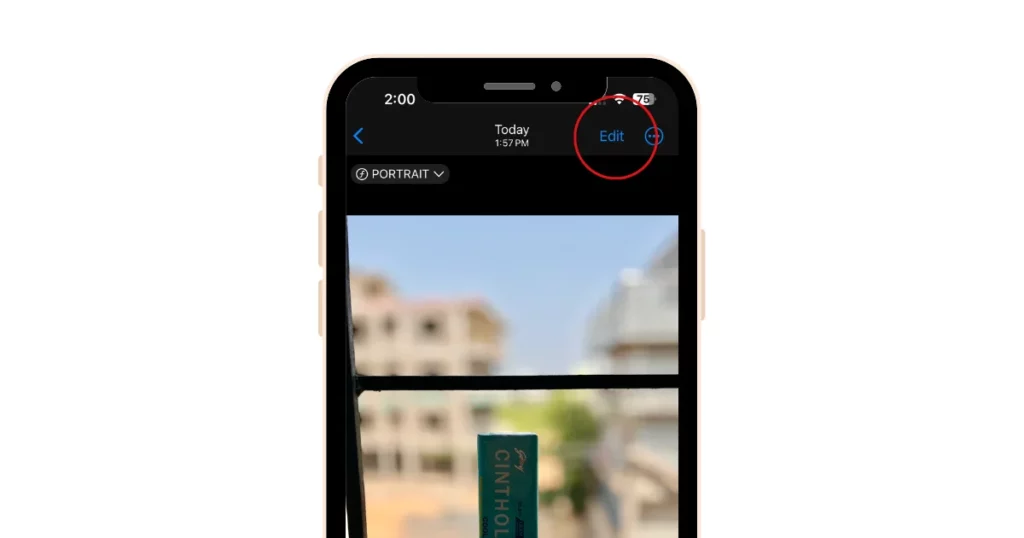
- You can adjust how blurry a photo looks in Portrait Mode even after taking the picture. Just open “Photos“, pick a Portrait photo, or tap the picture thumbnail, then press “Edit” to make some changes.
Step 2: Adjust the Background Blur
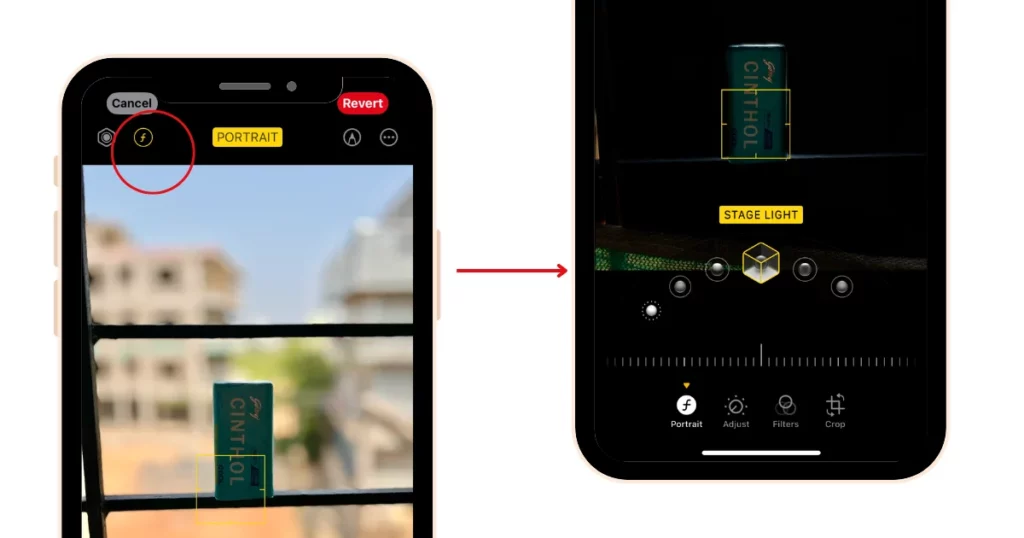
- First, when you open Portrait Light effects, you’ll see some options. These options let you change the lighting to make your photo look like it was taken in a studio, with shadows, or on a stage.
- There are also some black-and-white effects. You can try them out to see if any make your photo look better.
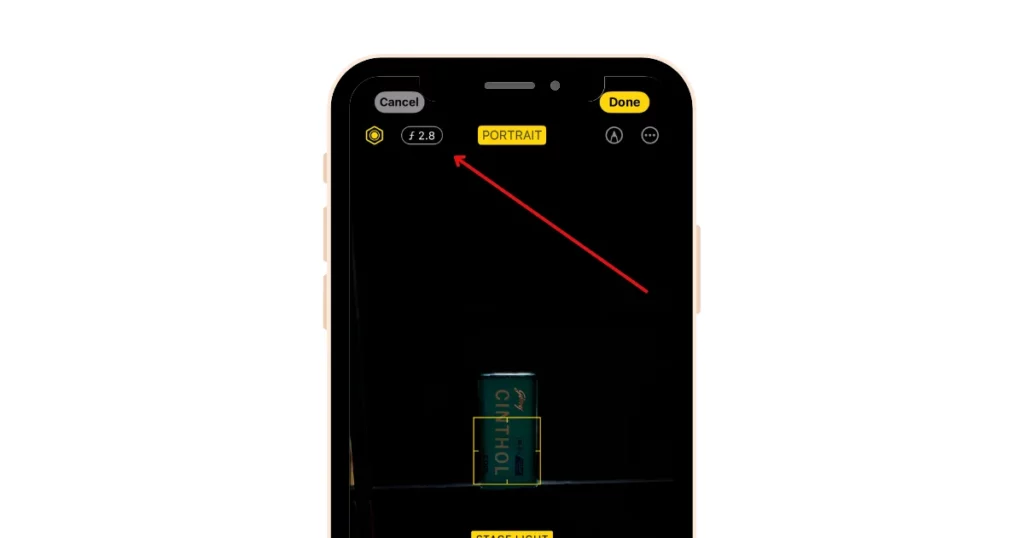
- If you want to blur the background in your picture, focus on the “f/number” next to the “Studio Light“. Just click the “f/number“, then move the slider to adjust how much blur you want. Easy!
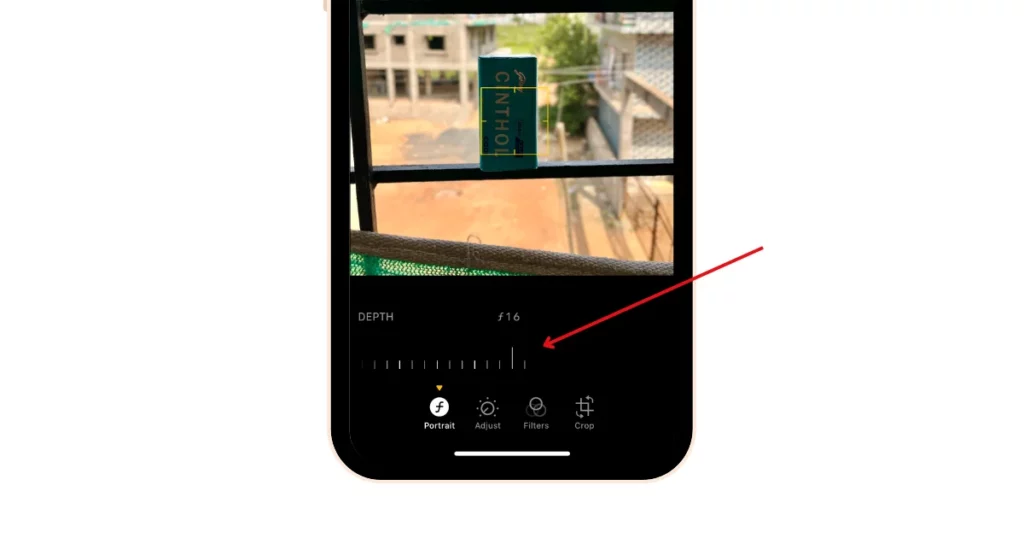
- If your iPhone gets confused about what’s in the front and what’s in the back of a picture, moving the depth slider all the way to the right can help. This can reduce blurriness and hide any weird stuff at the edges.
- You can use all the usual photo editing tools, like adjusting brightness, shadows, and white balance, just like you do with any other photo on your iPhone. Tap “Done” after editing. And if you have an iPhone from 2018 or later, you can also edit portrait blur.
How to Blur Background on iPhone Without Portrait Mode
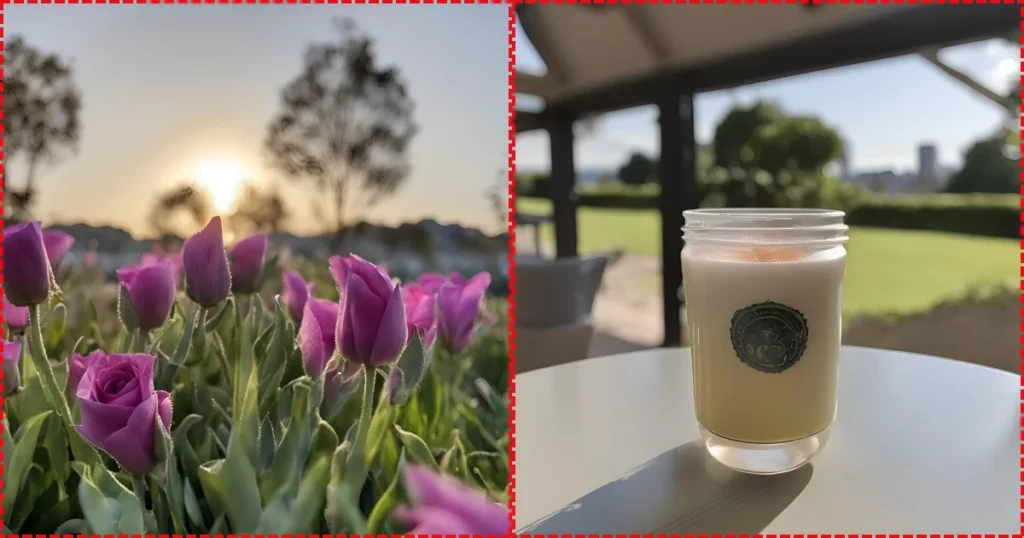
Recently, iPhone cameras have gotten better at creating natural background blur without using software. The key factors are the image sensor size, aperture, and lens focal length.
- Image Sensor Size: A full-frame DSLR has a larger sensor, which is an advantage here.

- Aperture: Light is seen as bokeh rings around lights with a wide aperture and smaller f/number. Aperture size varies by camera.
- Lens Focal Length: Long focal lengths usually have narrow apertures, but they also create a shorter depth of field. This means the best iPhone lens for natural blur relies on the condition. Sometimes zooming in helps, while other times it reduces background blur.
Comparing iPhone and DSLR Cameras
- Full-frame DSLR: Traditional cameras let photographers adjust the aperture to control background blur or sharpness.
- iPhone Cameras: iPhones, like other smartphones, have fixed apertures but come with multiple rear cameras, each with a different aperture. By picking the right camera, you can achieve natural background blur.
iPhone Camera Lenses and Their Effects
- It has three cameras: an ultra-wide lens (f/1.8), a telephoto lens (f/2.8), and a main lens (f/1.5). The primary camera creates a natural blur. The telephoto camera, despite its narrow aperture, also produces significant blur due to its longer focal length. The ultra-wide camera keeps most of the photo in focus.
Natural Blur from a Close-range
- This rule is not absolute, however. When you get close to your subject, the iPhone 13 or 14 pro model switches their ultra-wide cameras to macro mode, giving a narrow depth of field and strong natural blur.
- Macro photography is great for small objects or small details but not for larger objects. The whole face or body should be captured in a portrait. The macro mode is better for close-ups.
- The ultra-wide camera keeps most of the image in focus, while the primary camera creates more blur because of its wide aperture.
Natural Blur from a Distance
- For distant subjects, a telephoto lens creates dramatic blur and allows close framing. In photography, there’s no single best answer, so it’s good to experiment to capture the most suitable shot quickly.
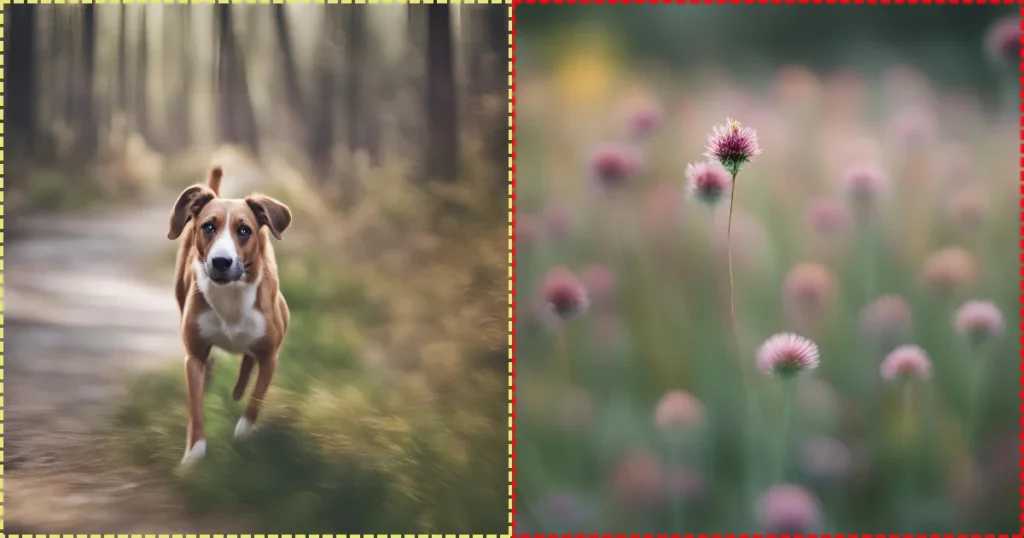
- Switching between lenses on your camera helps you see how different focal apertures and lengths affect blur. Using a tripod that matches your subject’s size and distance can make your shot easier.
How to Blur Background on iPhone Live Photo – Two Ways
Consider these two ways to blur the background on an iPhone live photo.
1. With Settings – Only for iPhone 15 Models
On iPhone 15, you can turn photos of people, dogs, or cats into portraits.
- Open “Photos“.
- Pick a photo and hit Edit.
- Tap Portrait and Depth Adjustment if available.
- Adjust the background blur using the feature “Depth Control slider”.
- Tap Done to save.
- To remove portrait effects, tap Edit, then Revert.
Note: Portrait effects don’t work with Live Photos in Photo mode.
2. With Mockey.ai App – For iPhone 14, 13, 12, or 11 Models
With the Mockey.ai App, you can blur the background of any iPhone 14, 13, 12, or 11 models.
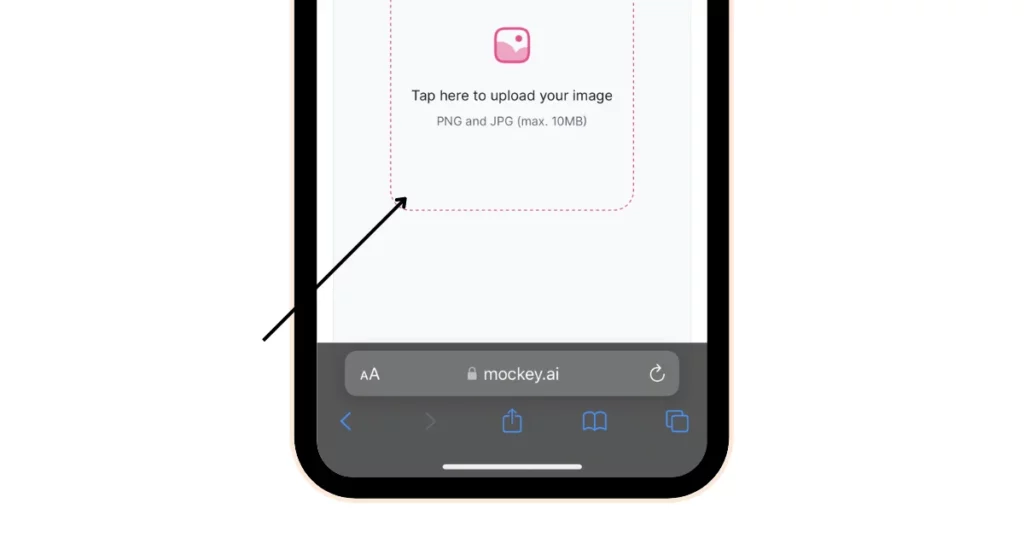
- Click https://mockey.ai/blur-background/
- Tap “Blur Background“.
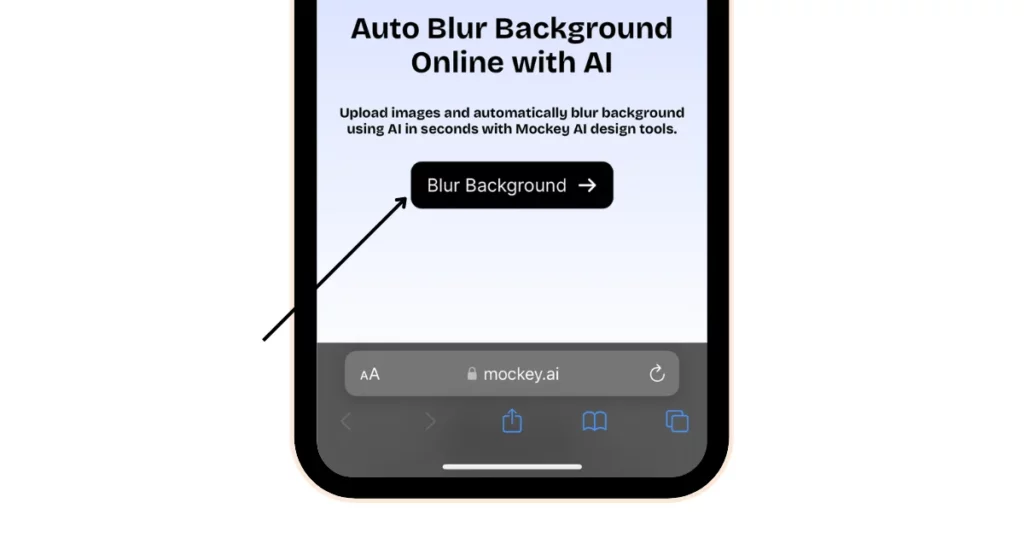
- Upload any of your photos.
- Click the “Blur” button to start processing your photo.
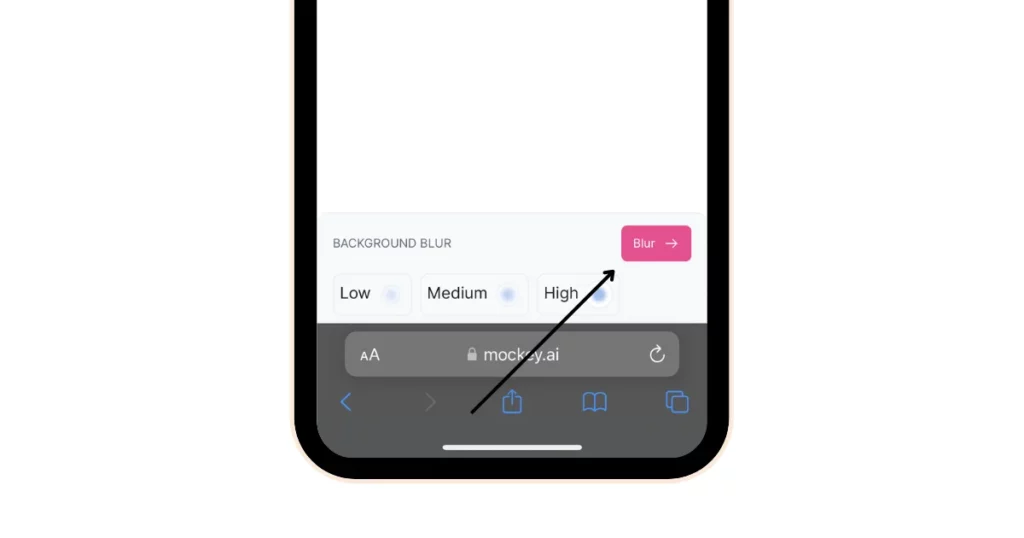
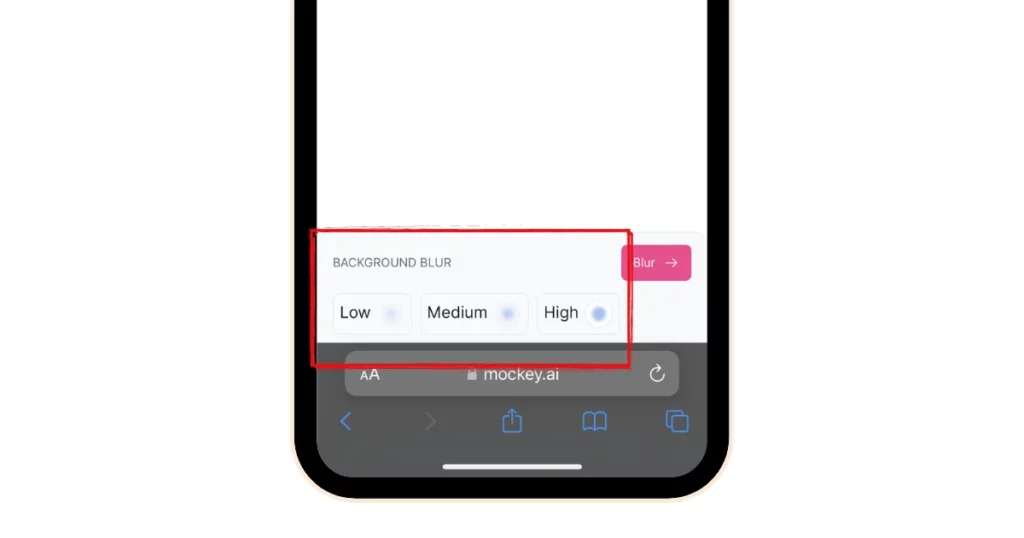
- Customize with different settings.
- Tap Download to save in top-notch quality.
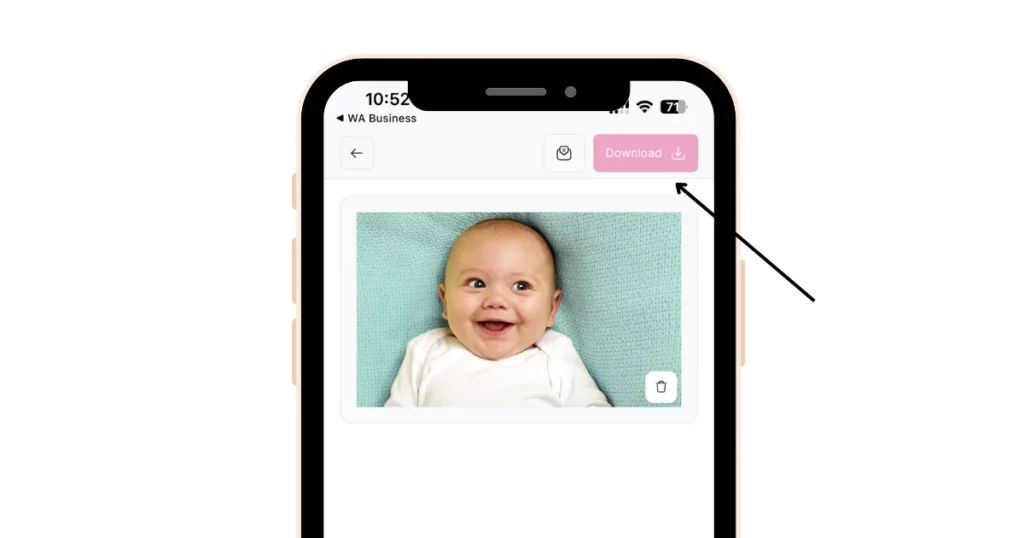
Note: Don’t forget to sign up there and upgrade to the Max plan once you have signed up.
How to Blur Background on iPhone Facetime
You can blur a background on iPhone during FaceTime calls. This also makes others less nervous about passing by during your video chat.

Step 1: Initiate a FaceTime Call
- Open the FaceTime app on your iPhone.
- Start a new FaceTime call or join an ongoing one.
Step 2: Access the Portrait Mode
- Tap on your face during the FaceTime call to bring up the controls.
- Tap the Portrait mode icon (usually represented by a silhouette).
Step 3: Activate the Background Blur
- Once you’ve tapped the Portrait mode icon, your background will blur automatically.
- To turn off Portrait mode, simply tap the icon again.
Note: Many video call apps have matching controls, but you might need to look through the settings to see them.How to Blur Background of a Video on iPhone
Let’s discuss how to blur background on iphone video step-by-step.
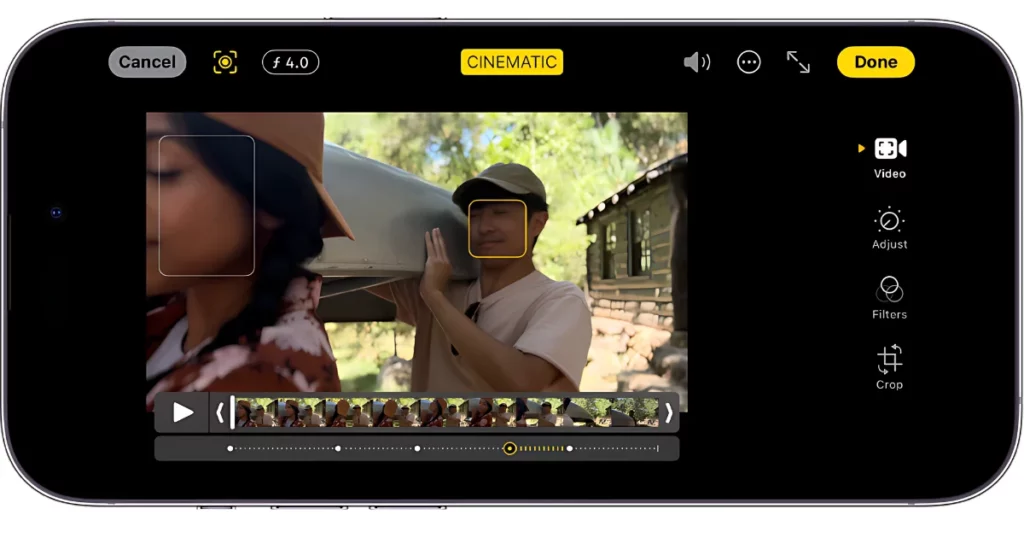
The newest iPhones can shoot videos with a cool blur effect like Portrait mode images. It’s known as Cinematic mode, but it needs an iPhone 13 or newer because it’s pretty taxing on the processor.
To blur a background on iPhone in photos or videos helps focus the viewer’s engagement. It’s a great tool, and mistakes can usually be fixed later in editing.
Go to Cinematic mode. Tap on the screen to set focus, then click the shutter to begin recording.
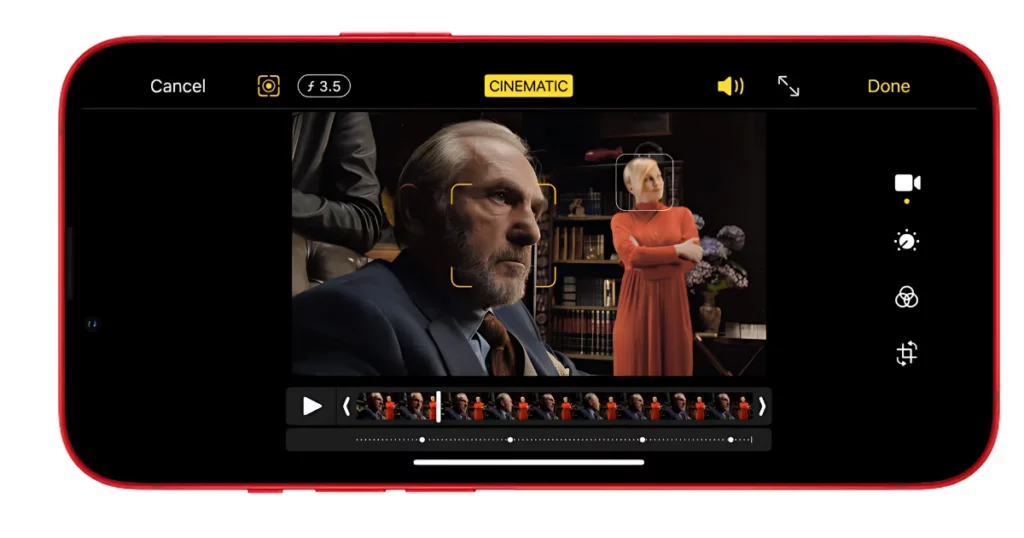
When you’re recording in Cinematic mode on an iPhone, it helps by adjusting focus as needed. If someone comes into the background or you move the camera, it might shift focus automatically. Sometimes it might not be perfect, but you can always adjust the focus later.
To adjust your video, hit the edit option. Choose a point on the dotted line and edit it. Set the focal point anywhere in the preview. You can add or delete focus points. To go back to the original focus points, tap the tracking icon at the top left.
The Bottom Line
Blurring the background of an image or video is an excellent way to direct the viewer’s focus.
This effect, once only available with costly gear, is now available on iPhones and many Android devices.
Even video call software like FaceTime offers this feature, making the subject stand out while minimizing distractions.
Learning to use these controls can make your videos and photos better in almost any setting.
However, we have covered how to blur photo background on iPhone after taking a photo, in live photo, without portrait mode, using Facetime, and a video.
FAQs
How do you blur the background in a photo on iPhone?
Adjust the background blur in portraits using the Depth Control slider. To do this, tap a portrait to consider it full screen, after that, click Edit. Move the Depth Control slider to change the blur level. White dots indicate depth.
How to blur the background in a photo?
With the Mockey blur background tool, you can blur the background in a photo quickly. Just upload your image and click on the blur background button to start the process. That’s it.
How do I get the blur tool on my iPhone?
Launch the Photos app on your iPhone. Find and open the picture you want to blur. Tap Edit at the top right. Click the pen icon to access the editor. Tap the + button and choose a shape. Pick a color for the shape. Blur the text with the shape. Lastly, click Done to save.
How to remove background from image on iPhone?
You can also use the Files app, which has a background remover feature. To use it, open Files, locate the file you like to make a transparent background, click and hold the file until a menu appears, then tap Quick Actions and choose Remove Background.
Can you blur the background of a photo already taken on an iPhone?
First, launch the Photos app on the iPhone. Then, choose any photo you took in Photo mode to see it full screen. After that, click Next, and tap on Portrait. Finally, use the Depth Control slider to make the background blur more or less in your portrait.
How do I blur the background of a picture I already taken?
Use the Mockey blur background tool to put your photo in focus. Just pick your photo from your device or drag it onto the page. Start the process by clicking the Blur background button. Then, edit your picture as you like. Finally, download and share it!
How to blur background on iPhone after taking photo without portrait mode?
Rather than using portrait mode on iPhone, tap the screen to focus. But remember, you’ll need to get closer to the subject for a stronger blur effect to blur a background on iPhone.
How do I blur out part of a picture on my iPhone?
On newer iPhones, you can change how blurry the background is in Portrait mode photos. Just open the photos, tap Edit, and move the Depth slider to adjust the blur. Easy!
How do I make my iPhone background blur automatically?
You can use Portrait Mode on iPhone SE and newer models, like the iPhone X, iPhone 7 or 8 Plus. It blurs the background of your photos. Just open the iPhone Camera and select Portrait Mode to blur a background on iPhone automatically.
Can you blur wallpaper on iPhone?
Click Customize Home Screen. Then, pick a color to adjust the wallpaper, or choose a custom photo. You can also select ‘Blur’ to make the wallpaper less sharp and help your apps stand out.
Can I blur background on iPhone video?
Yes, you can blur a background on iPhone videos by using different apps from the App Store. One app people often use for this is YouCam Video, which lets you edit your videos.
Can I change my background on FaceTime?
Yes, you can change the background on Facetime by using Apple’s FaceTime Screen Share Feature. Begin a FaceTime call like you normally would. Tap the Screen Share icon. Show any open window or app. This lets you put any background you want behind you during the FaceTime call.
How do I turn off the blur background on FaceTime on my Mac?
On the latest MacOS updates, Apple included a new feature called Video Effects, which lets you change how your face looks during FaceTime on Mac. If you’re using Zoom and want to get rid of the blurred background, try turning off the Video Effects mode.
Can you blur out background on iPhone video?
In your Photos app, you can switch the main focus of your Cinematic mode videos and tweak how blurry the background looks. You can even turn off this effect if you want.
How do you Unblur a video on iPhone?
Start by opening the Photos app on your iPhone and selecting the video you want to fix. Then, tap on Edit and find the adjustment option. Next, slide the Noise Reduction bar to the right. Increase it up to 100 depending on how blurry your video is.
Related reading: