This post talks about how to blur background in Photoshop and how to do it in seconds with Mockey’s blur background tool. It gives step-by-step instructions to help you achieve professional-looking blurry backgrounds, even if you’re not a photography expert.
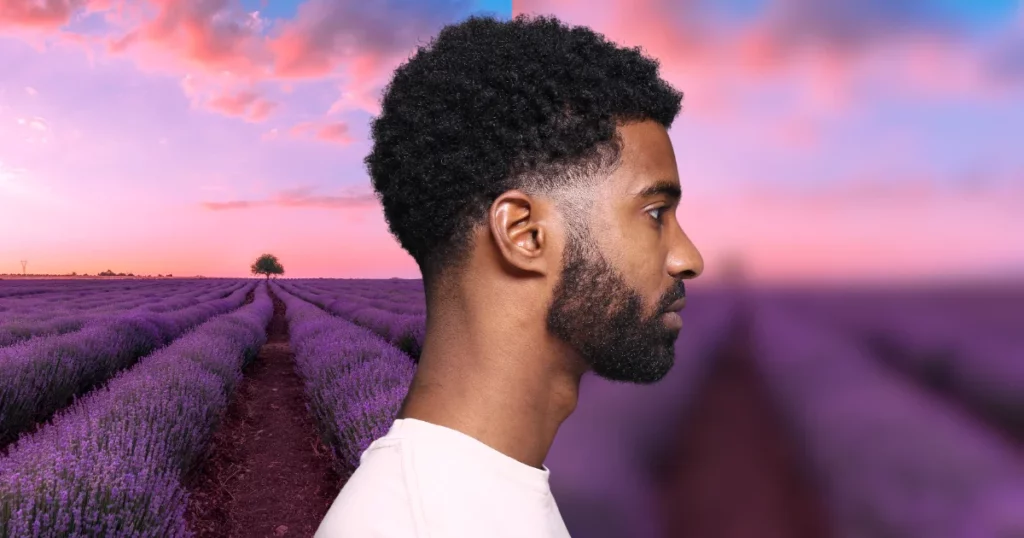
Table of Contents
Can You Blur a Background in Photoshop?
A blurred background can be captured with a camera. But if you don’t have the right lens or you’re working with photos you didn’t take, the next best option is to use Photoshop.
We’ll show you a method that gives realistic results without halos or ghosting. This technique is nondestructive, so you can always go back and edit your adjustments. Let’s get started with the tutorial.
A Straight-Up Guide on How to Blur Background in Photoshop
Here is a quick guide on how to blur a background in Photoshop in a few simple steps.
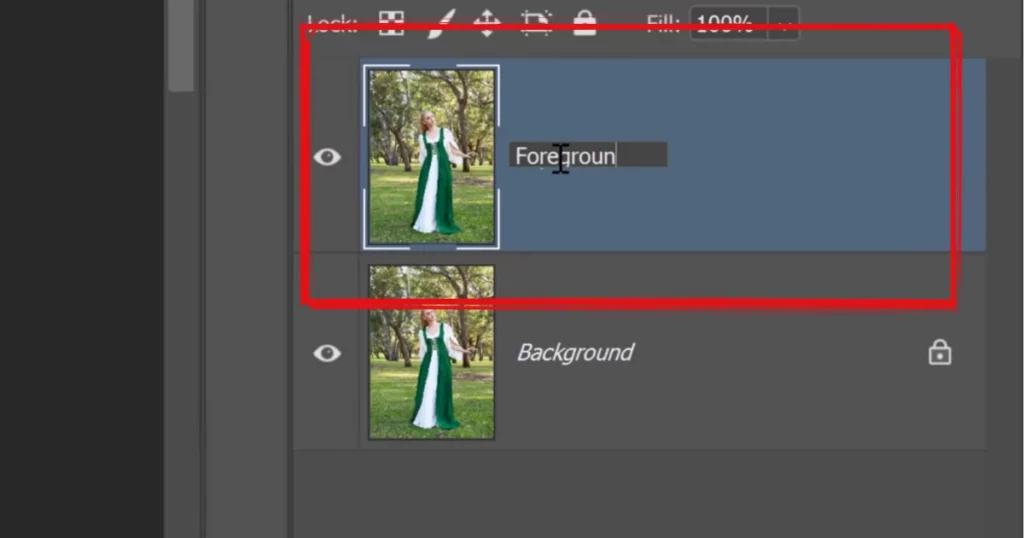
- Duplicate the Background Layer: Press Ctrl+J (Windows) to duplicate the background layer. Rename this layer “foreground” for organization.
- Remove the Background: Use selection tools like “Subject” in the Select menu or manually select the main subject. Extend the selection using Select > Modify > Expand. Remove the subject using Edit > Content-Aware Fill.
- Fine-tune the Selection: Adjust the mask by shrinking it using Filter > Other > Minimum. Choose a pixel value that removes fringing or edge halos.
- Refine the Mask: Use a Layer Mask to refine the edges of the main subject. Paint with white to reveal and black to hide parts of the image as needed.
- Blur the Background: Make a Smart Object out. Next, select Tilt-Shift from Filter > Blur Gallery. Adjust the blur settings to mimic a shallow depth of field effect.
- Final Touches: Adjust the mask and blur settings until you’re satisfied with the result.
How to Blur Background in Photoshop – Complete Guide
This guide will walk you through the entire process of how to blur background in Photoshop.
1. Duplicate the Background Layer
- First, use the keyboard shortcuts Ctrl J for Windows or Command J for Mac to duplicate your background layer. Rename this layer “Foreground” to keep things organized.
- Now, start by removing the background.
- You can mask the foreground element more easily when you do this in order to avoid edge halos. You’ll see what we mean shortly.
2. Remove the Background
Next, let’s select the main subject. In newer versions, one of the easiest ways is to go to the “Select” menu and click on “Subject”.
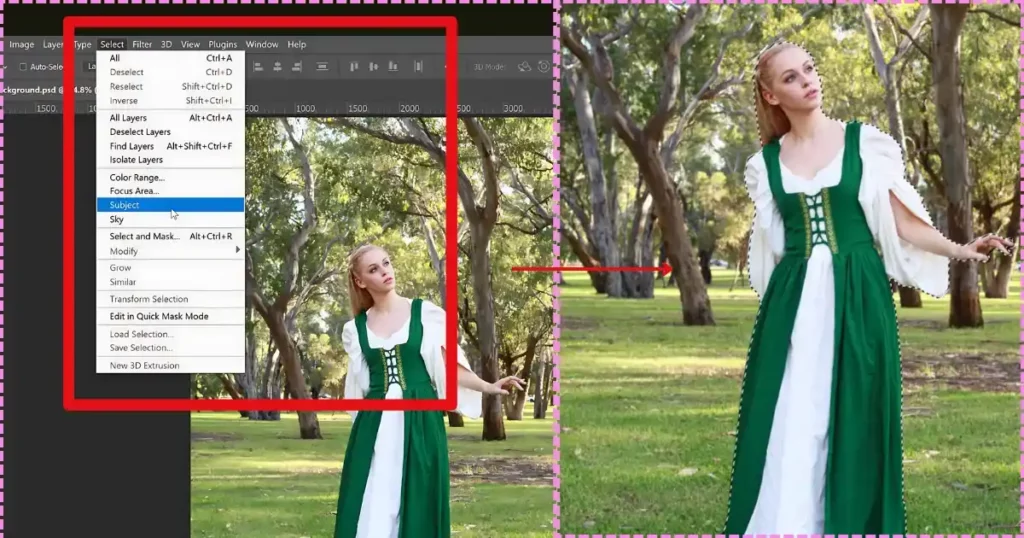
- This uses Adobe Sensei, Photoshop’s AI, to find the main subject and make a selection around it.
- In this case, it does a good job, though the selection isn’t perfect. That’s okay—we’ll fine-tune it later. We’ll expand so you can see what comes next.
3. Refine Mask
- You’ll notice the selection goes around her body, which is usually what we want. However, in this case, we want a gap between the selection and the edge of her body.
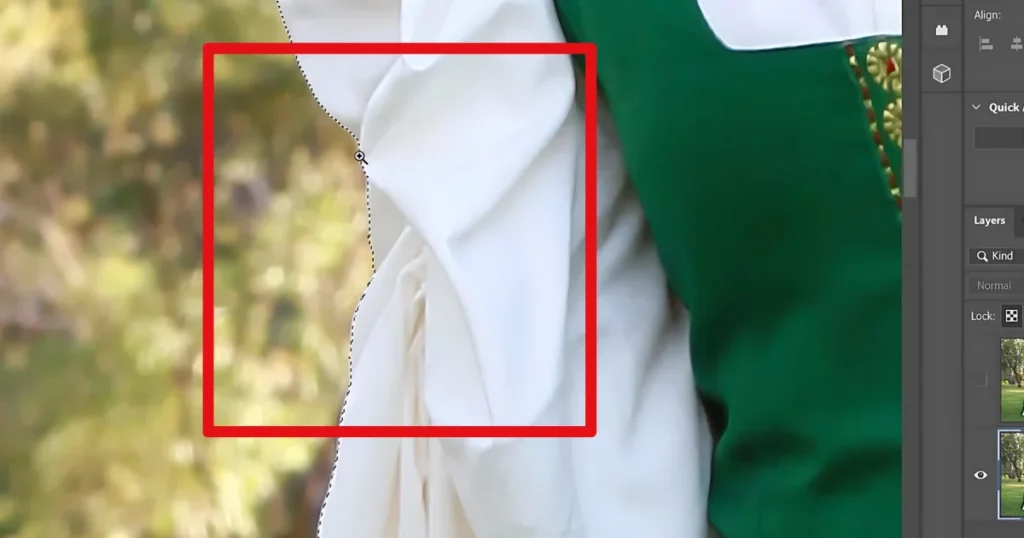
- To create a gap, go to the “Select” menu and choose “Modify“, then “Expand“.
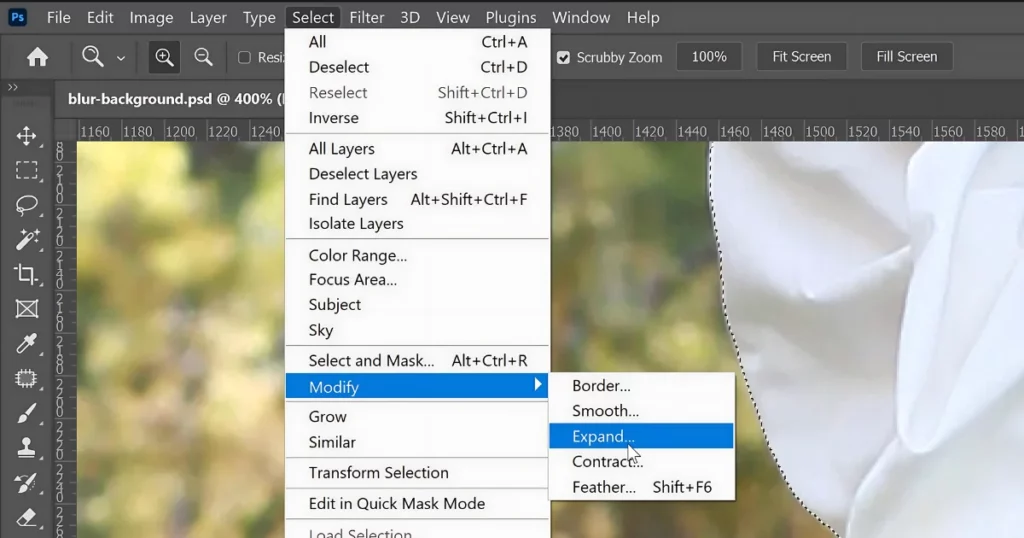
- Expand by about 5 pixels and press OK.
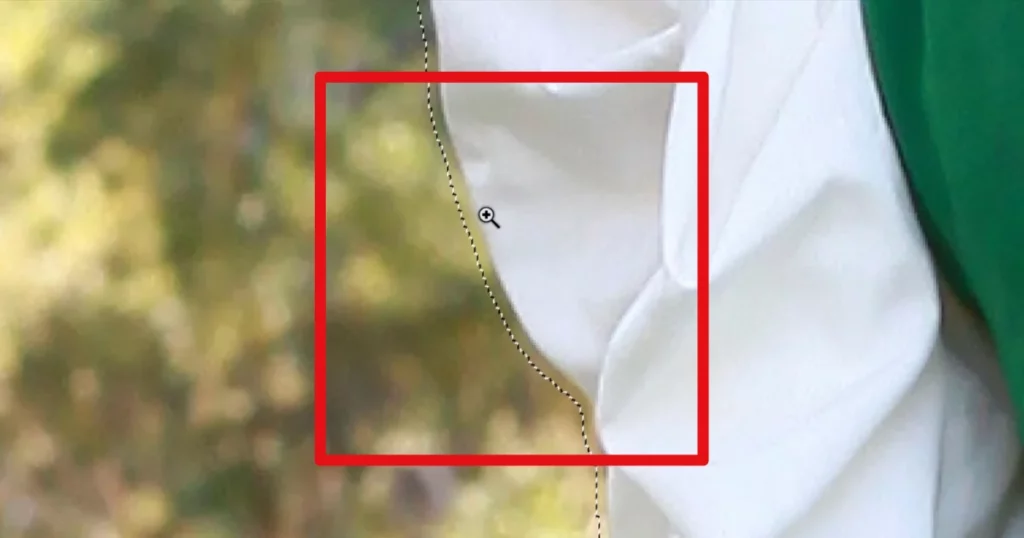
- Make sure there’s a gap between the selection and the edge of the main subject in your image.
- Once you have the gap, you can remove the subject by going to Edit, then Content-Aware Fill. The preview might not look perfect, but that’s fine.
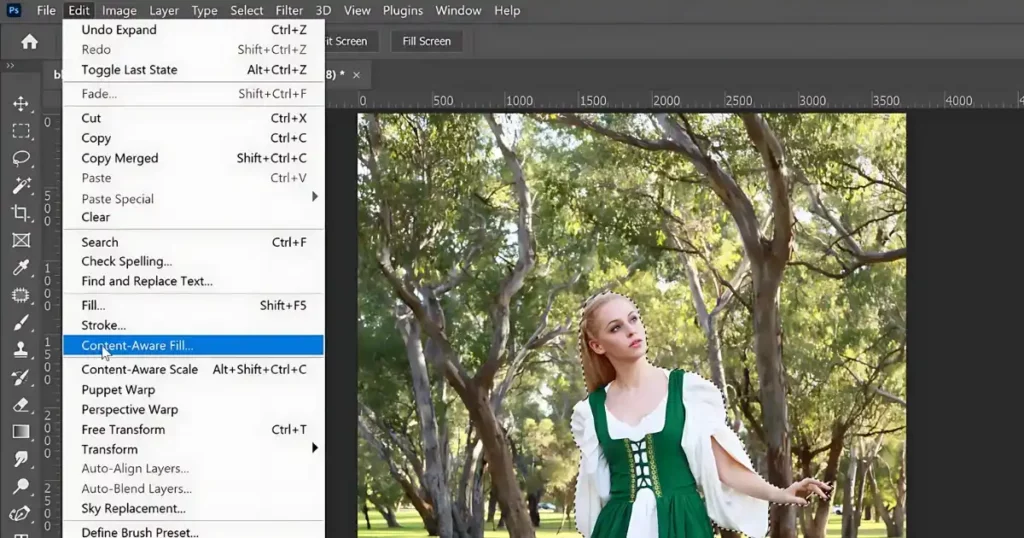
- We only care about the edges because the center is where she’ll be standing. The default settings work well, so we’ll proceed with the fill.
- Verify that “Duplicate Layer” is selected under “Output To“.
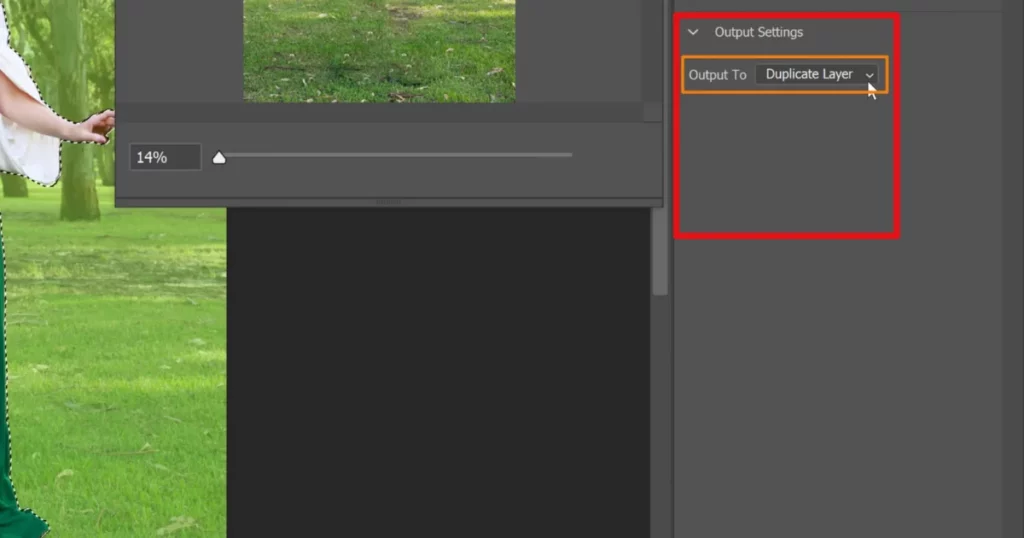
- Photoshop will create a new background copy without her in it. Next, turn off the two background layers and turn on the foreground layer. The selection will still be active. Select the layer and click Layer Mask to apply it to the foreground layer.
- But now we have a problem. When we expanded the selection, it added a five-pixel border around our main subject.
- To fix this, we’ll use a technique to remove fringing or edge halos.
- Choose the Layer Mask first, then “Filter“, “Other“, and lastly “Minimum“.
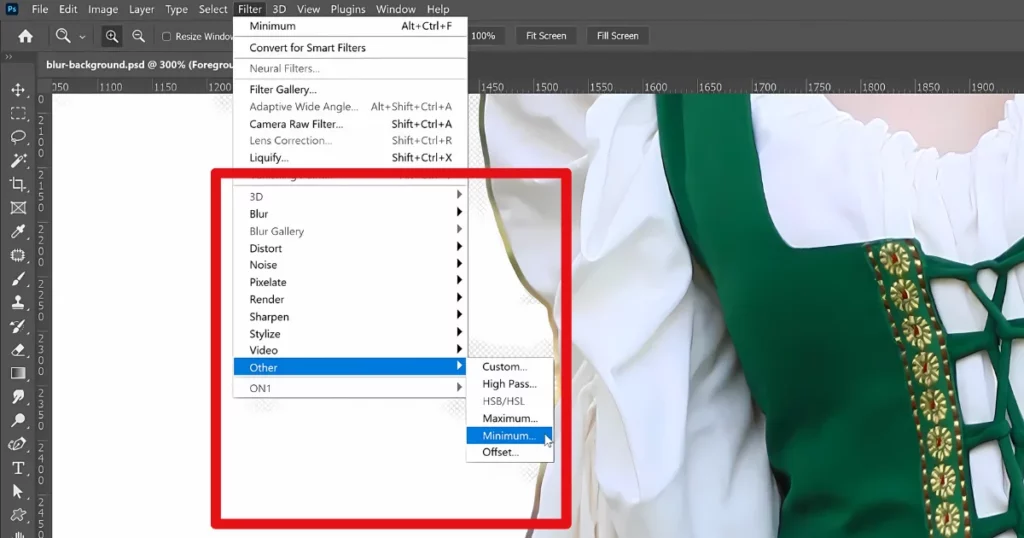
- This filter will shrink the mask by the number of pixels you set. We have it set to 4 pixels right now, but remember, we expanded the mask by 5 pixels.
- So if you set it to 5, you should get a similar result to what you had before. We think this filter is better for shrinking and growing masks than the Expand or Contract feature in the Select menu. It lets you choose whether to keep edges straight or rounded. Here, rounded edges work best. You can also use decimal values, not just whole numbers. For example, you can set the Radius to 5.5 pixels.
- So, we’ll adjust the mask by setting it to 6 pixels inward to avoid edge halos or fringing. We’ll click OK, and it’s looking good.
4. Blur the Background
- Now, let’s blur the background. Choose your Background Copy layer, then use the right-click menu to turn it into a Smart Object.
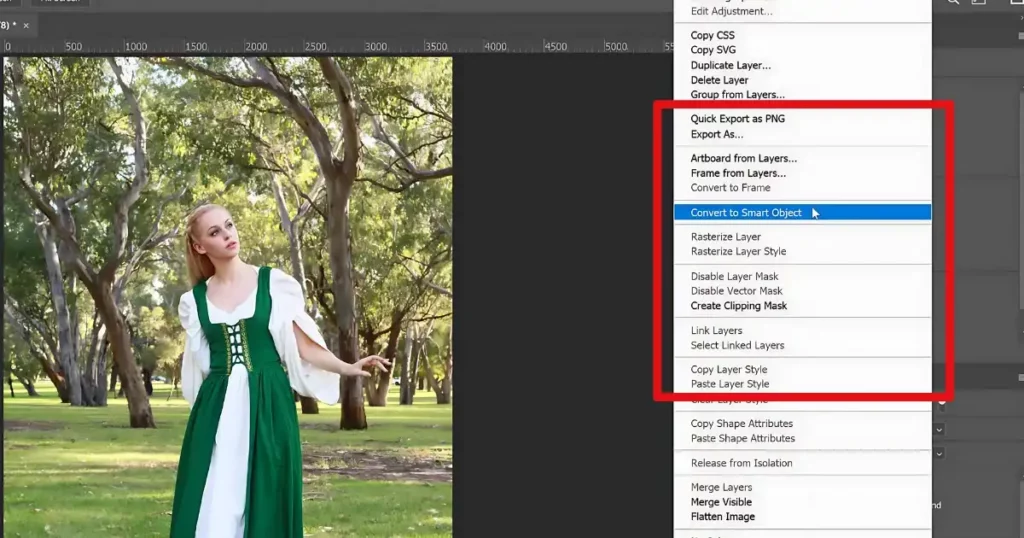
The Smart Object allows you to apply editable adjustments, distortions, filters, and transformations over one or more layers. - With the background layer selected, We’ll go to Filter > Blur Gallery > Tilt-Shift.

- This filter maintains sharpness in the middle of the image while blurring the top and bottom. We’ll increase the blur so you can see the effect better.
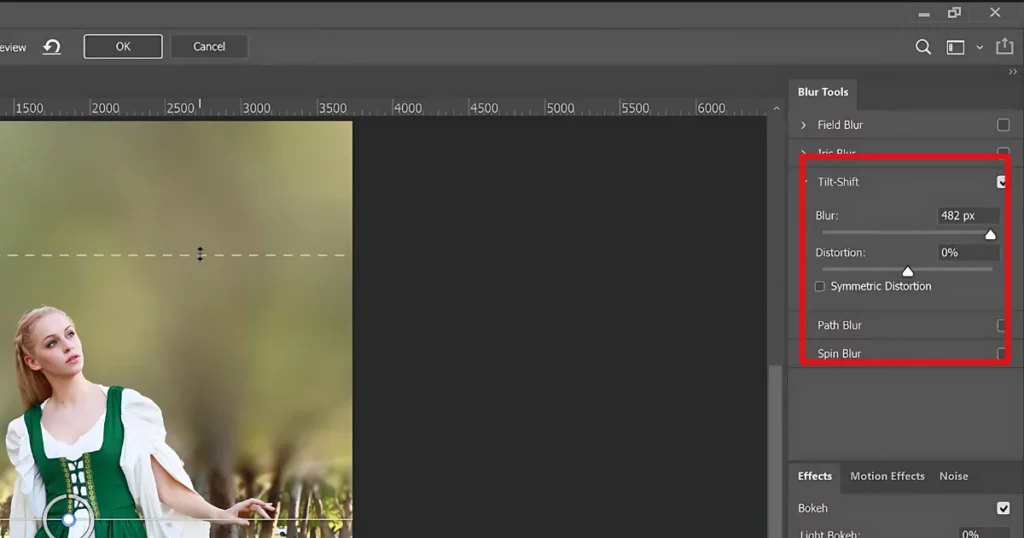
- First, look at these two solid lines. Everything inside them stays sharp, and everything outside them will get some blur.
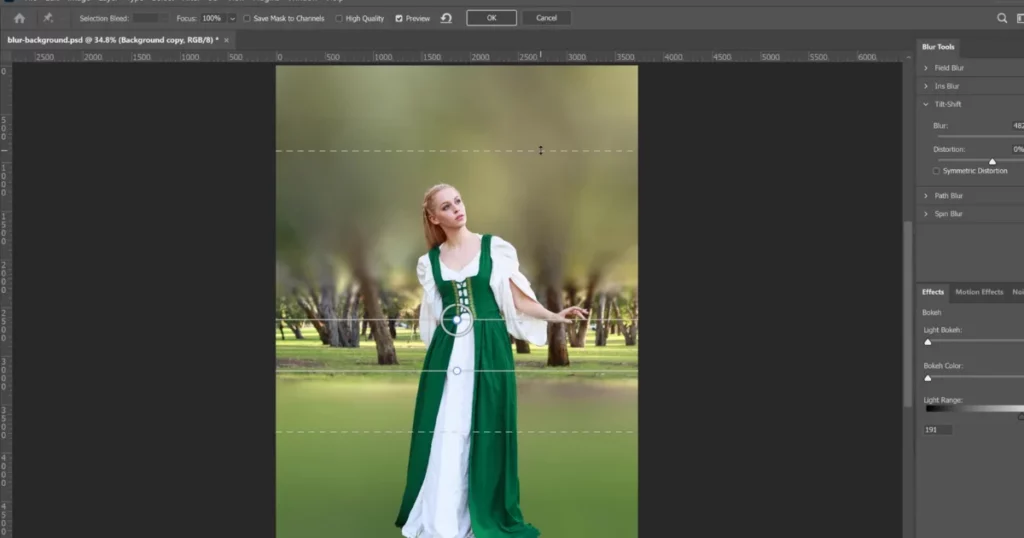
- Between the solid and dashed lines, the blur gradually increases. Beyond the dashed line, you’ll have the full blur set by this slider. The same applies to the bottom lines. Adjust these controls to mimic the effect a camera with a shallow depth of field would create in a real photo.
- If you think about it, in a real photo, our model would be in focus. The area where she’s standing would be clear, while everything behind and in front of her would gradually become blurrier as it gets farther into the background or closer to the foreground. You can use the controls to adjust the blur in your image.
- We think our background looks too blurry, so we’ll reduce the blur to about 100.
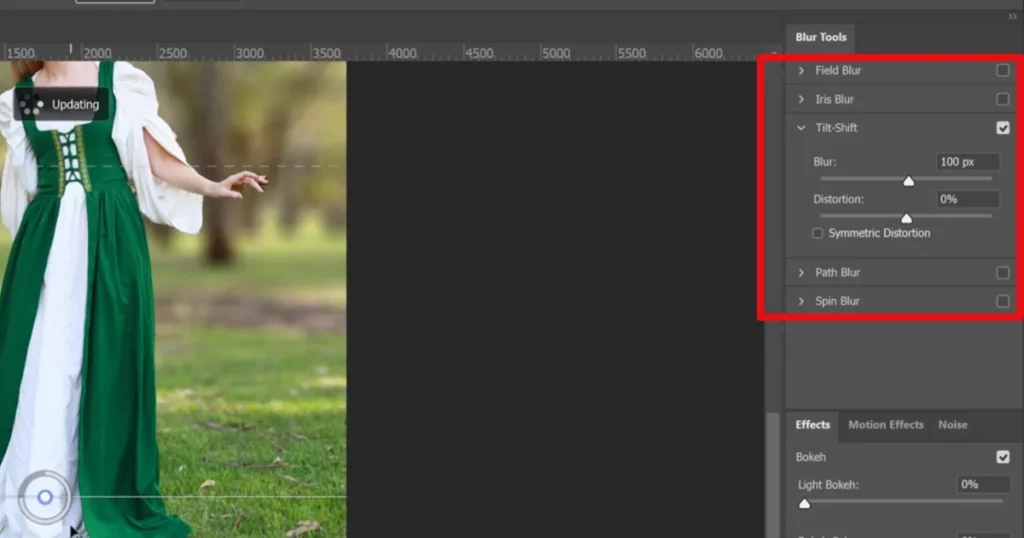
- That looks pretty good, and we’ll adjust these controls too.
- We pushed the bottom one down too much, so we’ll bring it up. Only the area where she’s standing is in focus. Once you’re satisfied with how it looks, you can press OK.
You’ll see there’s no ghosting effect on the edges, which means everything looks great. Removing her from the background before blurring it is why it looks so good. If she were still there, the edges would be blurry and create that ghosting effect you often see.
5. Final Touches by Adjusting the Layer Mask
- Simply put, the last thing to do is adjust your mask. If there are parts that don’t look right, you can fix them by painting with white to show them or black to hide them.
- Painting with black gets rid of unwanted bits while painting with white brings back the parts you want. It might take a bit of time to get it just right, but that’s what you need to do to finish the photo.
Some Modification with the Hair After Final Touches
- We want to show you something important: her hair. It didn’t look perfect and was hard to select because of the busy background.

Here’s what to do:
- First, ensure no stray pixels are visible, as they will ruin the effect. We’ll hide these pixels and paint her back using one of two methods.
- The foreground layer should be overlaid with a layer. We’ll call this the “hair” brush.
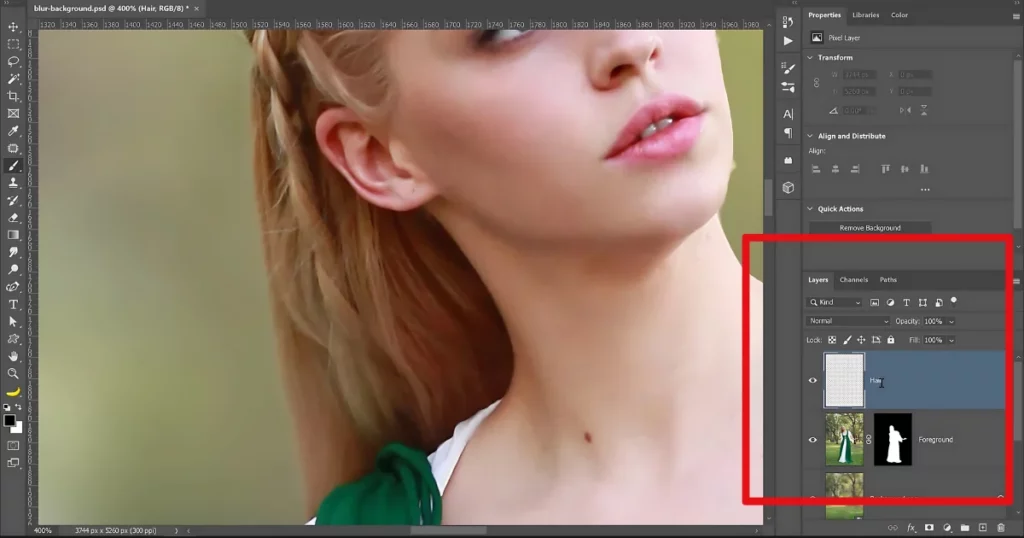
- After selecting the Brush Tool, navigate to the settings bar, click the down arrow, and adjust the size and hardness to 1 and 0, respectively.
- If you have a Wacom tablet, there’s an extra step: click the icon for Shape Dynamics and set Size Control to “Pen Pressure.”
- Now you can paint your hair. Hold Alt (Windows) or Option (Mac) to temporarily use the Eyedropper tool and pick a color from your hair.
- Start painting in the flyaway hairs.
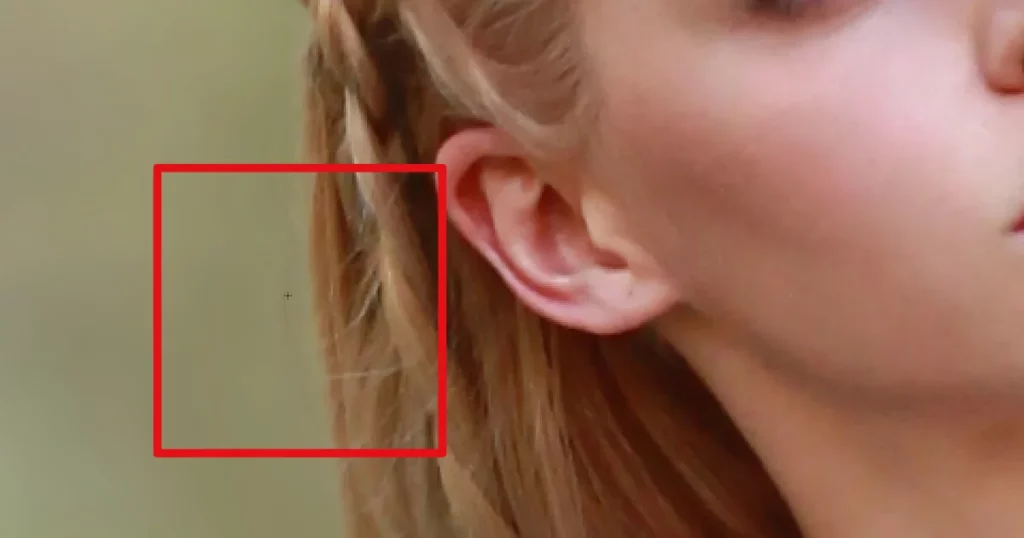
- You can pick colors from other areas and keep painting. Although it will take some time, the end result will be worthwhile. You can also use custom hair brushes.
How to Blur Background in Photoshop on iPhone
In this section, we will show you how to blur the background on iPhone using Photoshop.
- Install Photoshop: Download Photoshop from the App Store if you don’t have it installed.
- Open your photo: Start Photoshop and open the picture you like to edit.
- Open the Discover Panel: Hit the search icon at the top right. Or press Cmd/Ctrl + F.
- Click Blur Background: Look for Discover panel, then head to Browse and choose Quick Actions. Choose Blur background.
- Apply the Blur: To blur the background, press the Apply option.
- Optional – Different Layer: Select a different layer from the Layers panel. Tap Refresh to apply the blur to the selected layer.
- Undo Changes (Optional): Tap the Revert button to undo the changes if needed.
- Explore More Quick Actions: Tap Browse more quick actions for additional editing options.
How to Blur Background in Photoshop on iPad
On an iPad, here is how you can blur a background with Photoshop.
- Open Photoshop.
- From the toolbar, tap the “Smudge tool“.
- Pick the brush size and settings.
- To blur certain areas, drag the Smudge feature over the desired area. Or, utilize the Gaussian Blur filter.
Best Way to Blur Background without Photoshop
Mockey is a top app to blur the background of pictures. This is simple and quick thanks to the new “Blur Background” option.
Here’s a simple guide to blur your picture’s background using Mockey:
- Sign up for Mockey and upgrade to the Max plan to access the blur background feature.

- To access the AI blur background page directly, go to Mockey Blur Background.
- Upload your picture.
- Click “Blur Background” to start the process.
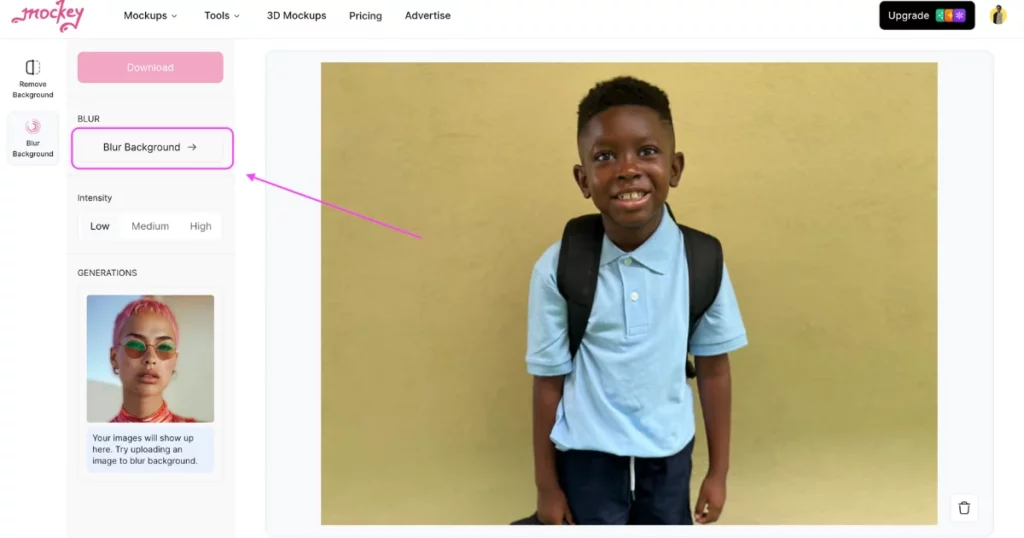
- Use the customization settings to modify your picture if needed.
- Click “Download” to save your photo in its highest resolution.
Why to Use Mockey’s Blur Background Instead of Photoshop
Reasons to use Mockey’s blur background feature instead of Photoshop:
- Affordable
- Simple interface
- Easy to use
- No learning curve
- Easy customization
Conclusion
There are multiple reasons to understand how to blur background in Photoshop.
We provided an online blur background tool and a blur background app for beginners, so you can pick the best way to blur your photo background.
FAQs
How do you blur part of a photo in Photoshop?
In Photoshop, head to Filter, then Blur Gallery and choose Iris Blur. Tap the center pin and move it to your focus point. Drag individual points to change the shape of the ellipse or you can drag the outer edge to adjust the size of the blurred area.
How do I remove the background in Photoshop?
Open your photo in Photoshop, unlock the layer, and click Remove Background in the Properties panel under Quick Actions. Refine the edges to make them look smooth, replace the background if needed, and move the new background layer behind your photo.
How to make lens blur in Photoshop?
To create a lens blur effect in Photoshop, start by enabling the Graphics Processor in Preferences under Edit (Windows) or Photoshop (macOS). Then, go to Filter, then Blur, and lastly Lens Blur. Choose a preview option (Faster for quick previews or More Accurate for final results). Select a depth map source like Transparency or Layer Mask, or None if unavailable. Adjust the Blur Focal Distance to set the focus depth, then customize the Iris Shape, Blur Radius, and Specular Highlights using sliders. Add noise if desired. Finally, click OK.
How do I blur a photo?
Use the Blur tool in Photoshop or Lightroom and select your favorite brush and strength settings to blur areas. For adding motion, apply a Path Blur filter in Photoshop to create movement in still objects or people in photos.
What is the shortcut for the blur tool in Photoshop?
In Photoshop, you can quickly switch to the Blur tool by pressing the letter R. If you hold down the Shift key and keep pressing R, you can switch between the Sharpen and Smudge tools as well.
Related reading: