Do you want to know how to resize an image on iPhone? You can easily do so using your Photos app with some settings and using the best free software without losing your quality.
We will learn how to resize an image on iPhone without cropping, resize it to 1MB, resize your photos to print, and resize for Instagram, email, and wallpaper.
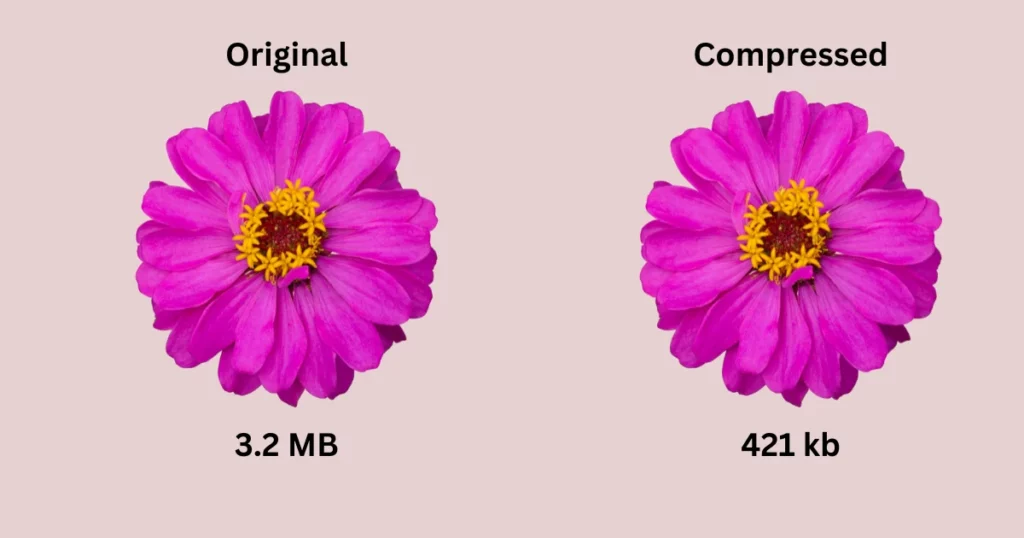
Table of Contents
What Does Resizing an Image Mean
Resizing an image means changing its size without altering the data. You can adjust file size, resolution, or dimensions, which affects the image’s appearance, quality, and file size.
Types of Resizing:
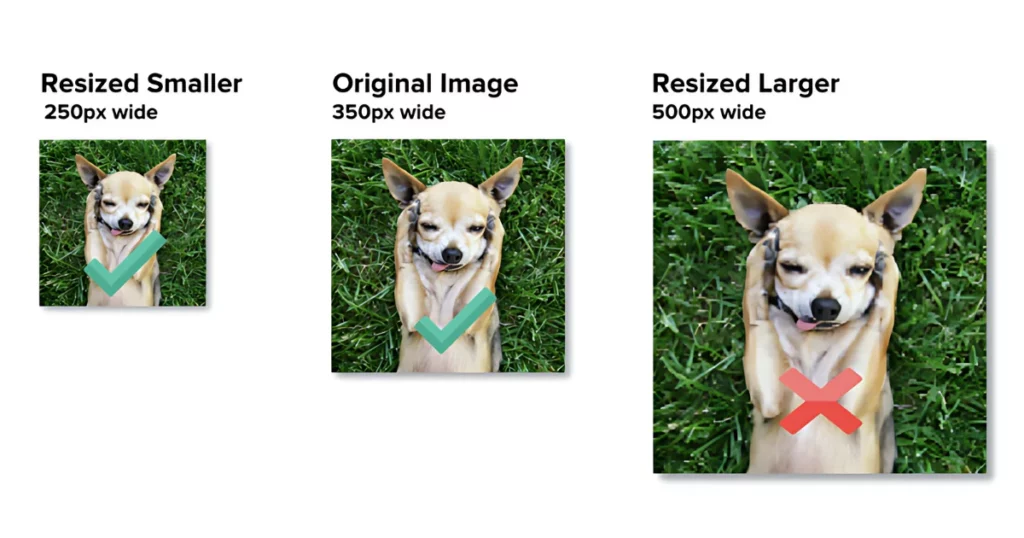
- Upscaling: Making the image bigger by increasing dimensions or adding pixels.
- Downscaling: Making the image smaller by reducing dimensions or removing pixels.
Why Resize?
- Upscaling: To meet specific requirements for websites or social media.
- Downscaling: To save storage space and improve website load times.
Note: Resizing is different from cropping, which involves cutting parts of an image to change its framing.
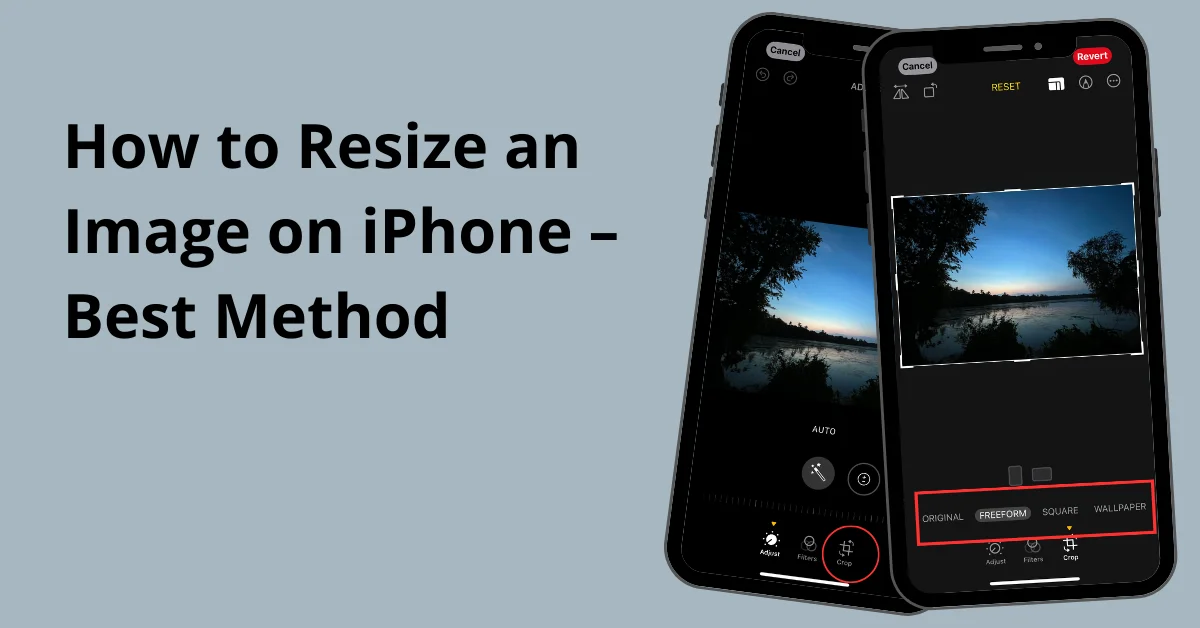
How to Resize an Image on iPhone Without Cropping
This tutorial will show you how to resize a picture on your iPhone without cropping it.
1st Method
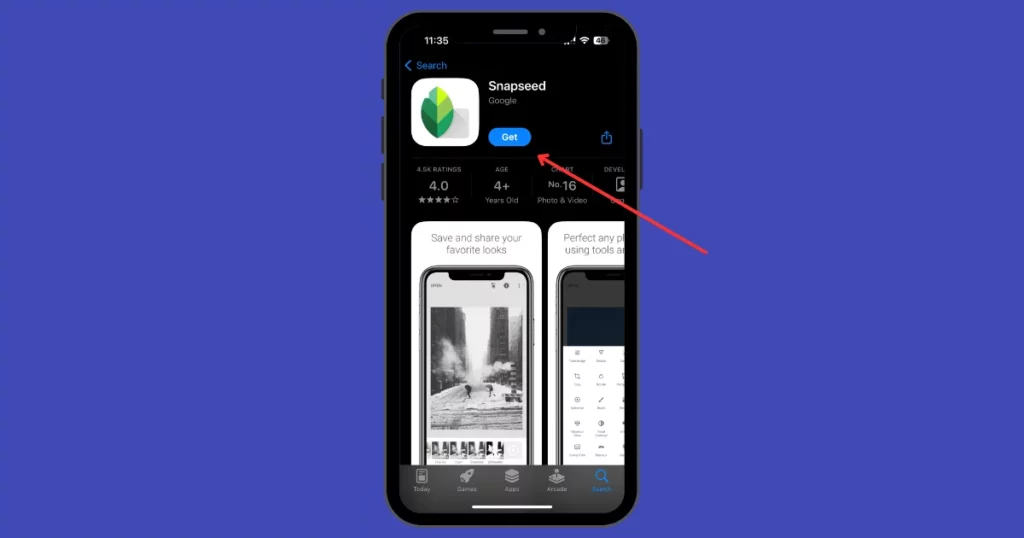
- Open the Snapseed app (It is free).
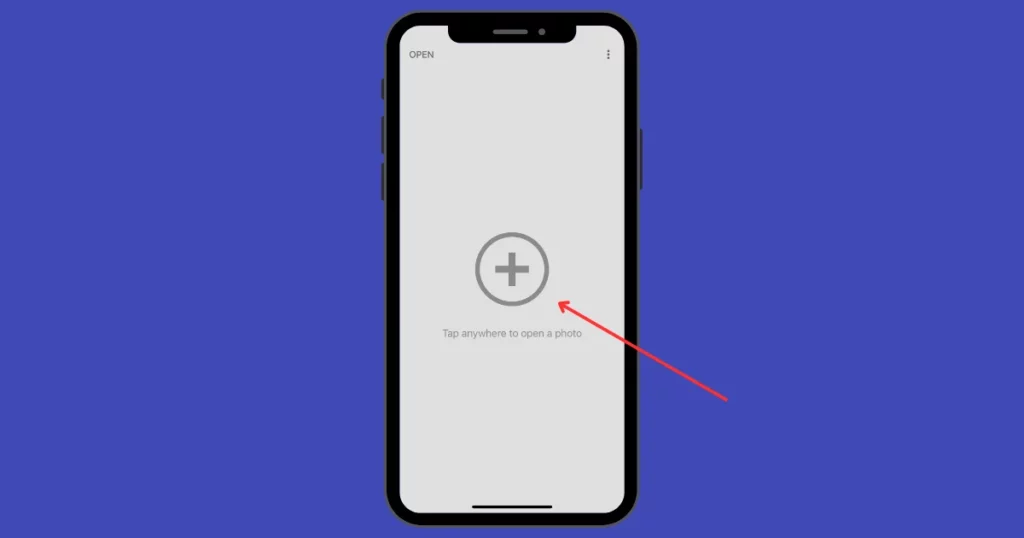
- Click “Open” to add your image.
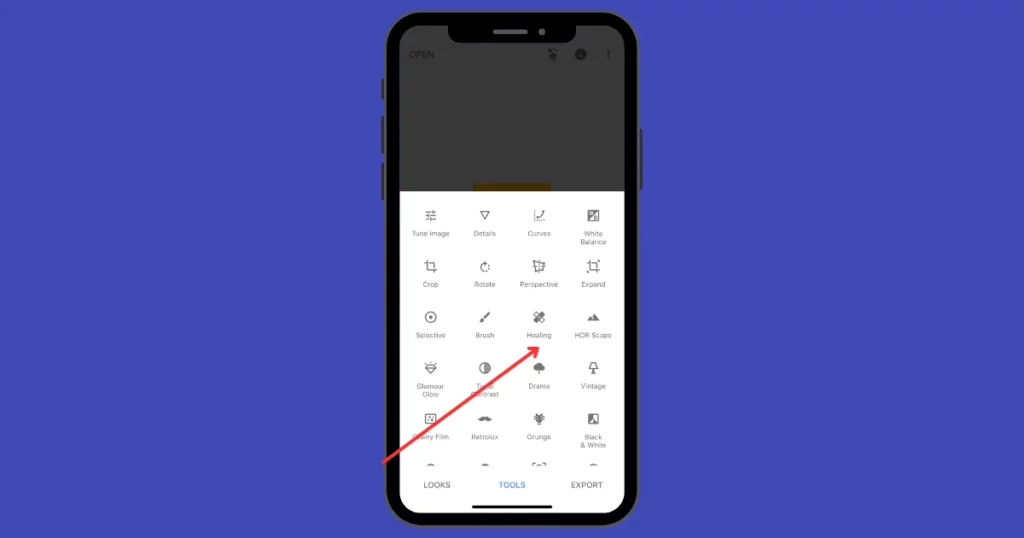
- Go to “Tools“, then “Expand“. Expand the left and right sides.
- Now tap “Healing” to clear the blurry part.
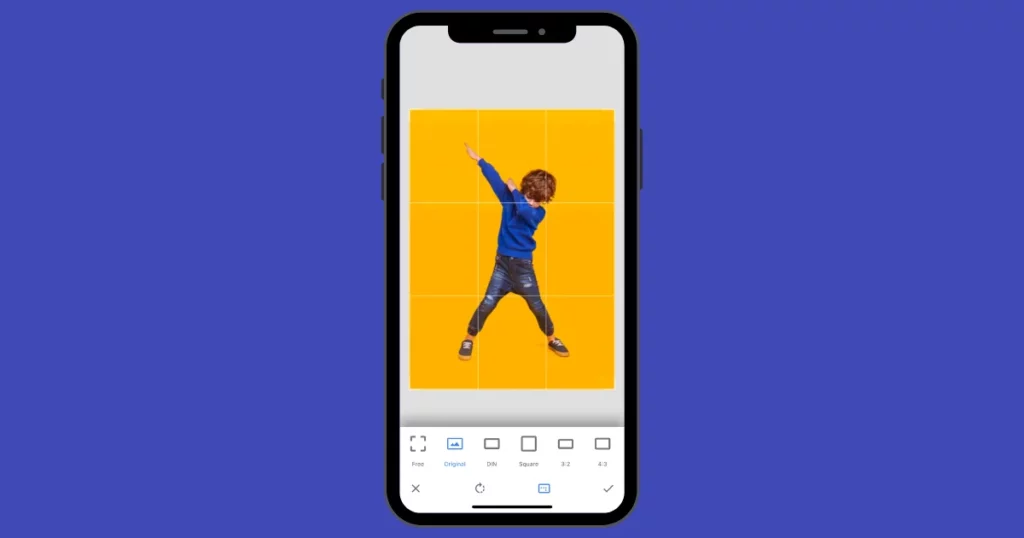
- head to the “Crop” section and it will automatically crop the extra areas.
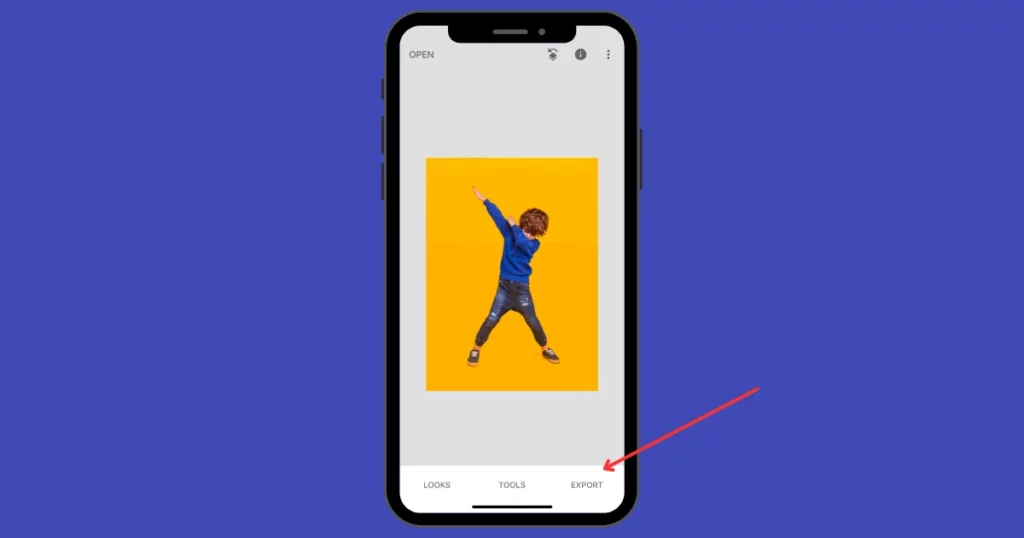
- Lastly, click “Export” to save your resized image.
A Step-by-step Guide
Step-by-step guide on how to resize an image on iPhone using Snapseed.
Step 1: Download and Open Snapseed
If you haven’t already, download Snapseed from your device’s app store—it’s free and available for both Android and iOS. Once installed, open the app.
Step 2: Import Your image
To start editing, tap on the big “+” or “Open” button in the center of the screen. This will open your gallery. Select the image you want to resize from your photo library.
Step 3: Access the Editing Tools
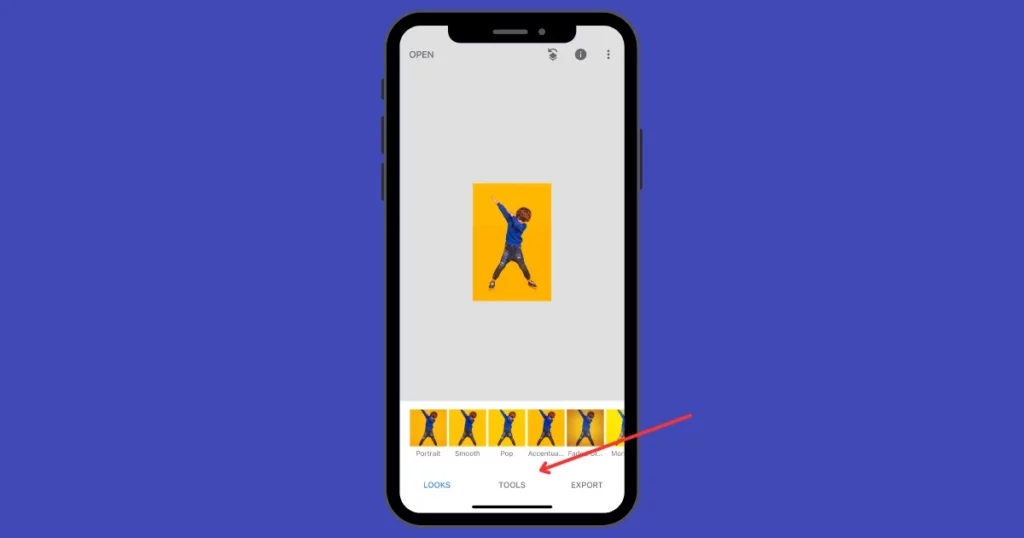
Once your image is loaded, look at the bottom of the screen and find the “Tools” option. Tap on it to open a range of editing tools.
Step 4: Use the Expand Tool
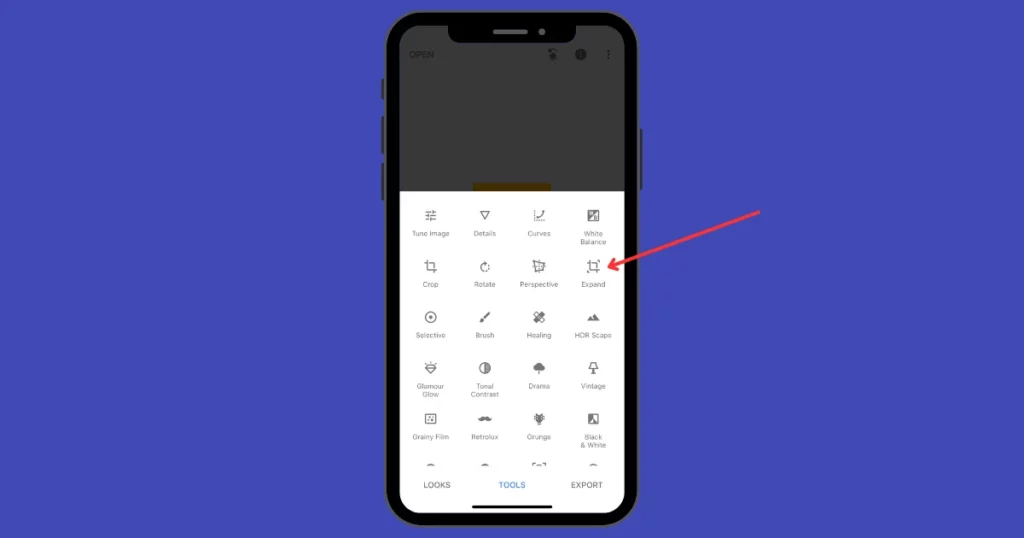
In the “Tools” menu, select “Expand.” This tool allows you to expand the edges of your image.
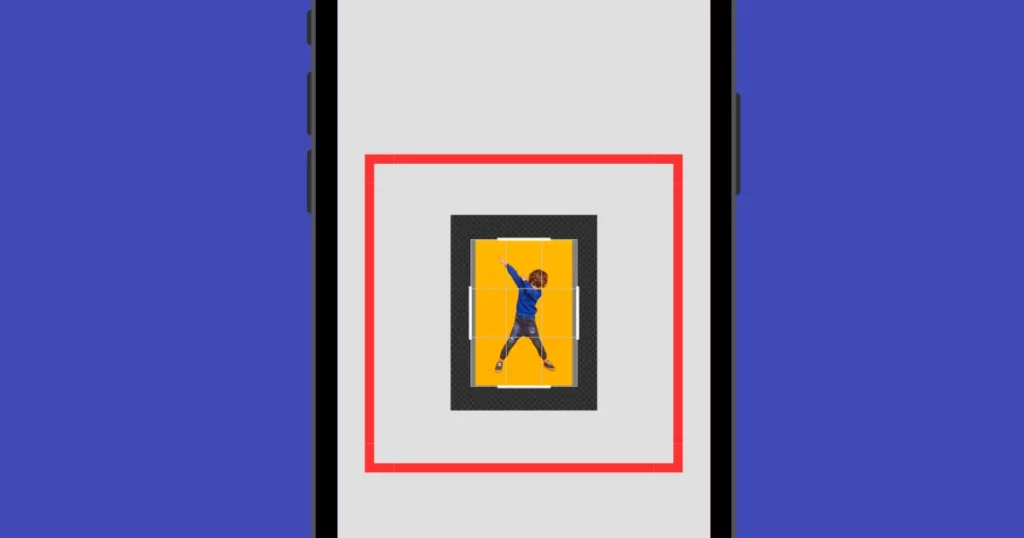
Drag the handles on the left and right sides to expand your photo as needed. The app will automatically fill in the newly added space using its AI, but it might be blurry.
Step 5: Clean Up with the Healing Tool
After expanding, you might notice blurry patches where the app filled in extra areas. To fix this, go back to the “Tools” menu and select “Healing.” Zoom into the blurry parts and tap on them to remove or correct these imperfections. This tool helps blend in any rough or blurry spots.
Step 6: Crop the Extra Areas
After healing, head back to the “Tools” menu and select “Crop.”

The crop tool will automatically adjust to remove the extra areas around your image, giving it a cleaner look. You can adjust the crop manually if needed by dragging the edges.
Step 7: Export and Save Your Resized Image
Once you’re happy with the result, tap the “Export” button at the bottom right of the screen.
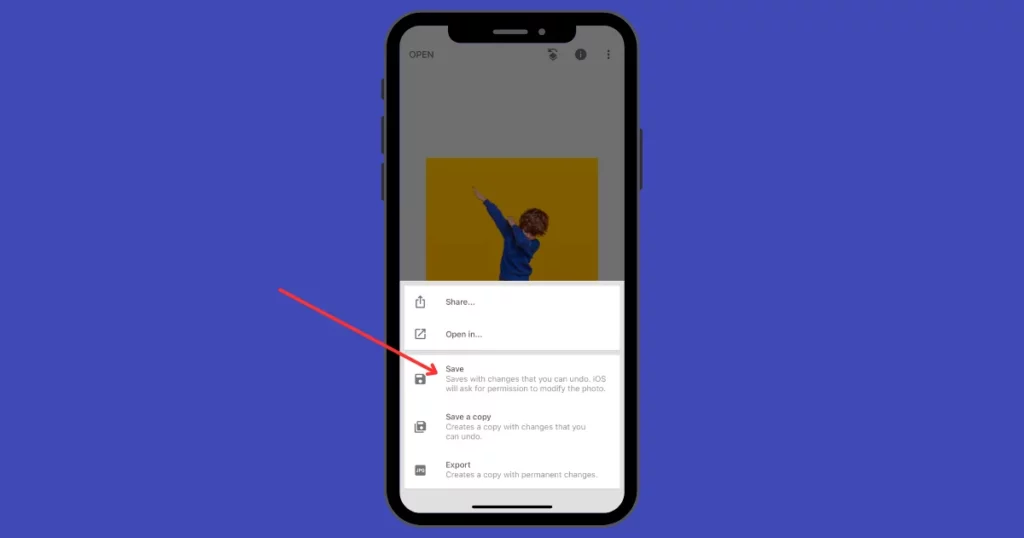
Choose the “Save” option to save the edited image to your device, or select “Export” to save with more options like size and quality.
2nd Method
Use the Mockey image converter to change your image format without losing your image quality on iPhone.
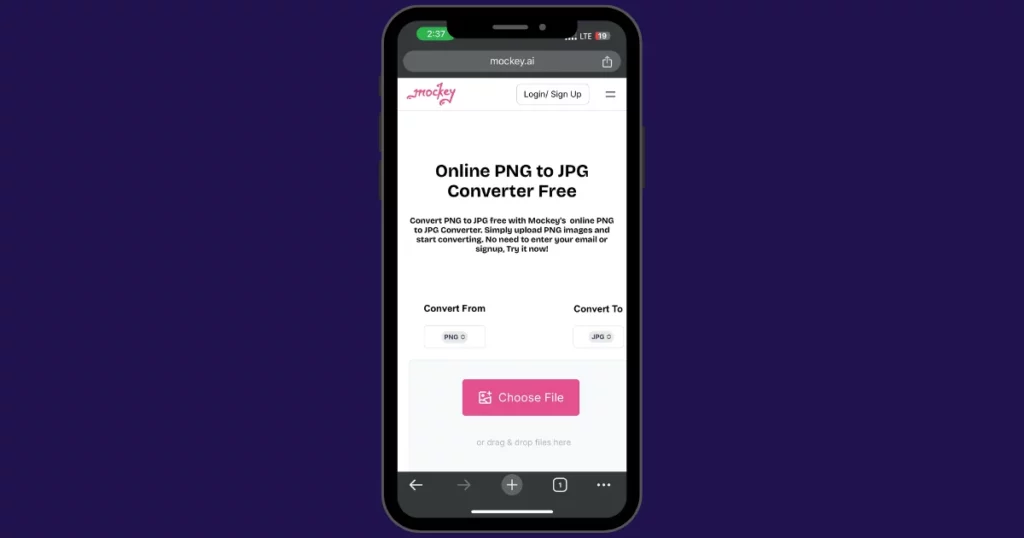
- Visit Mockey PNG to JPG Converter. (If you have a PNG format image)
- Click “Choose File” to convert your image.
- To begin, tap “Convert“
- Lastly, click “Download” to save the image without losing your image quality.
A Step-by-step Guide
Follow the steps below to make the conversion simple and hassle-free.
Step 1: Visit the Mockey PNG to JPG Converter
Go to the Mockey PNG to JPG Converter page on your iPhone. This tool is specifically designed to convert PNG images to JPG format without reducing the image quality.
Step 2: Select Your Image File
Click the “Choose File” button. Browse through your iPhone to find the PNG image you want to convert.
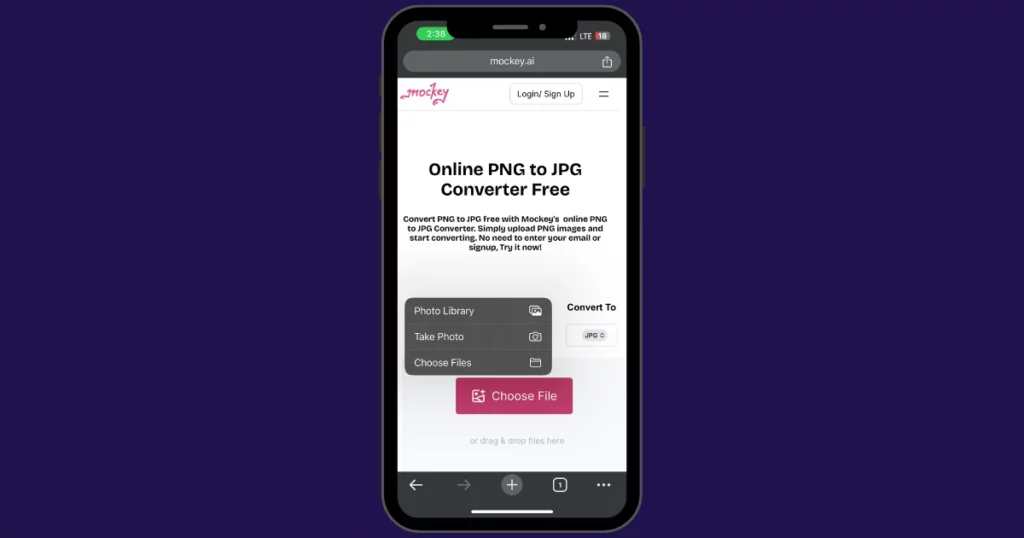
Once you locate your image, click on it, and then hit “Open” to select it for conversion.
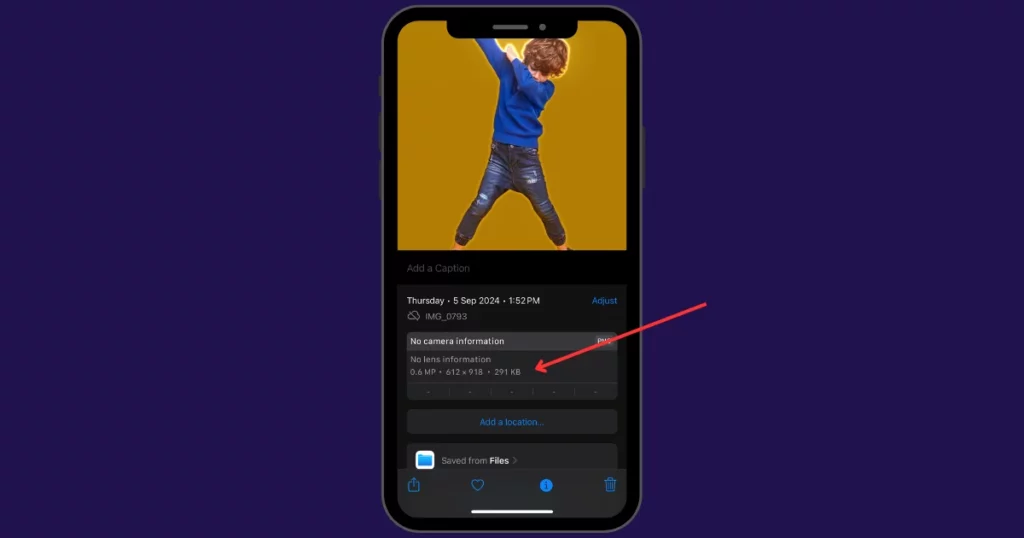
Look at the image size before converting. It’s 291kb.
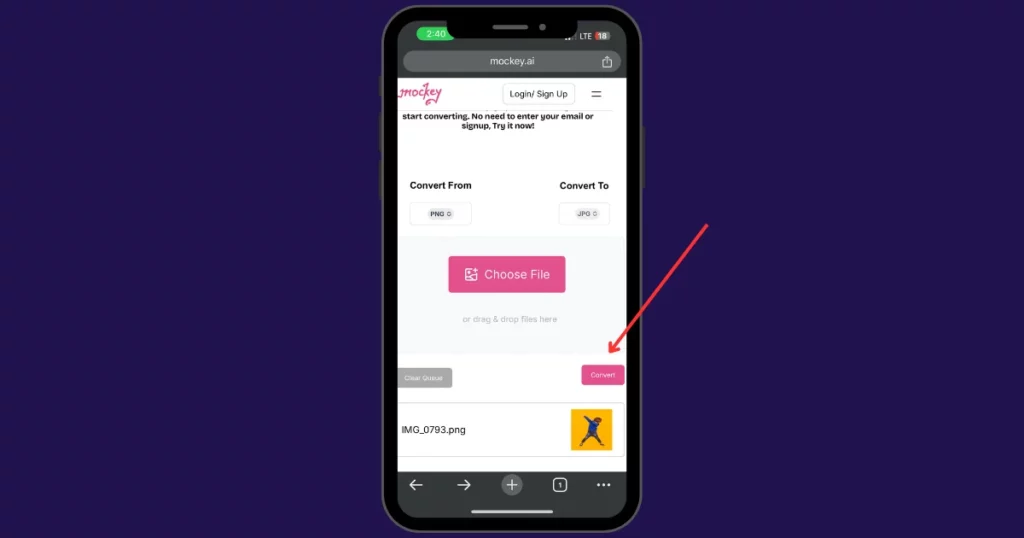
Step 3: Start the Conversion Process
After selecting your image, look for the “Convert” button on the website. To convert, click on it. Mockey will quickly change your image from PNG to JPG while maintaining the best possible quality.
Step 4: Download Your Converted Image
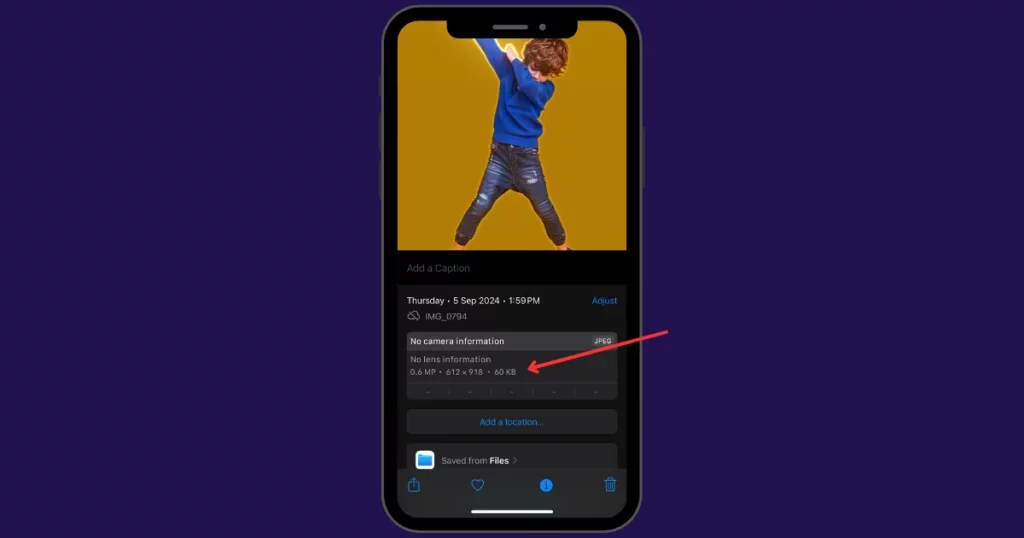
A download button appears after conversion. Click “Download” to save the new JPG image to your iPhone. Your image will now be in JPG format, with the same high quality as the original. Now, look at the image size after converting. It’s 60kb.
Now your resized image is ready without cropping, looking clean and professionally adjusted!
How to Resize an Image on iPhone to 1MB
A quick guide on how to resize an image on iPhone up to 1MB.
- Open Photos and select your image.
- Tap Share > Save to Files.
- Open the Files app, find the saved image.
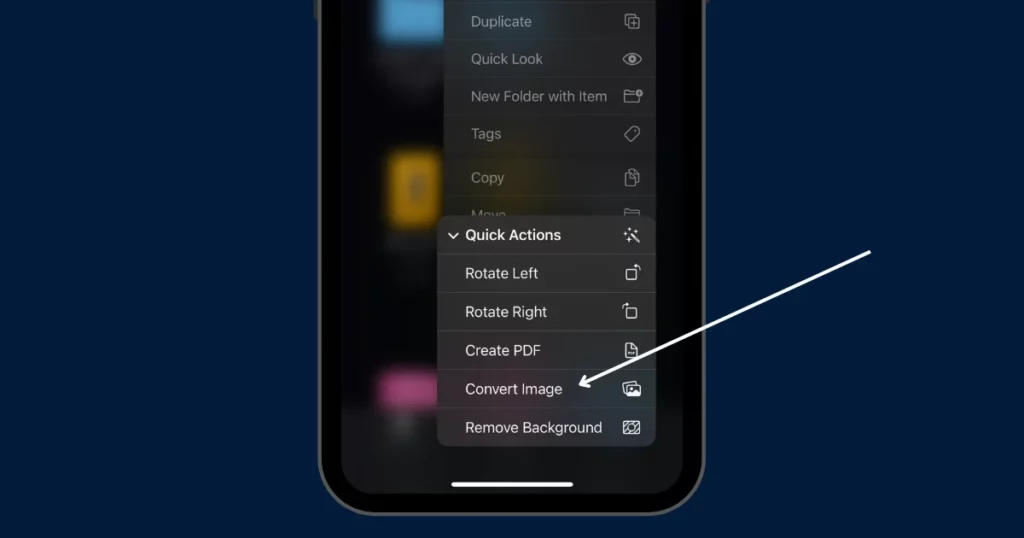
- Long press the image > Quick Actions > Convert Image.
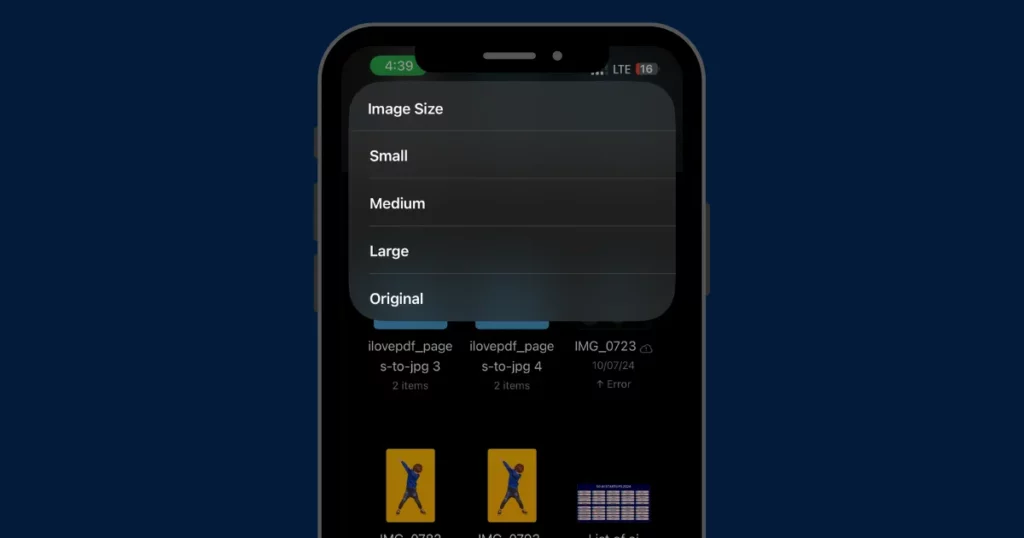
- Select size: small, medium, large, or original.
A Step-by-step Guide
Here is a step-by-step guide to resize an image on iPhone to 1MB:
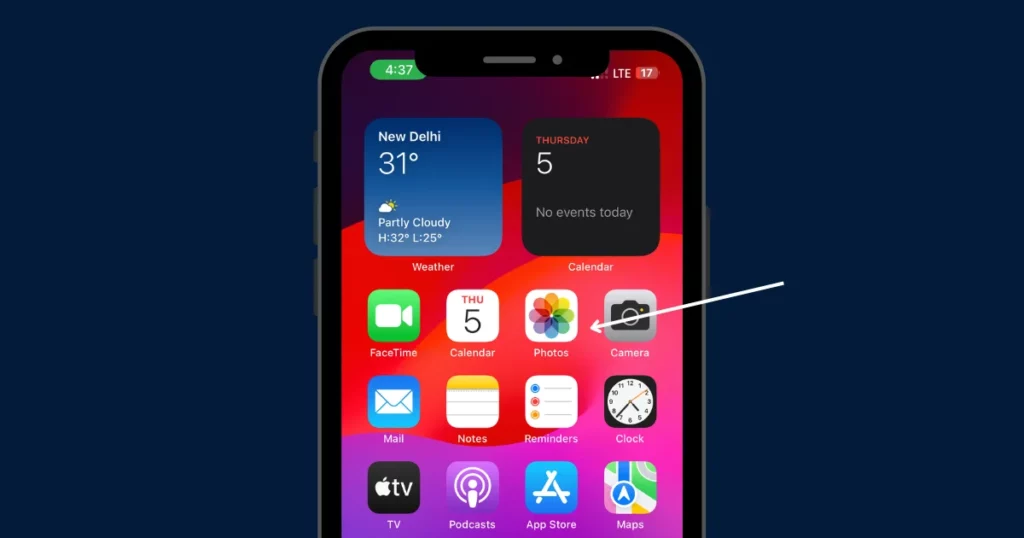
Step 1: Open the Photos App
On your iPhone, open Photos.
Step 2: Pick the Image You Like to Compress
Find and tap on the image that you want to resize or compress.
Step 3: Save the Image to Files
Share by tapping the arrow-pointing square. From the options that appear, select Save to Files.
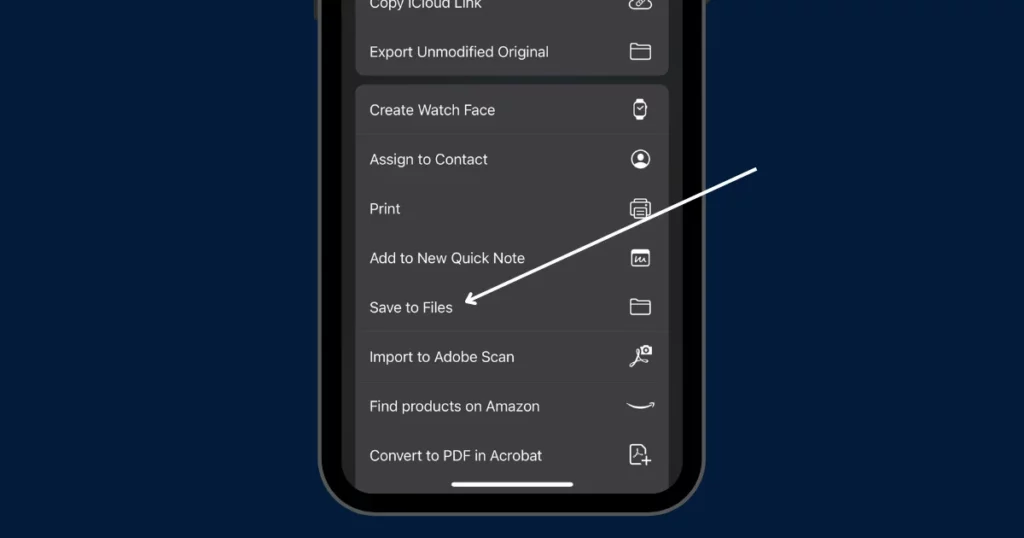
Choose the location in the Files app where you want to save the image (e.g., On My iPhone or iCloud Drive), and tap Save.
Step 4: Open the Files App
After saving, exit the Photos app and open the Files app on your device.
Now, find the image you saved.
Step 5: Compress the Image
Find your image in the Files app. Long press (press and hold) on the image to bring up a menu. Tap on Quick Actions from the menu options.
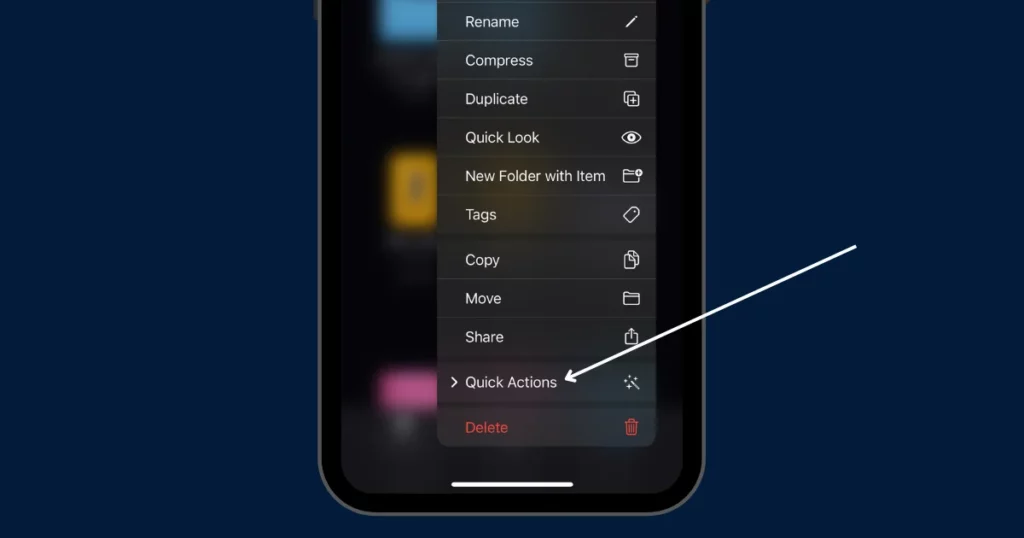
Select Convert Image from the next set of options.
A pop-up will appear with size options: Small, Medium, Large, or Original. Select the size you want based on how much you want to compress the image. Choosing smaller sizes will reduce the image’s file size.
How to Resize an Image on iPhone to Print
This section will show you how to resize an image for printing on iPhone using the Shortcut app.
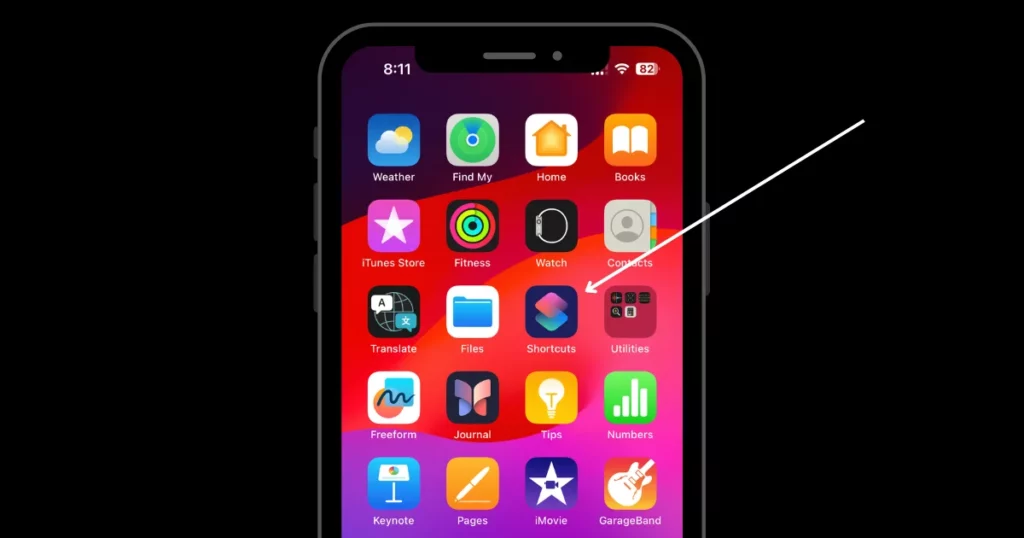
- Launch the Shortcuts app on your iPhone.
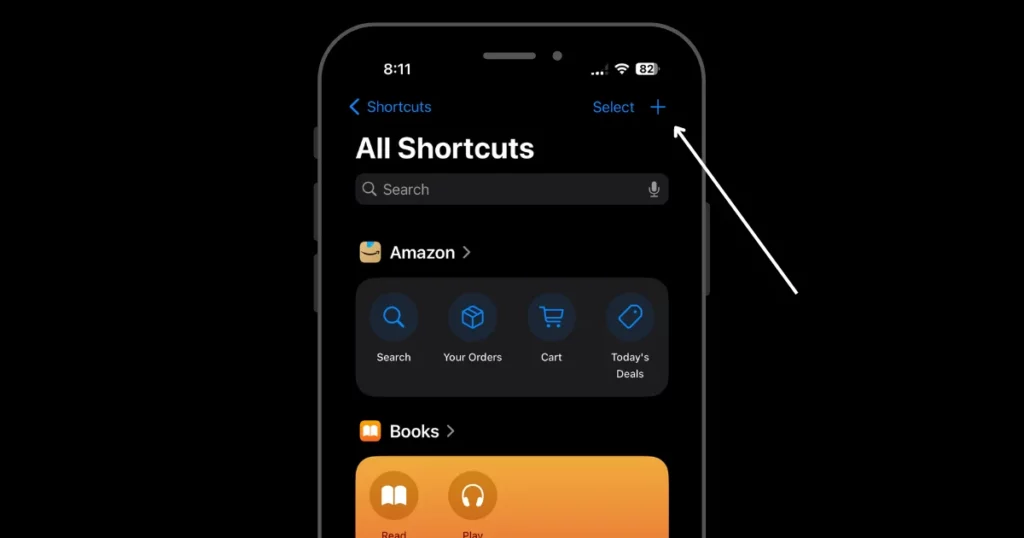
- Tap “+” to start a new shortcut.
- Search and add “Resize Image.”
- Adjust width/height; leave one on “auto” to keep the aspect ratio.
- Add “Save to Photos Album” to choose where to save.
- Use the shortcut to resize images easily.
A Step-by-step Guide
Step-by-Step guide to resize images using the Shortcut app on your iPhone.
Step 1: Open the Shortcuts App
Locate the Shortcuts app on your iPhone’s home screen. It’s a colorful icon with overlapping blue and red squares. Click it.
Step 2: Create a New Shortcut
Once inside the app, look at the top right corner and tap the “+” button. This will start the process of creating a new shortcut. You’ll be taken to a blank shortcut creation screen where you can add actions to build your custom shortcut.
Step 3: Add the Resize Image Action
At the bottom of the screen, you’ll see a search bar labeled “Search for apps and actions.” Tap on this search bar.
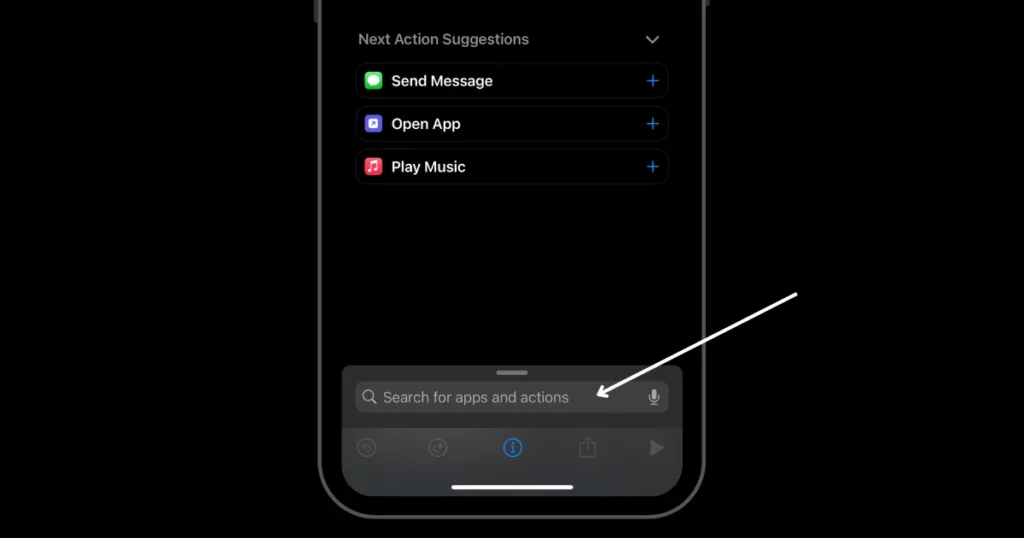
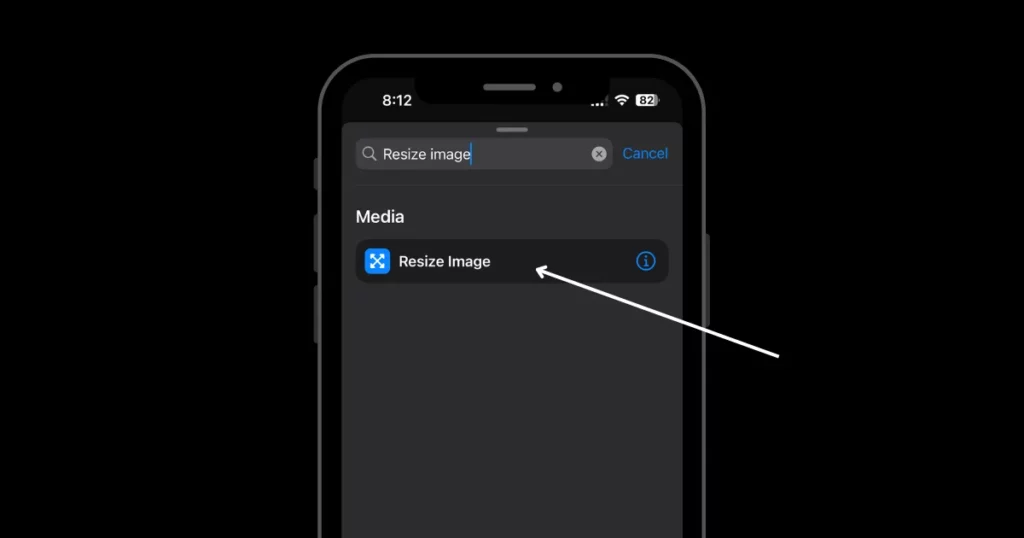
Type “Resize Image” in the search field. Tap on the “Resize Image” action to add it to your shortcut.
Step 4: Set the Desired Dimensions
After adding the resize action, you’ll see options for adjusting the width and height of the image. Tap on the width or height value to change it. You can enter specific dimensions in pixels or percentages.
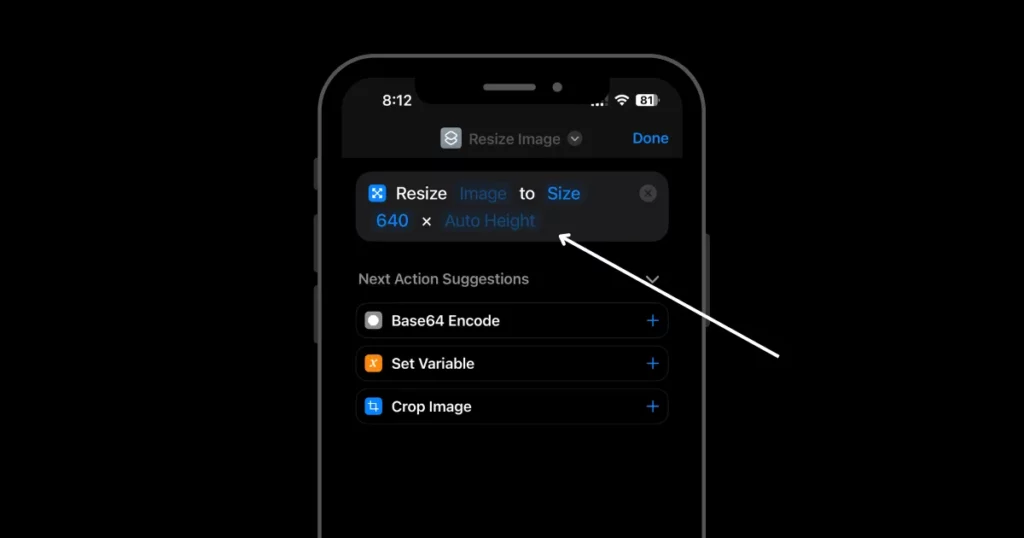
If you want to maintain the image’s aspect ratio (so it doesn’t look stretched or squished), leave either width or height set to “Auto.” This will automatically adjust one dimension based on the changes you make to the other.
Step 5: Add a Save Image Action
To save the resized image, you need to add another action. In the search bar, type “Save to Photo Album” and select this action. This will allow you to specify where the resized images will be saved.

By default, images will be saved to your main Photos album, but you can tap on the “Recents” option to choose a different album if preferred.
Step 6: Run and Test Your Shortcut
Your shortcut is now ready to use! You can give it a name by tapping on the shortcut title at the top. Tap the play button (a triangle icon) at the bottom of the screen to run your shortcut.
The shortcut will prompt you to select an image from your photo library. Once selected, it will resize the image and save the modified version to your chosen photo album.
How to Resize an Image on iPhone for Instagram
Here is how to resize an image on iPhone suitable for Instagram.
- Open the Canva app and click the “+” button.
- Pick the “Instagram Post” option.
- Click “Upload” to add your image.
- Adjust the crop if needed.
- Click “Download” to save the resized image on your iPhone.
A step-by-step Guide
Here’s a step-by-step guide to resizing images on your iPhone:
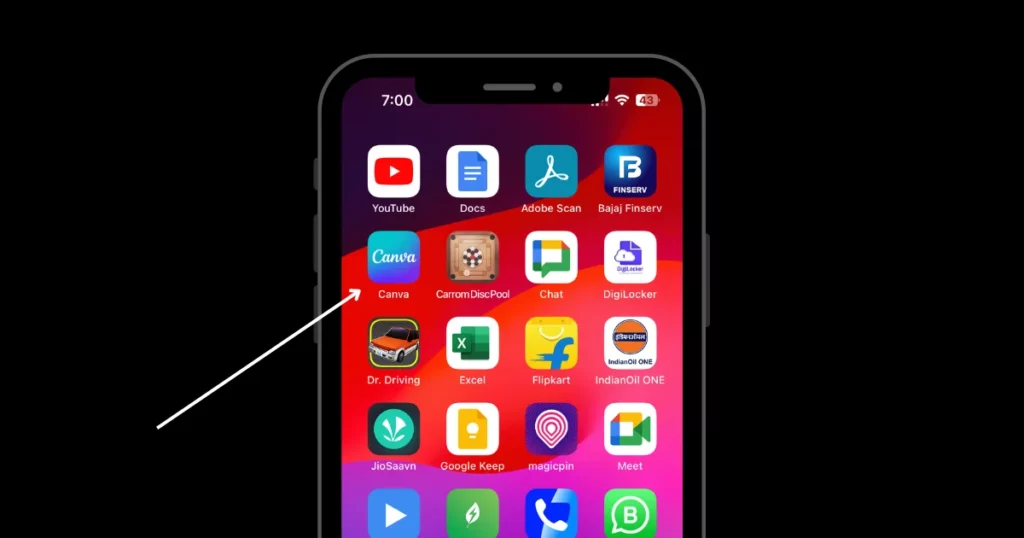
Step 1: Open Canva App
First, locate the Canva app on your iPhone and tap on it to open it.
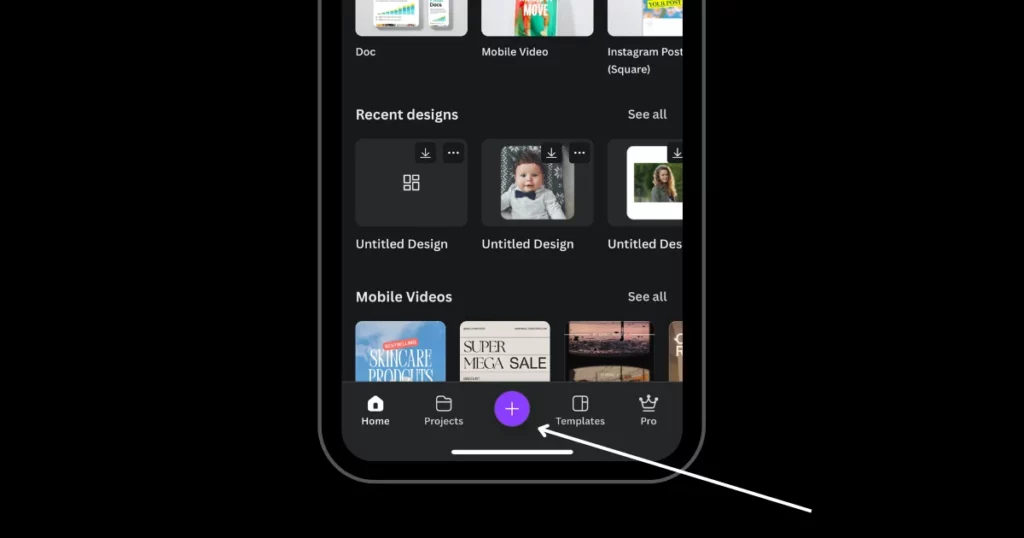
Step 2: Click “+” Button
Once inside the app, look for a “+” button, usually found at the bottom of the screen. Tap this button to start creating a new design.
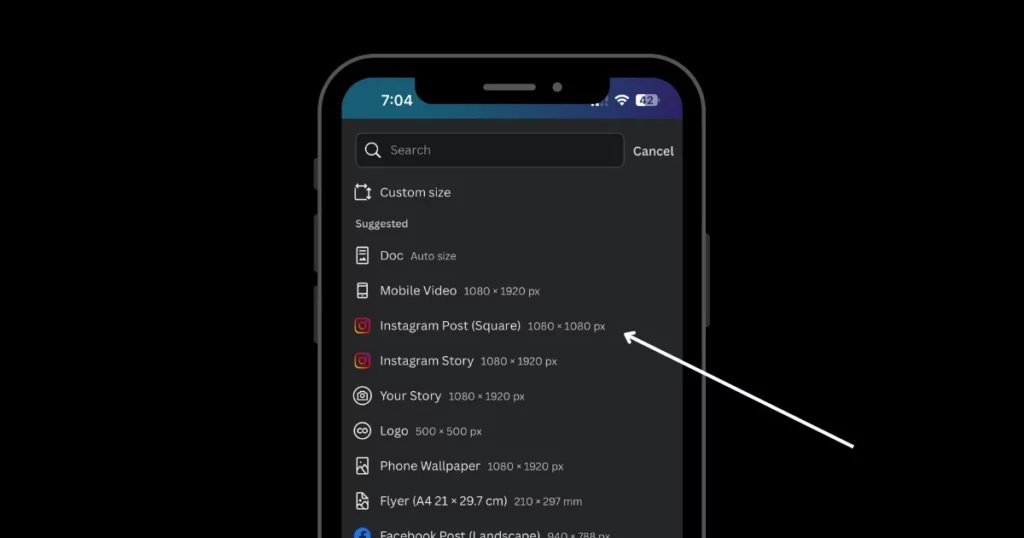
Step 3: Select a Design Size
From the options that appear, scroll through and select “Instagram Post.” This option is usually a square size, perfect for resizing images for social media. Tap on it to open a blank canvas.
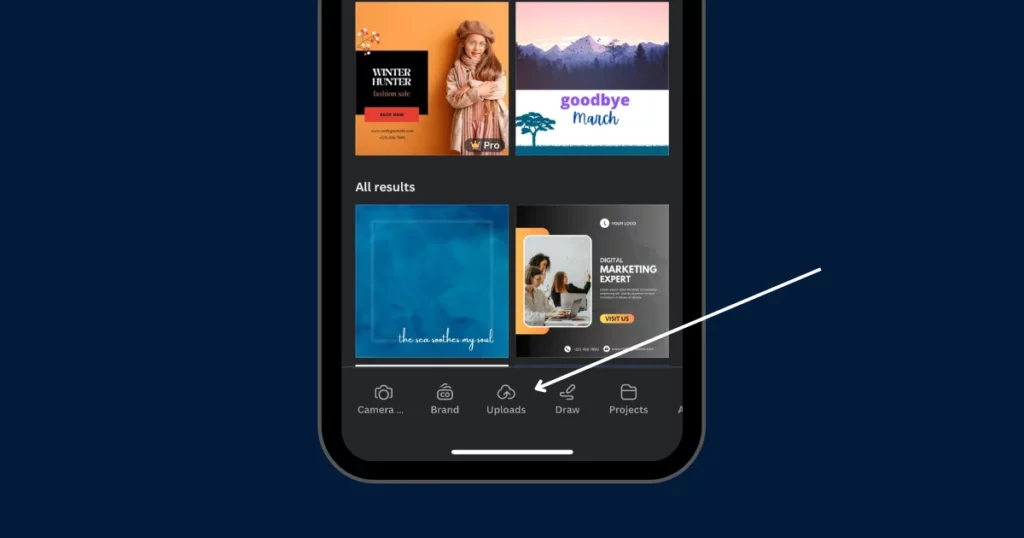
Step 4: Upload Your Image
To add your image, tap on the “Upload” button. It’s often found in the toolbar or by clicking on the “+” icon again. Then, select your image from your phone’s gallery or photo library.
Step 5: Adjust the Image
After uploading, the image will appear on the blank canvas. Drag the corners of the image to adjust the size and position it within the frame. If the image looks too big or small, you can zoom in or out by pinching or spreading your fingers on the screen.
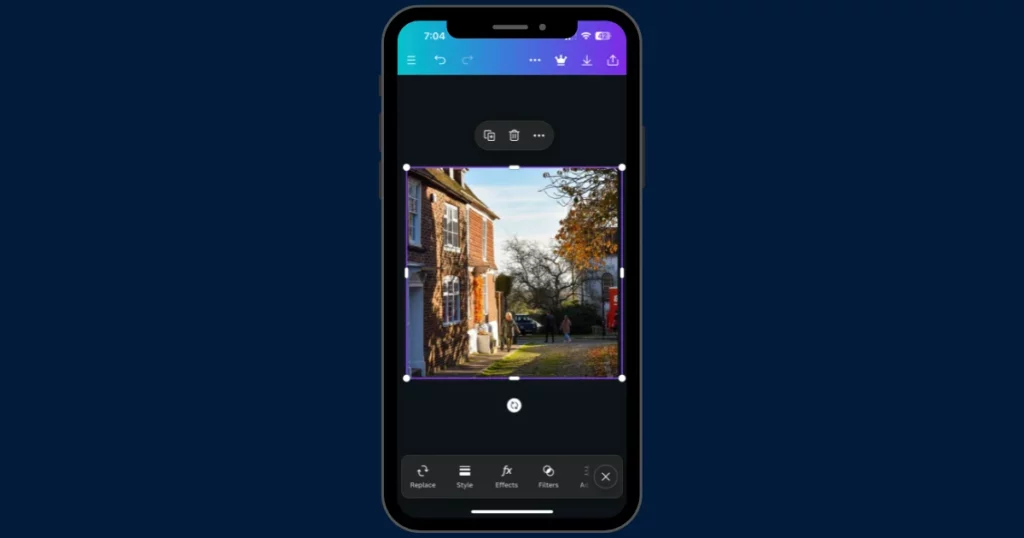
If you need to crop the image to fit better, look for the crop icon. Adjust the crop by dragging the edges until the image looks just right.
Step 6: Save Your Resized Image
Once you’re satisfied with how your image looks, tap the “Download” button, usually found at the top right corner of the screen. Choose your desired file type, like PNG or JPG, and then tap “Download” again.
Resize Photos on iPhone for Email
Resize an image on iPhone using Mail:
- Open Photos and select your image.
- Tap Share > Mail.
- Enter your email and tap the “Up” arrow.
- Choose a smaller size.
- Open your mail and save it.
A step-by-step Guide
A step-by-step guide to resize an image on your iPhone using the Mail app.
Step 1: Open the Photos App
Start by opening the Photos app on your iPhone and find the image you want to resize.
Step 2: Select the Image
See the full image by tapping it.
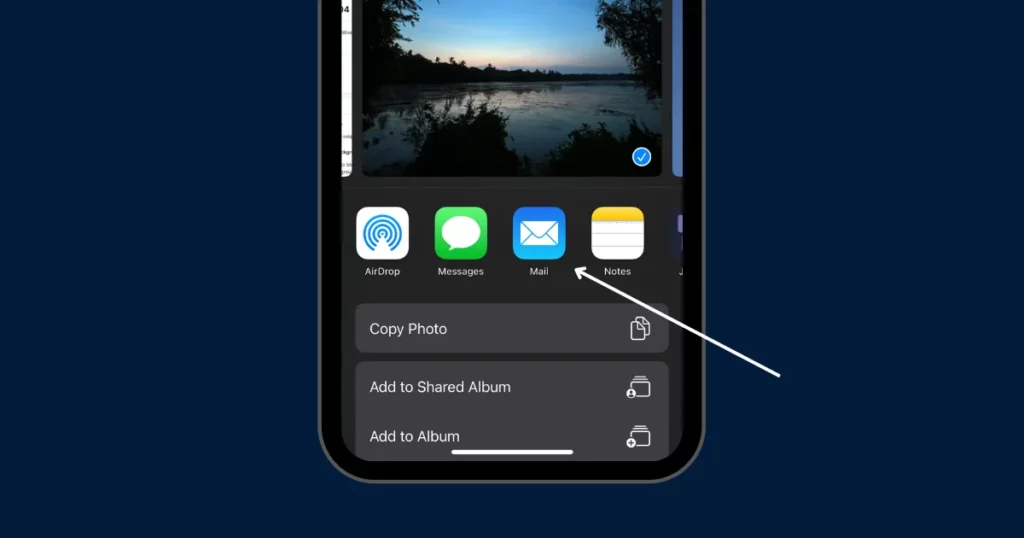
Step 3: Tap the Share Icon to Choose the Mail Option
At the bottom left corner of the screen, tap the “Share” icon, which looks like a square with an arrow pointing up.
Click “Mail” in the sharing options.
Step 4: Enter Your Email Address and Send the Mail
In the email draft, enter the email in the “To” field so that the image will be sent back to you.
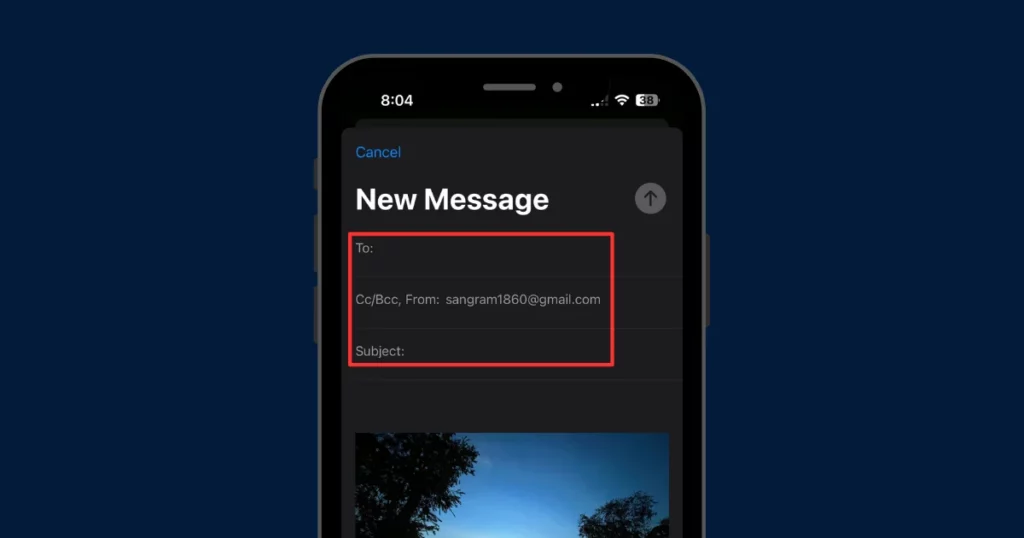
Tap the blue “Send” button (upward arrow) in the top right corner of the screen.
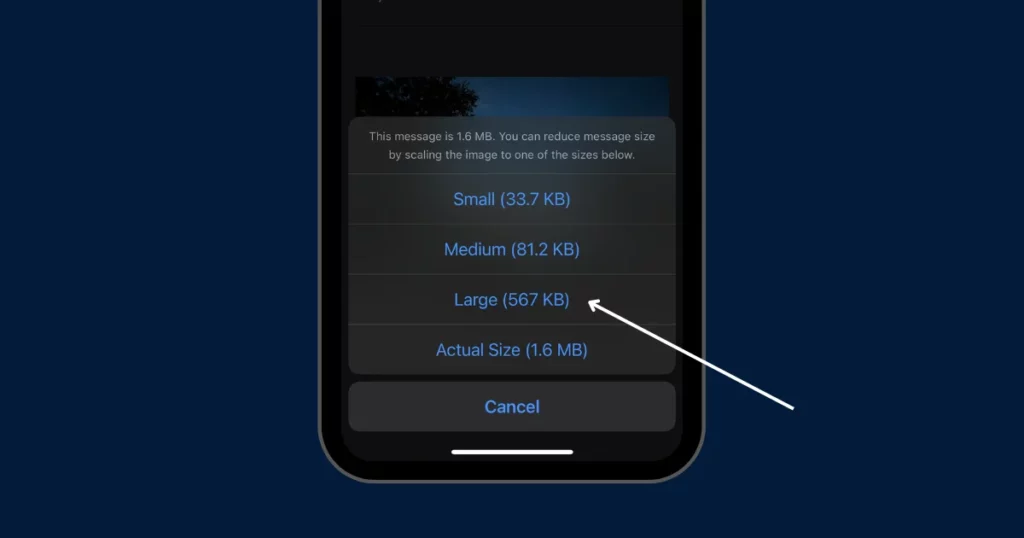
Step 5: Select a Smaller Image Size
After you tap Send, a prompt will appear asking you to choose the image size. Select a smaller size option like “Small,” “Medium,” or “Large” to resize the image.
Step 6: Open Your Email and Save the Resized Image
Go to your Mail app and open the email you just sent to yourself.
Tap the resized image in the email, then select “Save to camera roll“.
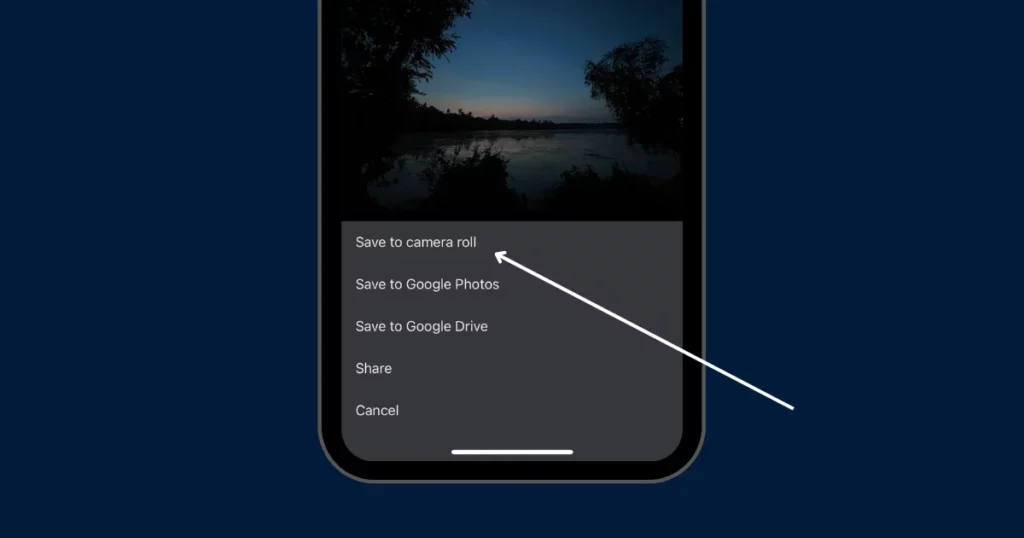
Now your resized image is saved on your iPhone!
Reduce the Size Before Taking a Picture
The simplest method to reduce image file size on your iPhone is by adjusting your phone settings, so large files don’t take up too much space.
Follow the steps to shrink the file size without losing image quality.
- Open Settings on your iPhone.
- Tap on “Camera,” then select “Formats.”
- Select “High Efficiency” to keep your photo quality while reducing the file size.
- To make photos even smaller, select “Pro Default” and choose “HEIF Max,” which keeps photos around 5 MB.
Why to Resize an Image on iPhone
- Save Storage Space: Large photos take up a lot of space on your device. Resizing images makes their file sizes smaller, leaving more room for other photos.
- Easier Sharing: Big images can be hard to send via messaging apps email. Resized images are quicker to upload and share.
- Fit Platform Requirements: New Social media platforms often have size limits for images. Resizing helps your photos fit properly without being cropped or distorted.
- Faster Load Times: Smaller images load faster on websites, improving user experience and boosting SEO.
- Change Aspect Ratios: Resizing lets you adjust the shape of an image, making it perfect for different uses like profile pictures.
Conclusion
This blog explains how to resize an image on iPhone. You can consider the Photos app to change image size or try an image compressor app for iOS to get the perfect fit for your screen. For multiple images, use a batch resizing tool to boost your workflow and save time. We hope you find this guide helpful!
FAQs
How to resize an image on iPhone for wallpaper?
To resize an image for iPhone wallpaper, use the Photos app or a resizing tool. Open the image, tap Edit, and adjust the size to 9:16. Save it, then set it as your wallpaper from the Photos app.
What is the best way to reduce iPhone photo size?
To reduce photo size on an iPhone, open the Photos app, select the photo, and tap the Share button to save it to Files. Then, open the Files app, find the photo, long-press it, and choose Quick Actions > Convert Image. Finally, select a smaller file size like Small or Medium.
How do I resize an image in Photos?
To resize an image in Photos, open it, click Edit, and select the Crop icon. Drag the corners to adjust the size and hold Shift to keep the proportions. Click Done to save your changes.
How do I change the size of a picture on my iPhone camera?
To resize a picture on your iPhone, open the Photos app, select the photo, tap Edit, and use the crop tool. To reduce file size, you can use a photo compressor app from the App Store.
How to resize an image without cropping?
To resize an image without cutting any part of it, use editing software like Photoshop or online tools. Keep the proportions by adjusting the width or height to maintain the original look. Save the image in high-quality formats like JPEG or PNG.
Read next: