You can follow the steps on how to increase resolution of image. If you’re using Photoshop, adjusting the resolution can also make a big difference.
For Pixelcut, you can use Super Resolution to increase image control and quality.
We can walk you through the steps if you’d like!
Table of Contents
What is Resolution in an Image?
Image resolution means how detailed an image is. It’s all about the number of pixels packed into the image. The more pixels you have, the sharper and more defined the image will be.
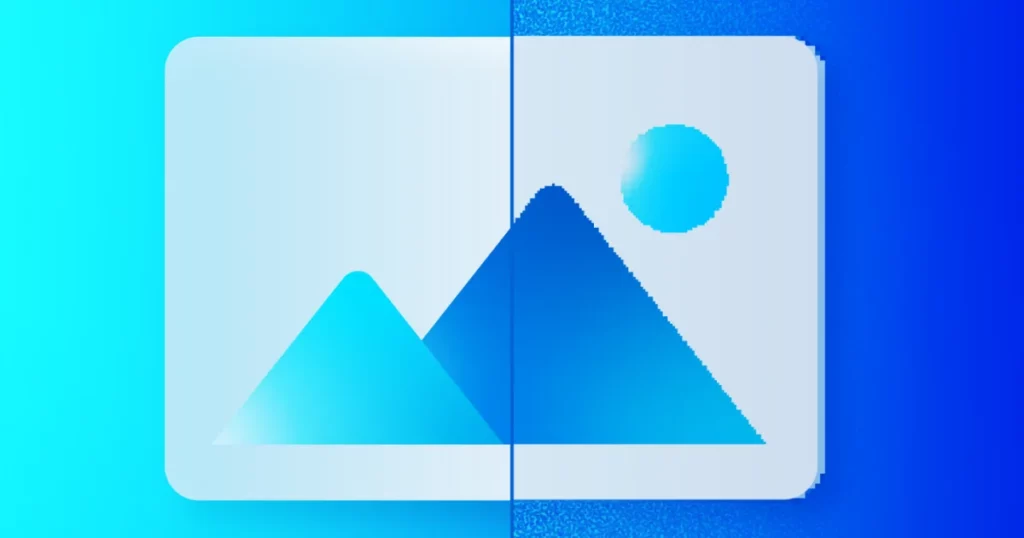
Higher resolution means more clarity and detail. It’s what keeps an image from looking blurry or pixelated.
You know, when images are low resolution, they can end up looking pretty bad. They can get all blurry or pixelated, and you lose a lot of detail. It just doesn’t look good, especially in print or when you see them from far away.
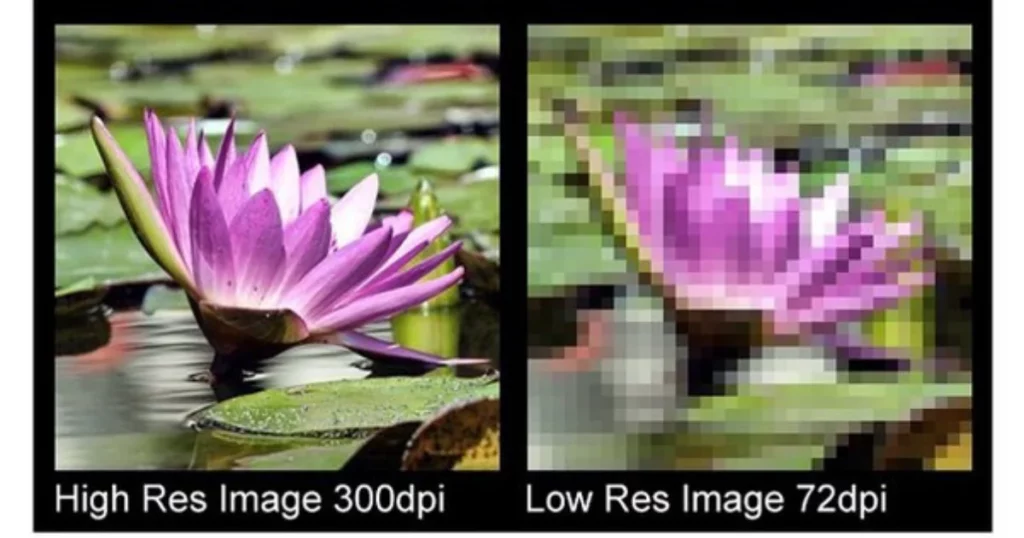
There are different ways to measure resolution. You can measure it by lines per inch, per picture height, per millimeter, or even angular subtense.
So, if we had an image that was 720 by 720 pixels and we viewed it at 10 inches square, what would the resolution be?
In that case, the resolution would be 72 pixels per inch or PPI.
What is Highest Possible Resolution for Images?
Did you know digital images can get insanely detailed? We’re talking gigapixel levels—billions of pixels!
Some specialized cameras and techniques can go beyond 10,000 x 10,000 pixels. For instance, the highest resolution photo ever taken is 900,000 pixels wide.
It was taken from the Astronomical Clock Tower back in 2028 in Prague. They stitched together over 7,000 individual pictures to create it.
Here are examples of high-resolution photos:
| Image | Description | Resolution |
| Barcelona Gigapixel 2022 | Largest photo of Barcelona | – |
| London 320 Gigapixel (2013) | World record photo | 320 gigapixels |
| Tokyo Tower Gigapixel | Second-largest at its release | 180 gigapixels |
| Rijksmuseum | Largest detailed photo of a work of art | 717 gigapixels |
| Hubble Space Telescope | Andromeda Galaxy image | 1.5 billion pixels |
Is It Possible to Enhance the Quality of a Low-Resolution Image?
A quick way to enhance low-resolution images for high-quality printing is by using image upscaling tools. This allows you to resize your image without losing quality.
How Resampling and Interpolation Affect Resolution?
Every digital image is made up of a certain number of pixels. So, the more pixels an image has, the better the resolution.
When you add or remove pixels from an image in Lightroom or Photoshop, that process is called resampling.
When you reduce the number of pixels in an image, that’s called downsampling. Basically, you’re taking data out of the image.
And what about when you increase the number of pixels? That’s called upsampling. It adds data to the image. If you upsample without changing the image’s dimensions, you’re packing more pixels into the same space. That means you’re boosting the resolution, which increases the detail in each inch of the image.
How to Increase the Resolution of an Image?
Can you figure out if you can get a high-quality print just by tweaking the dimensions or resolution, without messing with the pixel count?
Photoshop should handle adjusting the other values, so you’ll keep the same aspect ratio and pixel count.
How to Increase Photo Resolution With Photoshop?
Follow these steps on how to increase resolution of image in Photoshop.
- First, Add your image in Photoshop.
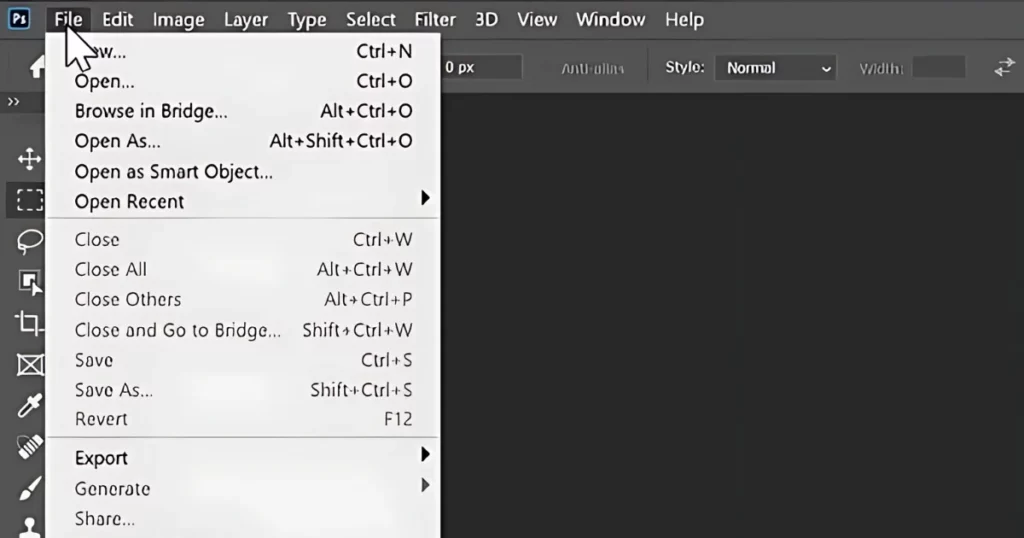
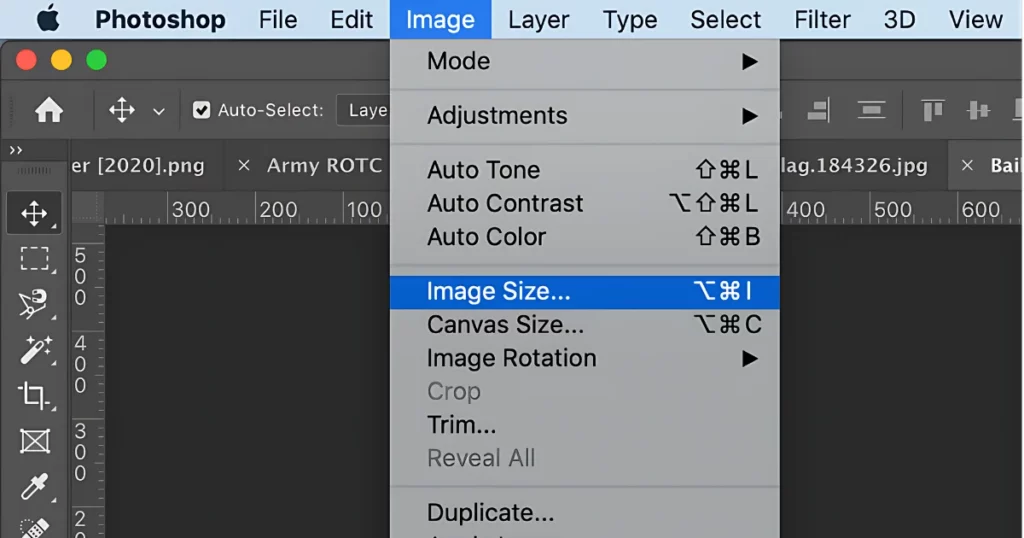
- Follow Image › Image Size.
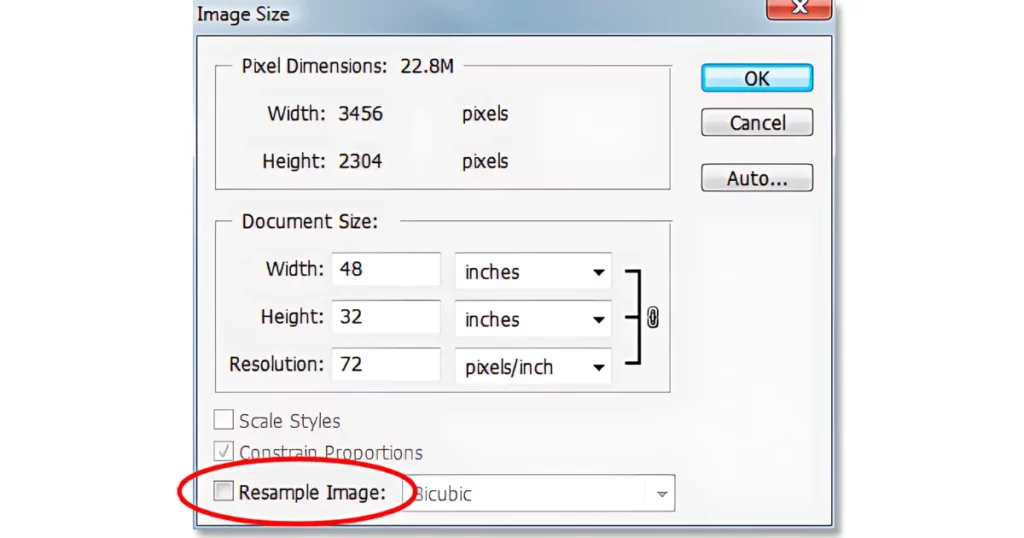
- You’ll want to deselect the Resample option. Width and Height are locked.
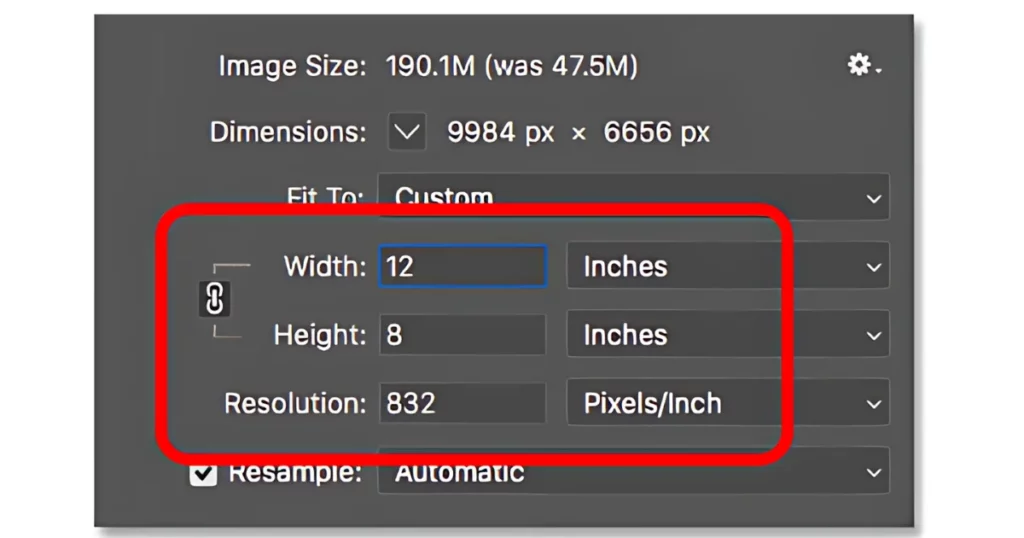
- Just enter new values for Resolution, and Photoshop will automatically adjust the Document Size to match. Enter new values for Height and Width, and Photoshop will update the resolution accordingly.
How to Increase Resolution of Image Without Photoshop?
If you don’t have Adobe Photoshop, you can use free online tools to increase resolution of image bigger and clearer without losing quality.
1. Increase Resolution of Image with GIMP
You can use image editing tools like GIMP. They not only show you the resolution information but also let you adjust it. It’s especially useful if you’re planning to print the image since the print quality relies on the image’s resolution.
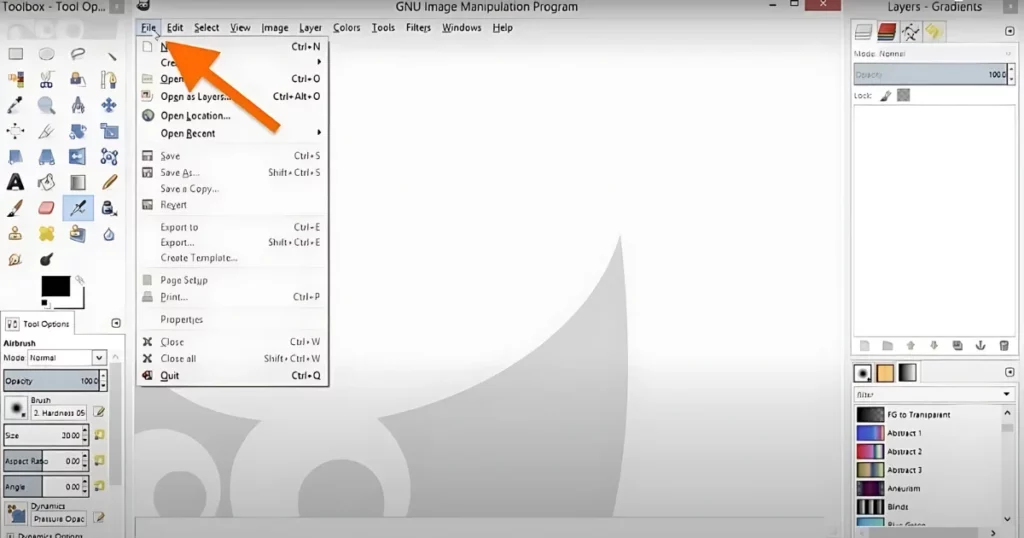
- First, open your image in GIMP by going to File > Open and selecting your image.
- Next, go to Image > Print Size. You should see a dialog box pop up. If the width and height aren’t shown in inches, click the dropdown next to Height and choose “in“.
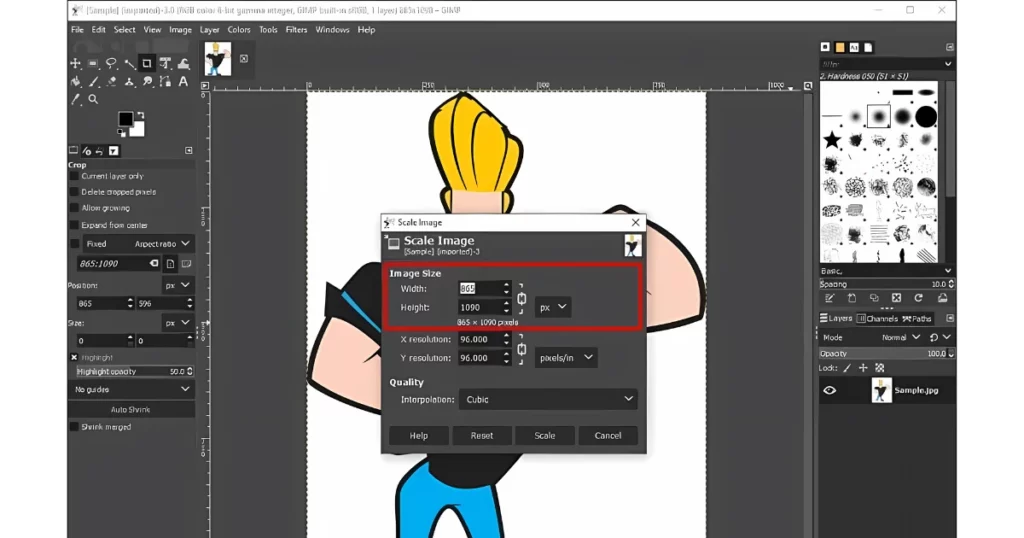
- In the X and Y Resolution fields, enter your desired resolution. As you type, you’ll notice the document’s width and height will adjust. This happens because GIMP is just adjusting the resolution, not adding or removing pixels. It’s about how many pixels will be displayed per inch, not changing the total number of pixels in the image.
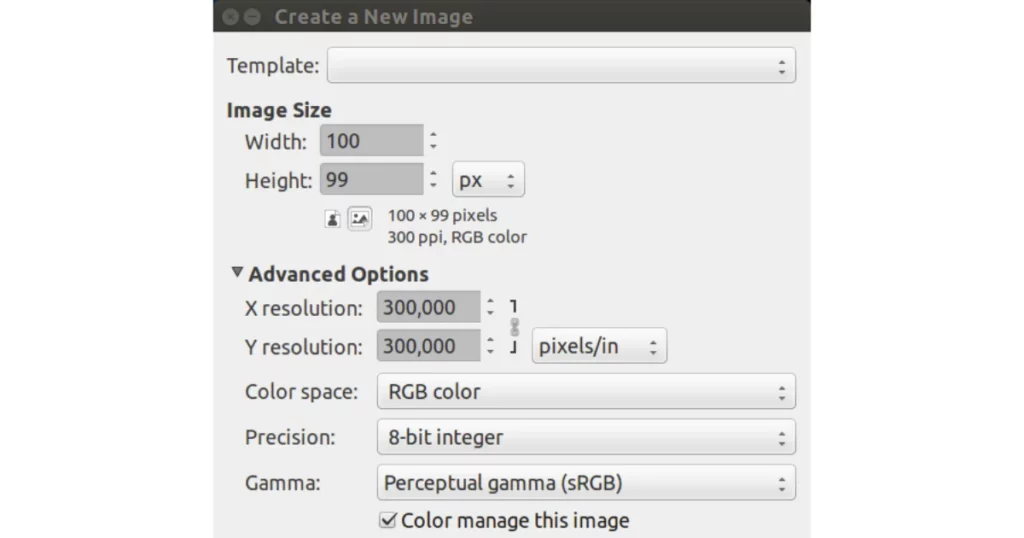
- Click OK to accept the changes. And there you go! You’ve successfully changed the resolution of your image.
- We started with an image at 300 ppi, but we need it at least 600 ppi for a professional print. We noticed the width and height got smaller. Since the resolution doubled, the width and height decreased by half. So, to print at 600 ppi and maintain full quality, you’ll be limited to a maximum print size of 5 inches by 3.33 inches.
2. Make a Photo Higher Resolution Photo Using Macos
Follow these methods to increase resolution of image using Macos.
- First, open your image in Preview.
- Then, go to the top menu, click on “Show Markup Toolbar,” and choose “Adjust Size.”
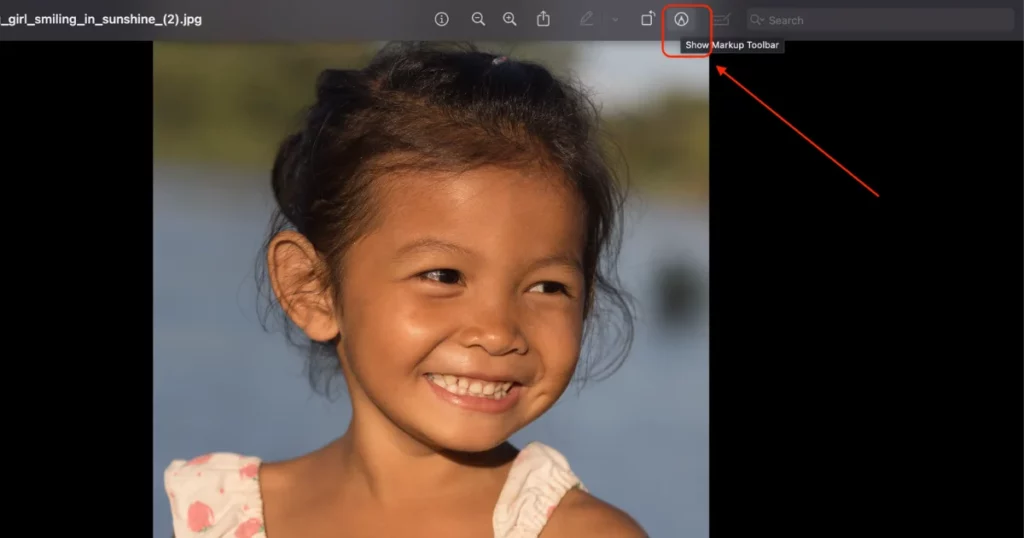
- Look for the “Fit into” drop-down. Select “Custom” from that menu.
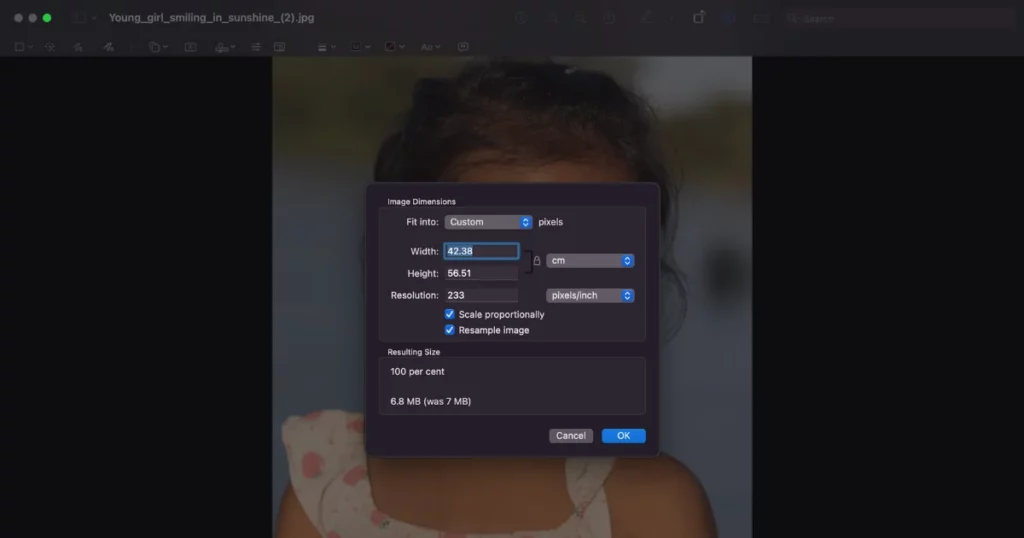
- Now you can modify the width, height and resolution of the image. You can switch between pixels/inch using the drop-down on the right.
- When you’re happy with the adjustments, just hit “OK.” After that, go back to the top, click on “File,” and choose “Export.” You can save your image as a PNG, JPEG, or PDF file. Then it’s ready to upload to this AI design tool.
3. How to Increase Resolution of Image with Pixelcut
Pixelcut’s AI image upscaler lets you easily increase the resolution of your images without losing details. It helps you enlarge your photos without making them blurry or pixelated. Follow the steps on how to increase resolution of image with pixelcut:
- Use Pixelcut’s image upscaling tool by choosing the picture you like to customize. Whether you need to enlarge a small image or improve the details of your old photo, Pixelcut can help.
- You can either tap “Upload Image” to select a file or drag a photo. This AI image upscaler works with PNG, JPG, and HEIC photos.
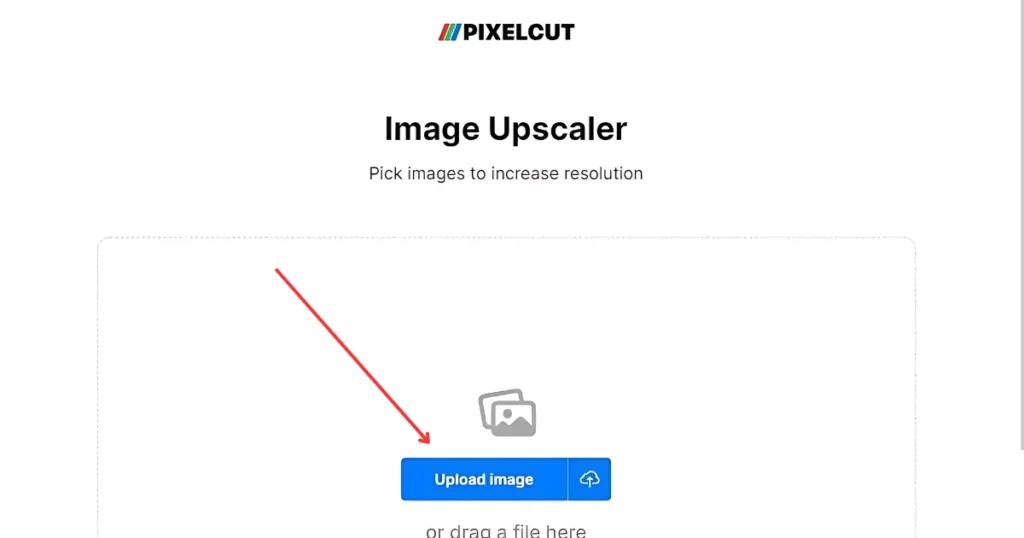
- After uploading your image, you can choose to enhance its quality. You have the option to make your image 2 times or 4 times larger than the original size, depending on what you want.
- Now Pixelcut uses AI to enlarge your image while also improving the details to avoid pixelation.
4. Create a High-Resolution Image with Topaz Gigapixel AI
Here’s how to increase resolution of image using Topaz Gigapixel AI:
- Install Topaz Gigapixel AI.
- Click “Open” to add your image.
- Choose the scale factor to upscale your image.
- Pick the model that fits your image (e.g., Standard, Lines, Art & CG).
- Fine-tune noise reduction and sharpening as needed.
- Compare the original with the upscaled version using the preview feature.
- Save your image, choosing the format and resolution you want.
- Open the saved image to verify its quality and resolution.
Recommended Image Resolution for Various Projects
The ideal image resolution for your project depends on how the image will be used:
- Printed Photos: For commercial printing, a resolution of 300 DPI is standard. If you’re printing on high-quality photo paper, aim for 300 DPI. For publications on plain paper, 150-200 DPI works well. For large posters viewed from a distance, 150 DPI can be enough.
- On-screen display: For images meant for web pages or PowerPoint presentations, a resolution of 72 DPI is suggested.
- For sharing on social media or websites, it’s best to use a low DPI and save your image as a JPEG.
- For displaying photos on an HD TV or monitor, use 600 DPI.
Conclusion
To get top-notch quality images, it’s best to use a good camera. If that’s not possible or you want to increase resolution of image, Lightroom and Adobe Photoshop can help.
Try using their resampling and super-resolution features to improve your picture quality. You might end up with great photos worth framing and hanging on your wall.
FAQs
How can I increase the resolution of a JPEG?
To make a JPEG higher resolution, use image editing software like Photoshop. Go to Image > Image Size, choose a resampling method and change the dimensions. You can also use online tools like Pixelcut for AI-powered upscaling that maintains quality.
How can I take higher resolution photos?
To get better quality photos, use a camera with a higher megapixel sensor, shoot in RAW format, and avoid using digital zoom. Make sure you have good lighting and focus, and take several shots to improve your chances of getting a great image.
How can I increase the resolution of a picture for free?
To boost a picture’s resolution for free, try GIMP. Open your image in the program, change the image size settings, and choose a higher resolution. This improves quality without needing expensive software.
How to check image resolution?
To check an image’s resolution, right-click the file and choose Properties on Windows or Get Info on Mac. Then, find the Details or More Info section to see the image’s dimensions and resolution in pixels per inch (PPI) or dots per inch (DPI).
What is the resolution of HD?
HD stands for High Definition and usually means a resolution of 1280×720 pixels, or 720p. It has a widescreen 16:9 ratio, which offers better clarity and detail than standard definition.
How do I save a low resolution photo?
To save a low-resolution photo, open it in editing software like Photoshop or GIMP. Next, go to Image > Image Size and uncheck Resample. Then, reduce the pixel dimensions to your desired size and save the image as a JPEG with lower-quality settings.
How do I increase the resolution of a picture on Android?
To make a picture clearer on Android, try apps like Photo & Picture Resizer or Image Size. Just open the app, upload your photo, choose the new resolution, and save it. This will improve the image’s clarity without much loss in quality.
How to change an image size?
Use a photo editor like Photoshop or an online tool to change an image size. Open the image, choose Image Size, adjust the width and height or resolution, and save. Keep the aspect ratio the same to avoid quality loss.
What is a poor resolution photo?
A low-resolution photo has fewer pixels, making it blurry or grainy and hard to see details. This results in a picture that looks unclear and less sharp.
What is the best resolution to save pictures?
For the best print quality, save pictures at 300 PPI (pixels per inch). For web or screen use, 72-150 PPI is usually enough. The resolution you choose depends on how you plan to use the image and how far away people will be when they look at it.
Read next:
