Interested in learning designing on Canva? well, get ready for some amazing Canva tips and tricks that will make you a design superstar in no time.
It is a shortcut only known to professionals. It’s like finding a secret treasure chest full of design gems that can help you create jaw-dropping masterpieces.
So, get ready for a detailed guide on Canva tips and tricks. By the end, you’ll have a whole new set of skills to create mind-blowing designs that will leave everyone in awe.
Table of Contents
Canva: The Magic Wand
Now, don’t worry if you’re new to Canva or if you’re just starting your design journey.
Canva is like a magic wand for designing all sorts of cool stuff. Whether you want to create beautiful posters, stunning social media graphics, or even awesome birthday cards, Canva has got your back. But wait, there’s more! Canva has some secret tricks up its sleeve that can take your designs from ordinary to extraordinary.
So, what are these mystical Canva tips and tricks we’re talking about? Imagine being able to make your text look like it’s written in candy or creating eye-catching animations that make your designs come alive. Well, buckle up because we’re about to uncover the top 30 Canva tricks you must know.
List of Top 30 Canva Tips and Tricks
A list of the 30 best Canva tips and tricks:
- Create Smartmockups
- Create QR codes for your designs
- Make collages or mockups using Canva frames
- Use a screen recorder of Canva to record the presentations
- Generate animations with Canva
- Comment while collaborating
- Blur background of a photo
- Search results filtering made easy
- Organize different elements into groups
- Make use of Pexels & Pixabay within Canva
- Make a beautiful color combinations with the color palette generator of Canva
- Text position by using rulers
- Make music beats sync with videos
- Make amazing logos using the logo maker of Canva
- The addition of new fonts
- Adding highlights to YouTube thumbnails
- Templates for Magic design
- Alphabet frames for masking text
- Colorize vector art
- Element style copy
- Create a gradient for any background
- Use Canva to create websites
- Magic write – Create engaging content
- Edit designs using separate layers
- Use Magic Edit to add custom elements
- Time-saving Canva shortcuts
- Text to AI image converter
- Maintain order by locking elements
- Enhance the color of your pictures
- Tidy Up to create even spacing
Top 30 Canva Tips and Tricks
Here are some amazing Canvas tips and tricks.
#1. Create Smartmockups
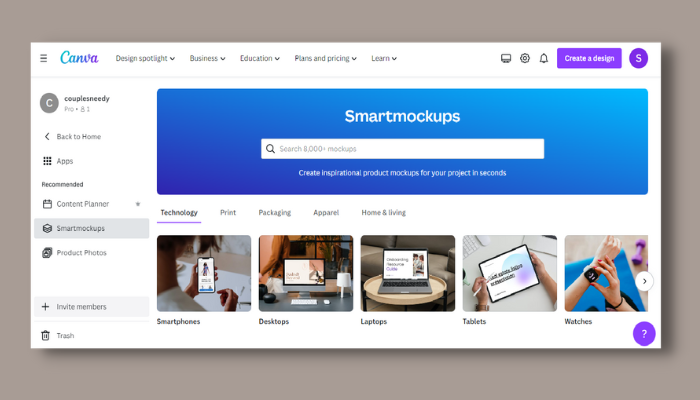
If you are passionate about creating printed products, books, clothing lines, technology, apparel, or similar items, the integration of Canva with SmartMockups allows you to breathe life into your work!
Follow the steps:
- Select your design and click the right-hand three dots.
- Locate the option for SmartMockups.
- Proceed to register on SmartMockups using your email address.
Experience the incredible ability to visualize your T-shirts, websites, books, and other items!
#2. Create QR Codes for Your Designs
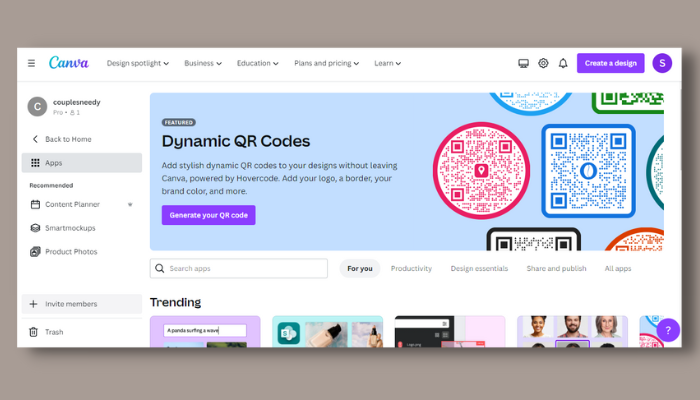
Follow the steps:
- Navigate to the ‘More‘ option.
- Choose the “QR code Generator“.
- Enter the URL of your website, blog, app, or company.
#3. Make Collages or Mockups Using Canva Frames
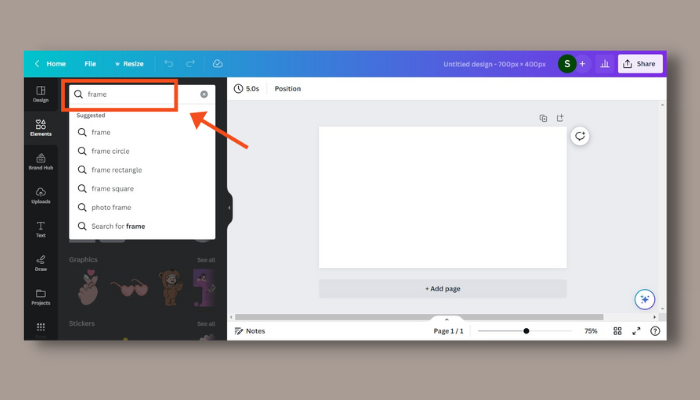
Follow the steps:
- Choose a design template or create a blank page.
- From the editor side panel, click Elements and search for “frame” in the search bar.
- Drag and drop a frame you like onto your page.
- Click on the frame and then click Photos or Videos from the side panel.
- To fill the frame with a solid color or a gradient, click on the frame and then click on the rainbow color tile from the editor toolbar above.
- Save and download your design when you are done.
#4. Use a Screen Recorder of Canva to Record the Presentations
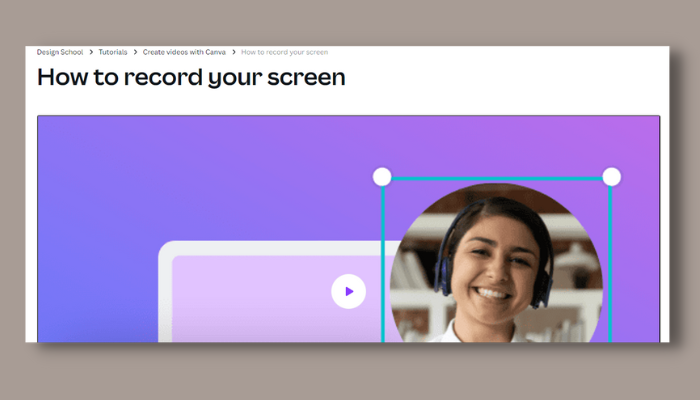
Follow the steps:
- Choose a Template for your presentation.
- Click on Uploads and select Record your screen.
- It is possible to record both your screen and webcam simultaneously.
- Click on Start Recording and grant permission to access your camera and microphone.
- Record your presentation and click on Stop Recording when you are done.
Alternatively, you can use other tools like Screencast-O-Matic that integrate well with Canva for screen recording.
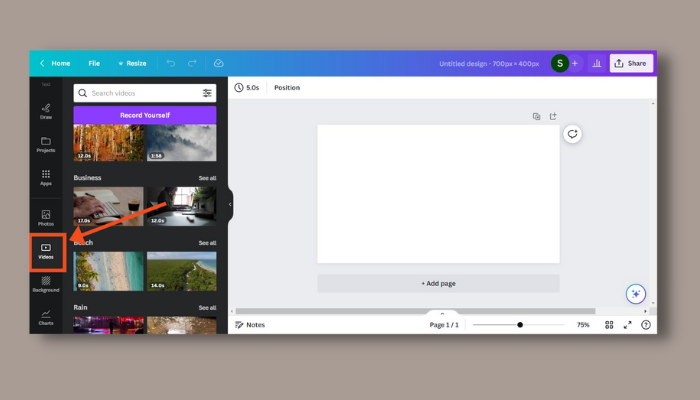
#5. Generate Animations With Canva
Learn how to generate animations in this tips and tricks for Canva article.
Follow the steps:
- To create an animated video, type “Video“.
- Choose a video template.
- Edit the video template by changing the text, colors, and fonts and adding your own photos and clips.
- To create an animation, click an element and then click Animate > Create an Animation.
- To animate the whole page, click Page > Animate and select a style like Fade, Slide, Block, etc.
- Preview your animation by clicking Play and make any adjustments as needed.
- Download your animated video as an MP4 file.
#6. Comment While Collaborating
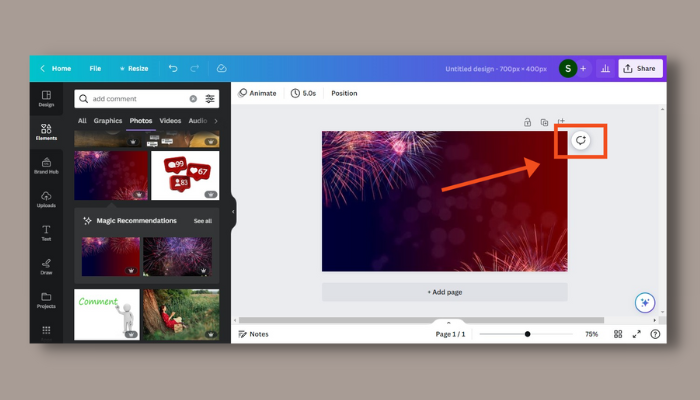
This is one of the awesome Canva tips and tricks. You can comment while collaborating.
Follow the steps:
- Select the element or page you wish to comment on.
- Click on Add Comment.
- Type your Comment and click on Comment.
- Enter “@” and select a user from the list to mention in your Comment. They will receive a notification and can access the design.
- To add a sticker to your Comment, click on the Sticker icon.
- To assign a comment to someone, click on the Assign icon and select a user from the list. They will see a badge on their profile picture indicating they have a task.
- To resolve a comment, click on the Resolve icon. The Comment will be moved to the Resolved comments section.
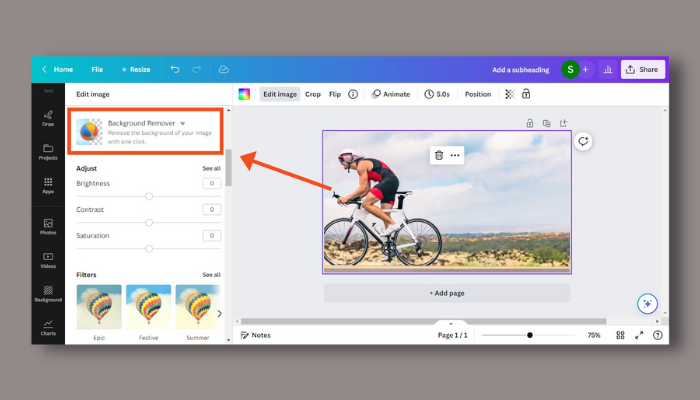
#7. Blur Background of a Photo
Follow the steps:
- Upload your photo by clicking on the Uploads tab and then on Upload Media.
- Duplicate your photo by clicking on the three dots and selecting Duplicate.
- Remove the background of the duplicated photo by clicking on Effects and then on Background Remover.
- Go back to the original photo and click on Adjust. Drag the Blur slider to the right to increase the blur effect on the background.
- Drag the duplicated photo with the transparent background over the original photo and align them perfectly.
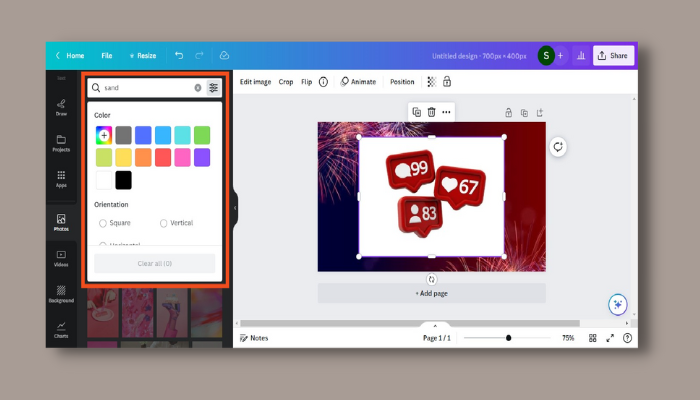
#8. Search Results Filtering Made Easy
Follow the steps:
- Click the Search icon.
- Type your search terms.
- Filter your search results using the icons above the search bar.
- Scroll through your results and find the asset you want.
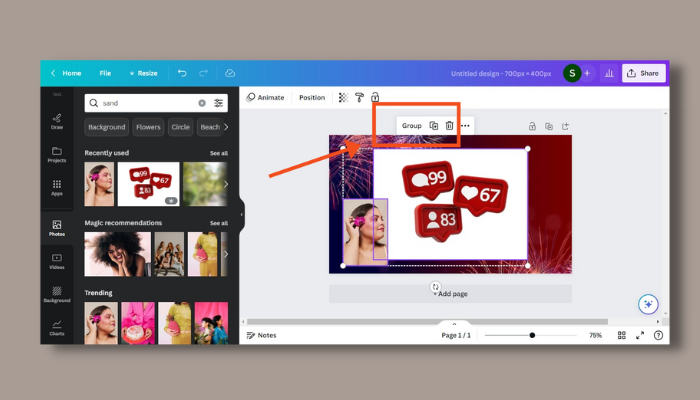
#9. Organize Different Elements Into Groups
Follow the steps:
- By clicking on each element and dragging the cursor over it, you can select them for grouping.
- From the top toolbar, click Group. You can also use the shortcuts Cmd + G (on Mac) or Ctrl + G (on Windows) to group the selected elements.
- With these new features, you can resize and move all of your selected elements in a single group.
- To ungroup the elements, click on the Group and then click the Ungroup button in the toolbar.
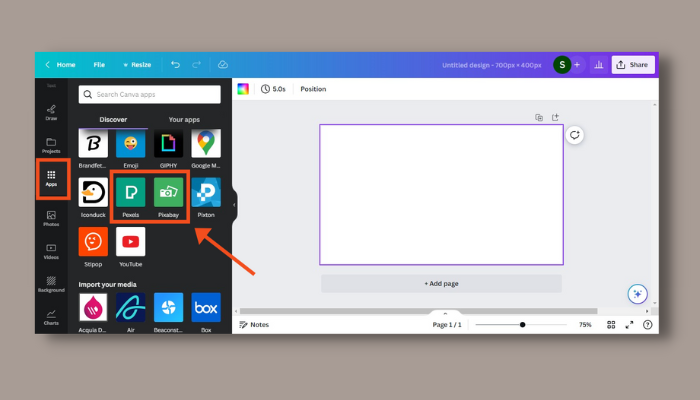
#10. Make Use of Pexels & Pixabay Within Canva
Follow the steps:
- Create or edit an existing design.
- Click on the More tab and look for Pexels and Pixabay.
- You will see a collection of free stock photos from the selected site.
- If you want to use images from both Pexels and Pixabay, you can switch between them by clicking on their icons.
#11. Make a Beautiful Color Combinations With the Color Palette Generator of Canva
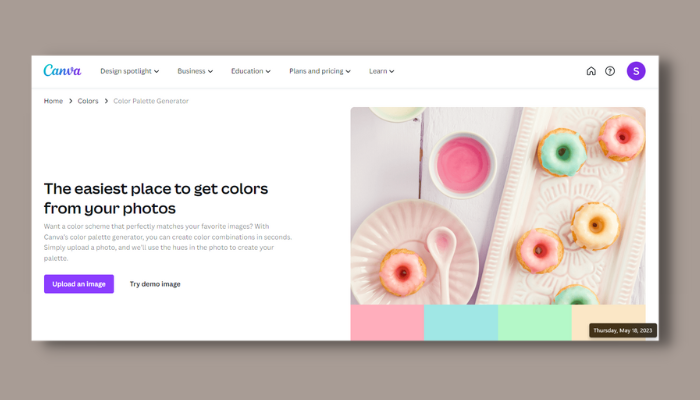
Follow the steps:
- Go to https://www.canva.com/colors/color-palette-generator/ and upload an image.
- The generator will automatically extract the dominant colors from the image and create a color palette for you.
- You can also click on any color to see its hex code, RGB values, and complementary colors.
- You can save the palette to your Canva account or download it as a PDF file.
#12. Text Position by Using Rulers with Canva
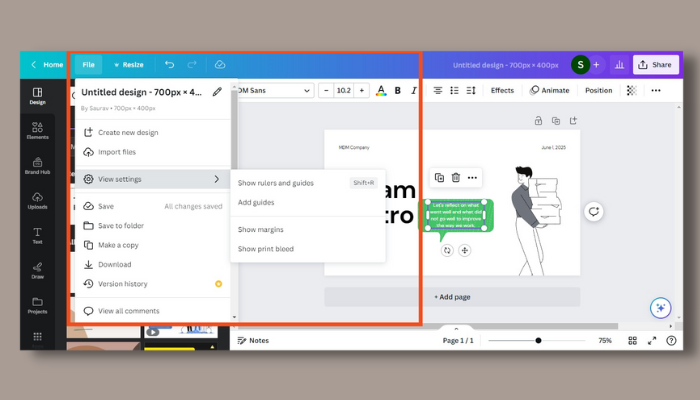
Follow the steps:
- Open a design of your choice with two or more elements on it.
- Go to File and select Show Rulers from the drop-down menu.
- Drag the text element to align it with the other elements using the gray highlights on the ruler as a guide.
- If you want more precise alignment, you can also turn on guides by selecting Show Guides from the File menu.
#13. Make Music Beats Sync With Videos
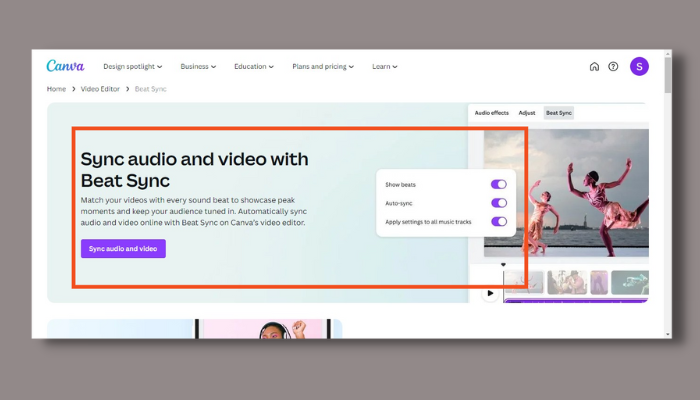
Follow the steps:
- Create a video project on Canva and add your video clips and audio tracks to the timeline.
- Select an audio clip that you want to sync with the video and click on the Beat Sync button on the toolbar at the top.
- Display beat markers and Sync now need to be enabled.
- Wait for the AI to detect the beats in the audio and align them with the video cuts.
- Preview the final product and download it when you are satisfied.
#14. Make Amazing Logos Using the Logo Maker of Canva
Follow the steps:
- Start by searching for “Logo“.
- Choose a professional template from thousands of free, ready-to-use templates.
- Customize your logo with your brand name, colors, fonts, icons and images.
- Download your logo in high-quality formats or print it on business cards, letterheads and more.
#15. The Addition of New Fonts
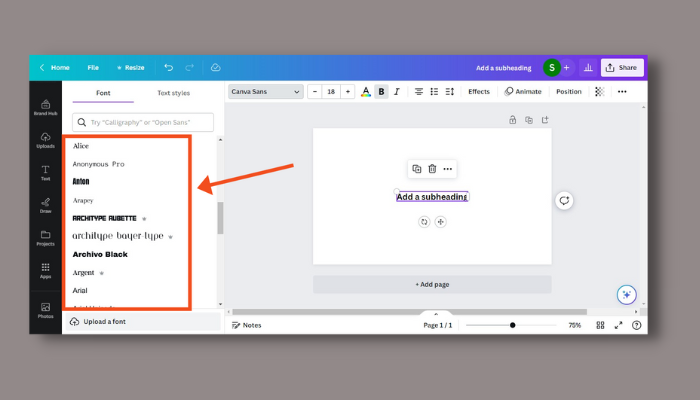
The addition of new fonts is also one of the best Canva tips and tricks.
Follow the steps:
- Open a design.
- Click on the text tool and select a text box or create a new one.
- Click on the font dropdown menu at the top of the editor.
- Click on the “Upload a font” button.
- Choose a font file from your computer and click on the “Open” button.
- Wait for the font to upload and appear in your font list.
- Select the font and start typing.
Here is a video tutorial related to new fonts that will provide you with more information:
#16. Adding Highlights to YouTube Thumbnails
Follow the steps:
- Search for a YouTube thumbnail. Design a new layout with a 1280 x 720-pixel size.
- Upload the picture.
- Drag the picture into the template and adjust its size and position.
- Add text using large and readable fonts.
- To add highlights to your text or image, go to Elements and search for glow or highlight.
- Drag the highlight element over your text or image and resize it to fit.
- If you want to highlight another text or image, repeat steps 5 and 6.
#17. Templates for Magic Design
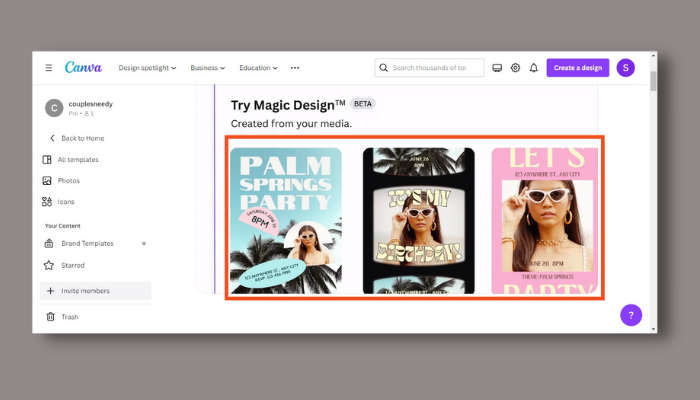
Follow the steps:
- You can select Presentations after clicking Create a Design.
- Click the Canva Assistant button.
- Type in Magic Design, or you can select it from the list of suggestions.
- Magic Design will generate a custom template for you based on your image or style selection.
#18. Alphabet Frames for Masking Text
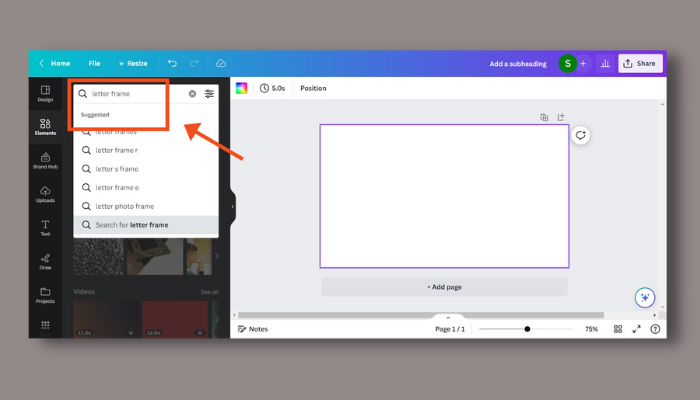
Follow the steps:
- Head to the Elements tab and search for “Letter frame.”
- Scroll down to find the letter frames that match your style and preference.
- Select and drag the letter frames that you want to use for your text mask.
- Go to the Photos tab and search for images that you wish to use for your text mask.
- Double-click on the images inside the letter frames to reposition or resize them as you like.
#19. Colorize Vector Art
Follow the steps:
- Upload your vector art as an SVG file to Canva.
- Click on the vector art to select it, and then click on the color swatch.
- Enter a custom hex code or choose from the palette.
- Color eyedropper tools are also useful for finding colors within your design.
- Repeat steps 2-4 for each part of the vector art you want to change the color of.
#20. Element Style Copy
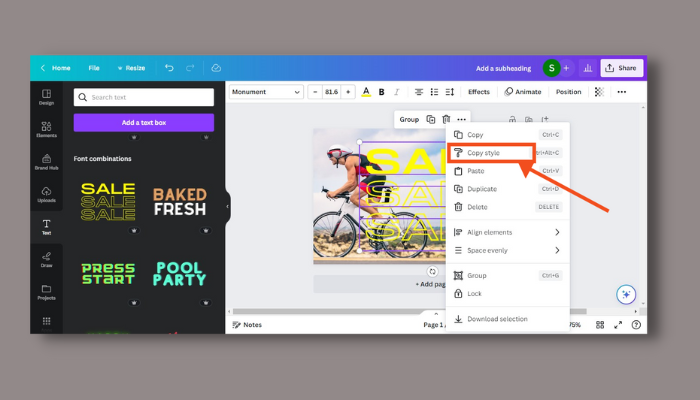
Follow the steps:
- Create or open an existing design.
- Choose a style or format for an element or text.
- Select More from the floating toolbar.
- Select Copy style.
- Copy the formatting of the selected element or text.
Style and format include the following:
- Elements: color, transparency, image filter
- Charts: Colors, formatting, and transparency
- Page: background color, background image filter
- Text: font style, font size, color, alignment
#21. Create a Gradient for Any Background
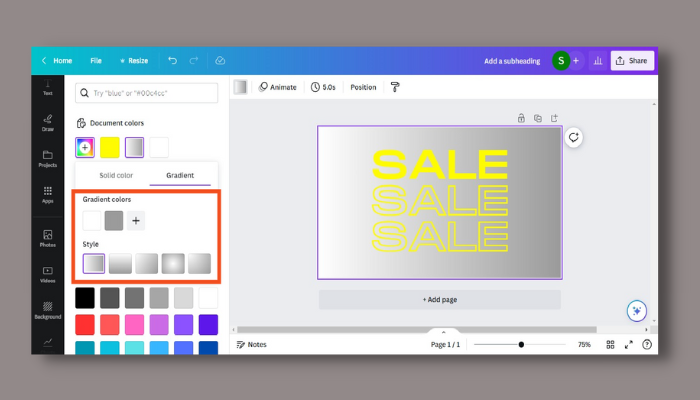
Let’s explore how Canva has recently launched a simple method for applying gradients to various backgrounds and shapes in this Canva tips and tricks article.
Follow the steps:
- Create or open an existing design.
- Select the shape or element.
- Click on the color swatch.
- Select the Gradient tab.
- Choose from the preset gradients or create your own by adding, editing, or removing color stops.
- Adjust the transparency and angle of the gradient as desired.
#22. Use Canva to Create Websites
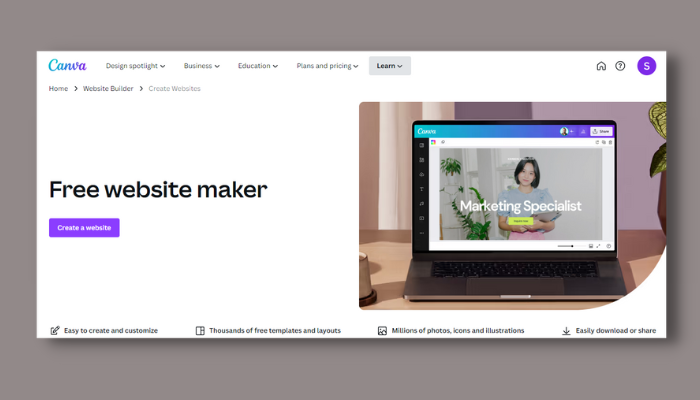
Follow the steps:
- In the Create a Design menu, choose “Website” if you wish to start a design project of your own.
- Choose a website template from the collection of ready-made website layouts that you can customize instantly.
- Customize your website design by editing the texts, images, colors, fonts, and backgrounds.
- Add more design pages to create multiple sections in your one-page website. You can duplicate an existing page or add a new one from the templates or blank options.
- Publish your website by clicking on Publish as Website button. Choose a free Canva Website domain or purchase your own domain. You can also download your website design as a PDF or PNG file if you prefer.
#23. Magic Write – Create Engaging Content
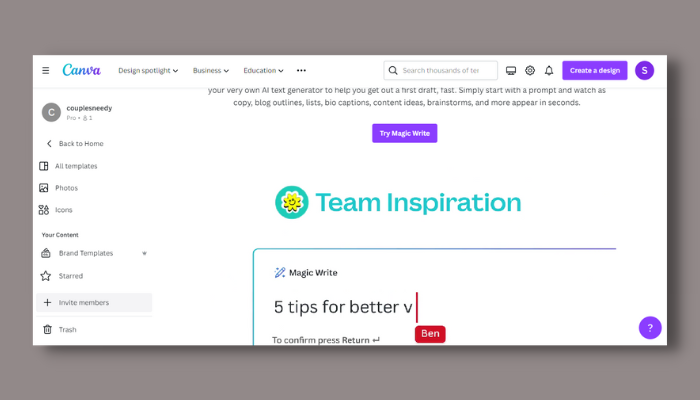
The Magic write option is one of the best Canva tips and tricks to use. Follow the steps:
- Open an existing Canva design or create one from scratch.
- Click on the + Add Magic button on the page or type / to open the Canva Assistant shortcut.
- Select Magic Write from the list.
- Enter or describe the text.
- Press Enter and wait for Magic Write to generate content for you based on your input.
- Make any necessary edits to the generated content.
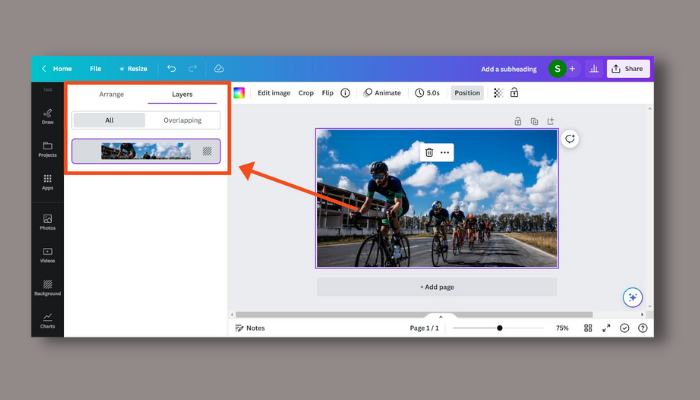
#24. Edit Designs Using Separate Layers
Follow the steps:
- Open an existing Canva design or create one from scratch.
- Click on it on the canvas. Blue handles and a border will highlight it.
- To select multiple layers, hold Shift on your keyboard and click on the layers you want to select.
- To find or select a layer in the Layers panel, click on the Position button on the toolbar above the editor and then select the Layers tab. You will see the layers on your current page. The page background will have a background icon, and grouped elements will have a grouped icon. Click on a layer to select it and highlight it on the canvas.
- To rearrange a layer, you can drag and drop it on the canvas or in the Layers panel. There will be a line indicating where to insert it. You can also use the Position button to move a layer forward or backwards.
Here is a video tutorial related to separate layers that will provide you with more information:
#25. Use Magic Edit to Add Custom Elements
Follow the steps:
- Create a new design.
- Upload the photo and drag and drop it into the layout.
- Click on the photo and select Edit Photo from the editor toolbar.
- Select Magic Edit from the effects section.
- Change the brush size according to how you wish to modify the photo.
- Click Generate and enter what you wish to replace or add in the brushed area.
- Wait for the edit to be processed and click Done to finish.
#26. Time-Saving Canva Shortcuts
Look at the table:
| Windows | Mac | |
| Text box | T | T |
| Add a link | Ctrl + K | Command + K |
| Add an empty page | Ctrl + Enter | Command + Return |
| Delete an empty page | Ctrl + Delete | Command + Delete |
| Line | L | L |
| Circle | C | C |
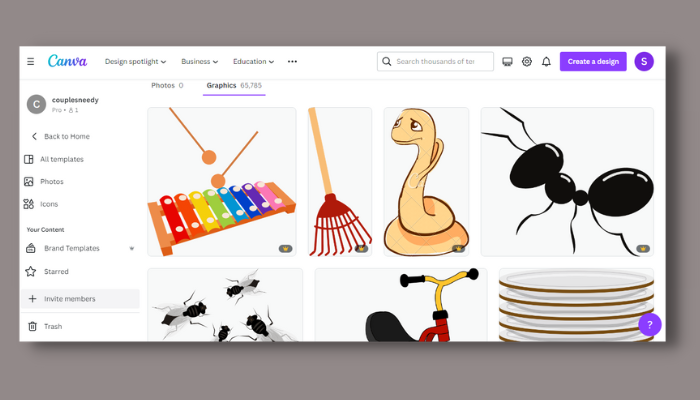
#27. Text to AI image converter in Canva
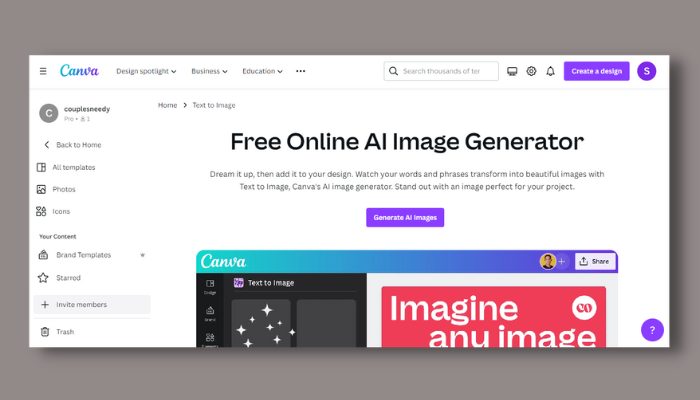
Follow the steps:
- Create a new design.
- Click on the Elements tab and select Text to Image.
- Type in a description in the text box and choose a style and an effect from the dropdown menus.
- Click on Generate and wait for the AI to create your image.
- Drag and drop the image into your design and resize or edit it as needed.
#28. Maintain Order by Locking Elements
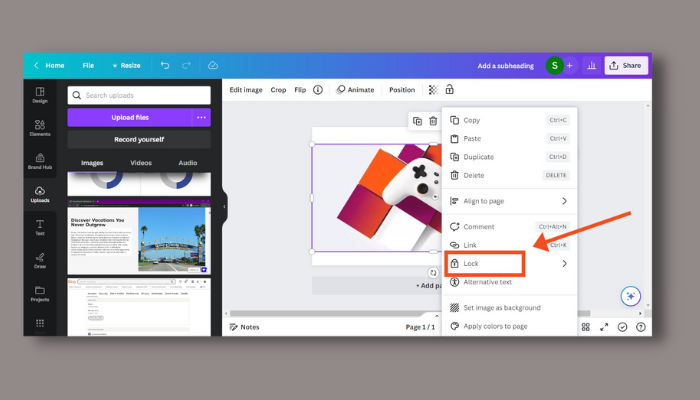
Follow the steps:
- To lock an element, click it.
- Select Lock from the floating toolbar. On the side of the element, there will be a small lock icon.
- By selecting Lock position only, the element’s position will be partially locked and editing will still be possible. This option is available for some Canva Pro or Canva for Teams users.
- Unlocking an element is as easy as clicking on it and selecting the Unlock or Unlock position icon from the floating toolbar.
#29. Enhance the Color of Your Pictures
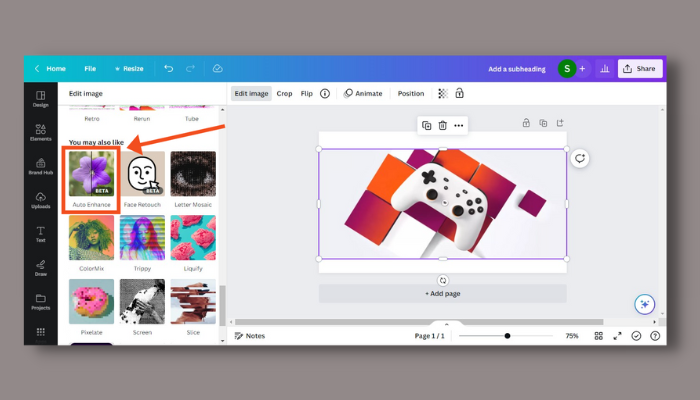
Follow the steps:
- Choose a template.
- Upload the picture or use photos from the Canvas stock library.
- Click on the picture and select Edit Photo from the editor toolbar.
- Enhance the image quality further by adjusting the Brightness, Contrast, and Saturation sliders.
- For quicker image enhancements, apply filters and effects from the effects section. Additionally, Auto Enhance allows you to automatically balance a photo with one click.
- Also, change the color of specific parts of your image by using the Background remover or Background color tools.
#30. Tidy Up to Create Even Spacing
Follow the steps:
- Choose a template.
- Add the elements you want to space evenly to your design.
- Select three or more elements you want to align by clicking on them while holding Shift on your keyboard.
- Click on the Position in the top panel and find Tidy Up in the drop-down menu.
- Your elements will be spaced evenly and aligned according to their Position on the page.
You can learn more about Canva tips and tricks in the following video tutorial:
Canvas Tips and Tricks for Teachers
Canvas is a website that helps teachers and students learn online. With so many features, learning becomes fun and easy.
Some Canvas tips and tricks for teachers:
- You can create quizzes and assignments on Canvas and grade them automatically. This saves you time and helps you track your student’s progress.
- You can use modules to organize your course content into different topics or units. You can also add requirements and prerequisites to guide your students through the course.
- You can use the SpeedGrader tool to give feedback and comments to your students on their work. You can also use rubrics to grade them more consistently and fairly.
- It is possible to communicate with your students and fellow teachers via the Inbox. You can send messages, attachments, and announcements to keep everyone informed.
- Calendars are useful for scheduling events and deadlines. You can also sync it with your personal calendar to stay organized.
These are the tips and tricks for teachers who use Canvas.
FAQs
Can we make Canva background transparent?
You can make a transparent background by selecting the Transparent background option in the download menu. The background of your design will be transparent in the PNG file.
How do I upload a custom font?
To upload a custom font, go to your homepage and click on the Brand Kit tab. Then, click on the Upload font button and select the font file from your computer. You can then use the custom font in any of your designs.
Can Canva animate my logo?
To animate your logo, go to the Download menu and select the MP4 video or GIF option. Then, click on the Animate button and choose from the different animation styles available.
Conclusion
We hope you learned new things from these amazing Canva tips and tricks! We’ve covered a bunch of cool things you can do with Canva to make your designs look super awesome.
With these top 30 tricks, you’ll become a Canva pro in no time!
So go ahead, my young designer, and let your imagination run wild! With Canva, the sky’s the limit.
Just remember, practice makes perfect. You’ll get better at Canva the more you use it.