In this blog, we’ll learn about how to use stable diffusion to create ai generated images. Learning Stable Diffusion can also help you create your own ai image generator and launch it on the Internet. We’ll be looking at various ways you can do it, since it is available through many website and standalone applications, we’ll be exploring a few of those below like ClipDrop, DreamStudio, Stable Diffusion Web, etc. Let’s begin:
Table of Contents
What is Stable Diffusion?
Stable Diffusion is one of the best Ai Image Generator. You can generate compelling images based on prompts and your own imager description. Stable Diffusion is completely open-source, and you can also train stable diffusion model using your owned datasets to get desired results and images as per your requirements.
How to Install and Run Stable Diffusion Locally on PC
You can download, install, and run Stable Diffusion locally on your computer:
But keep in mind that Stable Diffusion requires at least 6GB of VRAM to run smoothly. However, we recommend to have 8GB of VRAM or more. For larger images on default settings, 12GB of VRAM or more is ideal.
— Best GPUs for Stable Diffusion
Step 1: Install Python & Git
You’ll need Python 3.10.6 to run Stable Diffusion from your local computer. You can install it from the official Python website.
If you need help, check out the documentation on How to Install Python on its official website.
To check if your installation worked correctly or not, open the command prompt and type “Python” and execute this comment. It should print the version of Python you are using.
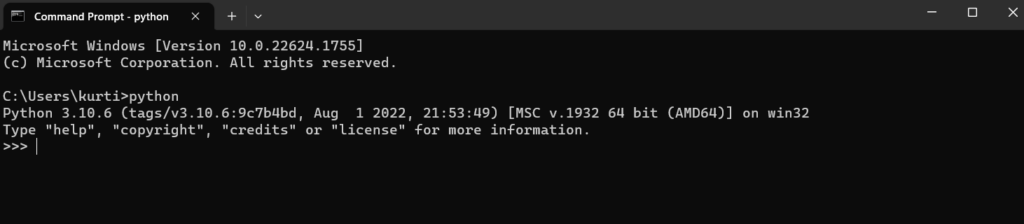
In case you don’t see Python version 3.10.6, see if you’ve any other versions of Python installed on your PC. If yes, you’ll need to remove all your other version of Python from your PC.
Note: Do not proceed with Python 3.10.6
Now, you need to install Git for code repository management. You can look for a Git Install Tutorial in case you need help with it.
Step 2: Create a Github and Hugging Face account
Since GitHub is free is very widely adopted, we recommend Github as your software development hosting service. Github is where most developers host their code, if you don’t have an account already, you can quickly signup and create your account on Github.
HuggingFace is an Ai Community for open-source contributions in the field of AI. It serves as a single place for people to share their models from different domains like NLP (Natural Language Processing), computer vision, and many more. You’ll need to signup on HuggingFace to download the latest version of the Stable Diffusion model – We’ll be using this in the later steps.
Step 3: Clone Stable Diffusion Web-Ui to your laptop or PC
This is an important step and might get tricky. We want to do is download the stable diffusion installation on our local PC.
In this step, we want to navigate to a folder in which you want to put the repository into. You can create a folder named stable-diffusion-demo-project and download the installation into that folder.
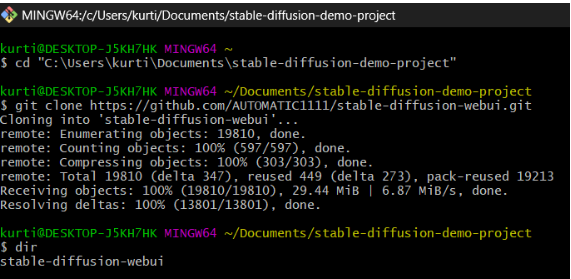
Open Git bash, navigate to the folder using CD command (which stands for Change Directory) to close the stable diffusion web ui into with this command:
cd path/to/folder - This code uses the command line interface to change the current working directory to the specified folder path.
- The “cd” command stands for “change directory” and is used to navigate through the file system.
- You need to replace “path/to/folder” with the actual path to the desired folder.
Now run the following command:
git clone https://github.com/AUTOMATIC1111/stable-diffusion-webui.git- This code is a command in the Git version control system.
- It uses the “clone” command to create a copy of a remote repository located at the URL “https://github.com/AUTOMATIC1111/stable-diffusion-webui.git” and downloads it to the local machine.
- The downloaded repository will be stored in a new directory with the same name as the repository*
Once the command gets executed successfully, you’ll have a folder called stable-diffusion-webui as shown the screenshot below:
Step 4: Download the latest Stable Diffusion model
Now in this step, your HuggingFace account will be used. Login to HuggingFace and download a stable diffusion model.
It may take you a few minutes because it is a large download file.
Once your download is complete, open the “models” folder within stable diffusion webui folder. There should be a “stable-diffusion” folder that has a txt file named “Put Stable Diffusion Checkpoints here”.
Now, copy and paste the latest downloaded stable diffusion model into that folder.
Here’s the directory path for simpler understanding:
stable-diffusion-webui\models\Stable-diffusionStep 5: Setup the Web-Ui
Now, we need to install the tools for running stable diffusion, it can take upto 10 minutes.
Open your CMD and go to the “stable-diffusion-webui” folder with the help of “CD” (change directory) command:
cd path/to/stable-diffusion-webuiOnce you reach that directory, run the following command:
webui-user.batThis command will create a virtual environment and install all the dependencies required.
Step 6: Run Stable Diffusion
Once all your dependencies are installed, an IP address URL will appear in your CMD (http://127.0.0.1:7860). Paste this URL in your browser address bar to open the SD web-ui locally in your PC.
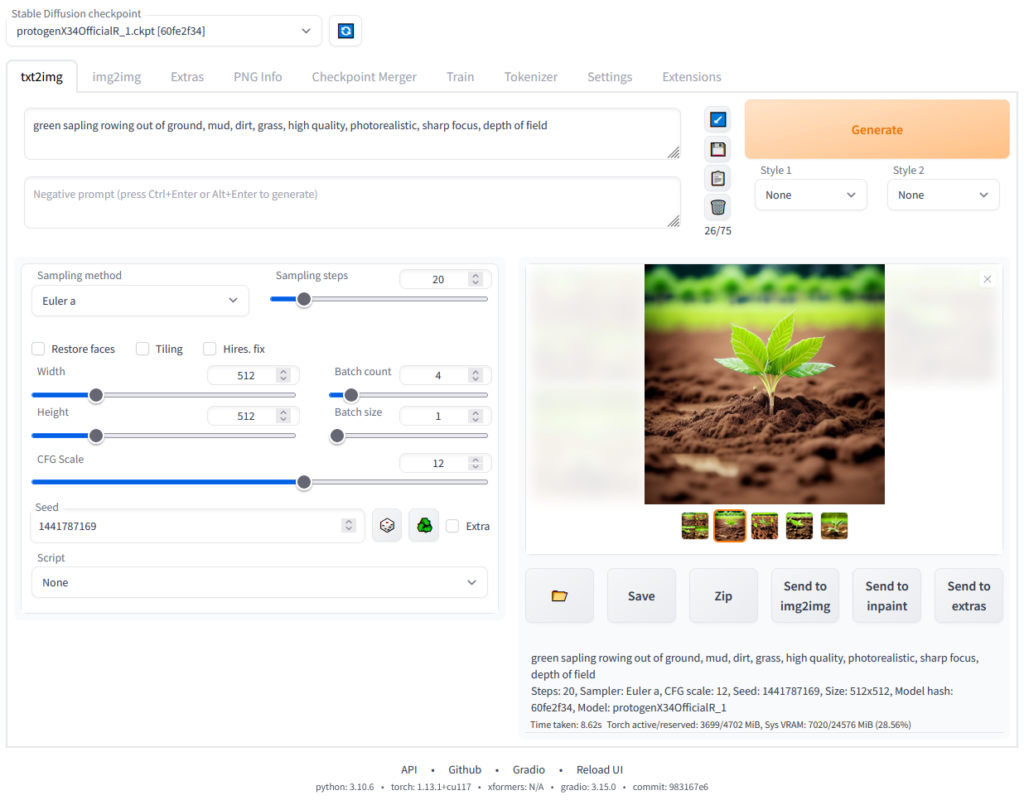
Done, ready to generate ai Images!
Form this web-ui, you can enter your own image descriptions and prompts. You can use various options available like image height and width, seed, negative prompt, styles, etc. and start generating your images. Depending on your machine’s specification the image generation can take anywhere from few seconds to several minutes. Be patient and run as many image generation experiments as you want.
You can follow the similar process as shown above on a renter server and run your own Stable-Diffusion installation on a server if your local machine ins’t capable of it.
Let’s explore other ways to access stable diffusion from online websites and pre-deployed tools —
How to Access Stable Diffusion Online
There are multiple ways to use Stable Diffusion. Let’s explore the most popular ways here below:
Another approach is by setting up for your own model using Leap AI, or by using something like NightCafe to get the API access.
The simpler approach to use Stable Diffusion is through Stability AI (the makers of SD and SDXL)
- Clipdrop
- Dreamstudio
- Hugging Face
- StableDiffusionWeb
Clipdrop is a simple and free tool, but DreamStudio comes with better control over the image generation output. Both are very popular and preferred tools to try out Stable Diffusion.
How to use Stable Diffusion with Clipdrop
Clipdrop is an Ai image generator that runs various versions of SD and SDXL on it. You’ll need to subscribe to the Pro Version of Clipdrop to access the ai image generator. Here are the steps on how to generate an ai image using Clipdrop.
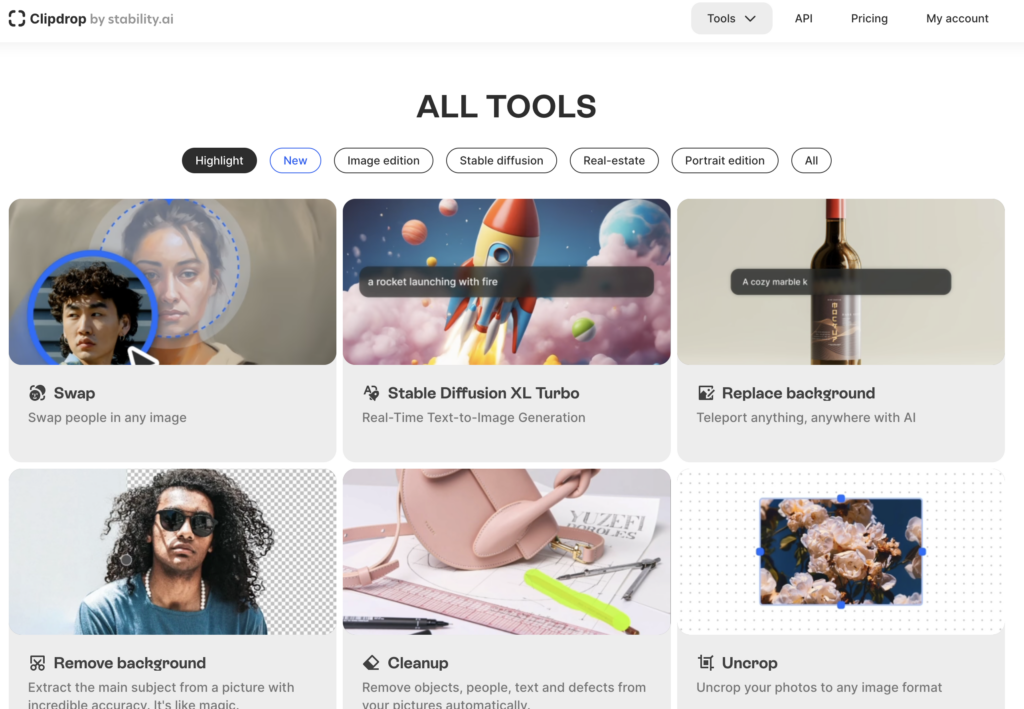
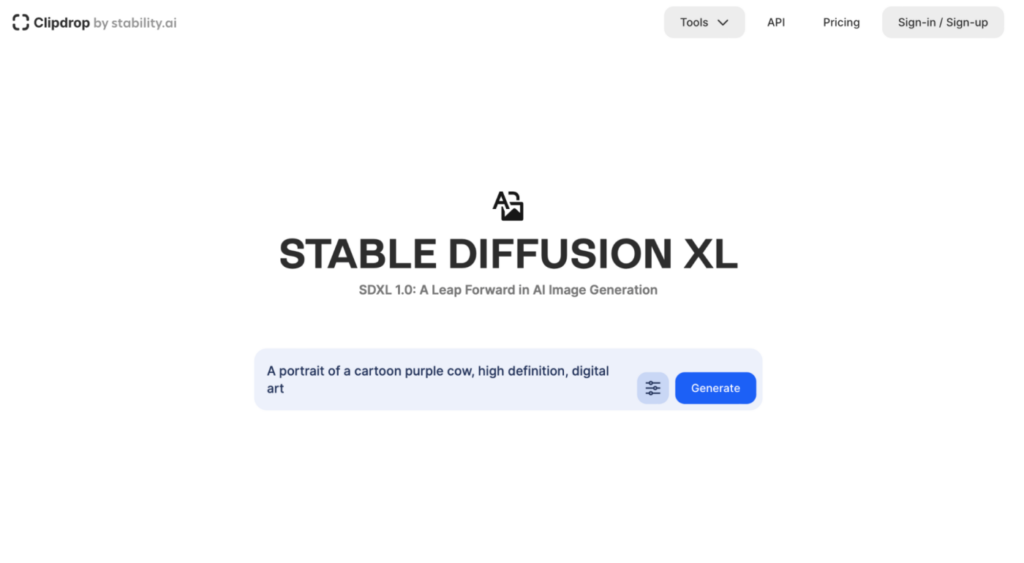
Step 1: Go to Clipdrop and select Stable Diffusion.
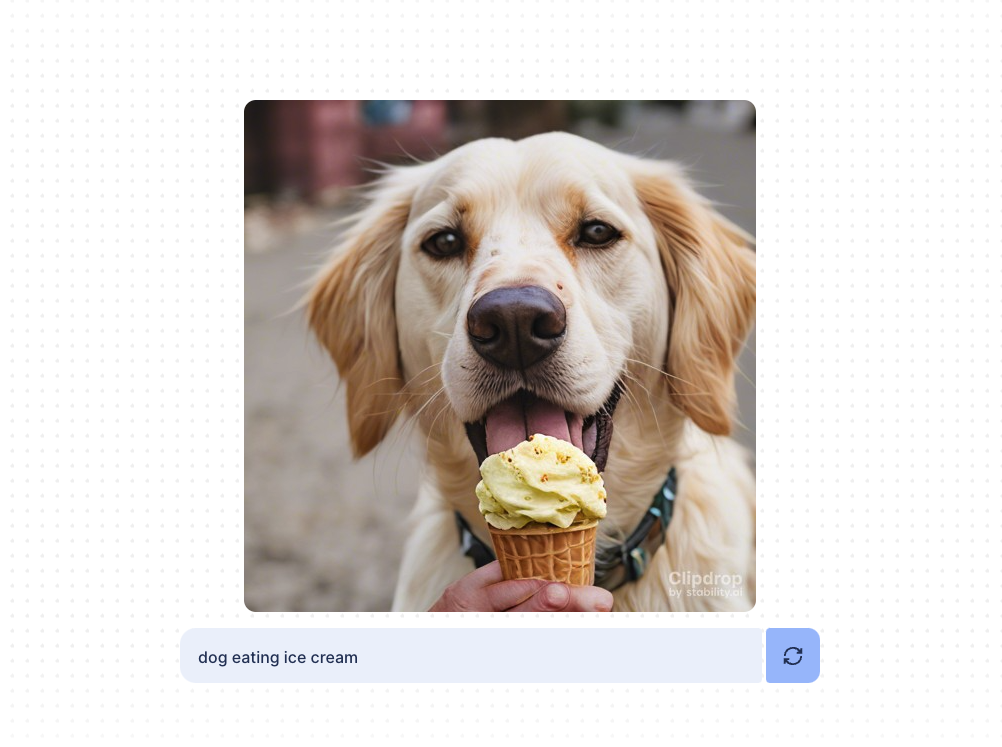
Step 2: Enter your prompt and click generate as per your requirements.
Step 3: In a few seconds you will get 4 ai-generated images as the output. You can choose the image that you like and continue making similar images.
By using the Options icon in the prompt box, you can dig deeper:
- For Style: You can select from any available style to transform your image into anime, art, comic, fantasy, punk, filmy, poly, origami, line art, 3D, pixel, etc.
- For Aspect Ratio: You can select Aspect ration from options like 21:9, 16:9, 4:3, 1:1, 4:5, and 9:16.
- Negative Prompt: If you don’t want certain things in your image, you can enter that in the negative prompt to imform the ai engine to not include those in the image output.
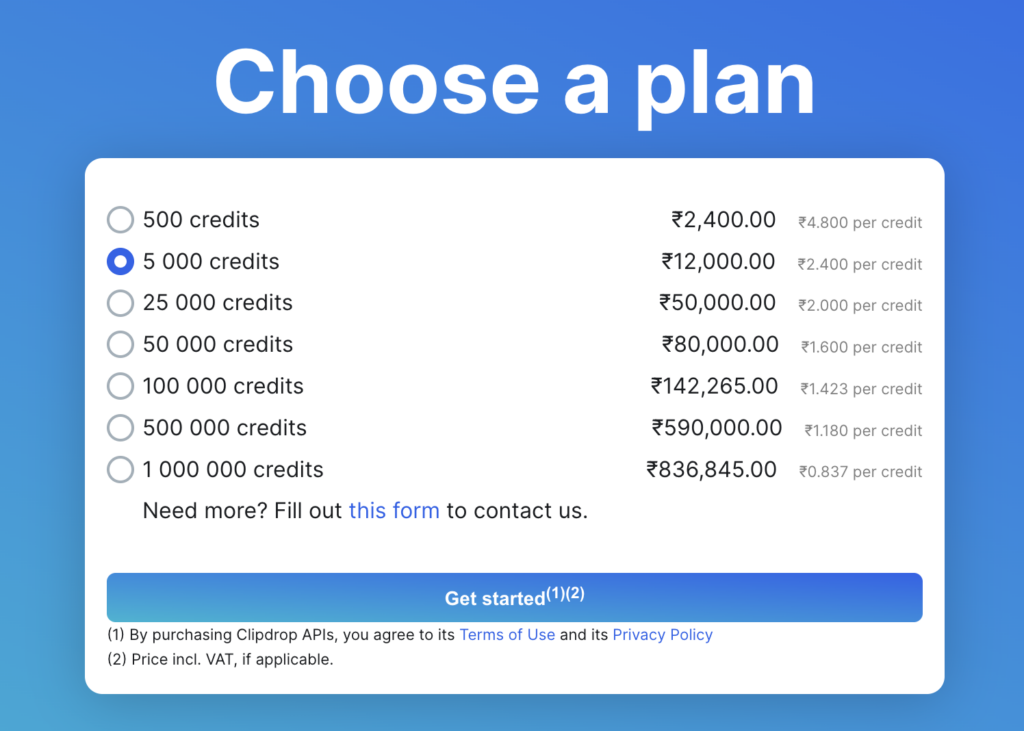
Clipdrop Pricing:
There are both free and paid version of Clipdrop. In the free version you will not get SDXL, but you’ll get access to Stable Diffusion Turbo and several other image editing tools. The free version gives you upto 400 images per day with water mark.
If you opt for clipdrop pro, you’ll get access to all the generative ai models with 14,000+ images in 24 hours without watermark. Each tool within Clipdrop has a daily quota on how many images you can generate. So we recommend you check the pricing before making any decision.
Get all the details on Clipdrop pricing here. For developers who want to build their own image generator and need API access, you can refer to the Clipdrop API Pricing.
How to use Stable Diffusion with DreamStudio
While Clipdrop is easy to use, DreamStudio, the official Stale Diffusion web app by Stability that allows more granular control over image generation and gives output with no watermark by default. Here’s a small step by step guide to use DreamStudio:
Step 1: Go to DreamStudio.ai/Generate
Step 2: You’ll need to agree to the terms and conditions before you begin to use the app.
Step 3: Signup if you are new or login to your account. You can also sign in using Google or Discord on DreamStudio.
Remember that after sign up, you’ll also need to verify your email so don’t forget to check your email inbox for the verification link.
How to generate an image with Stable Diffusion in DreamStudio
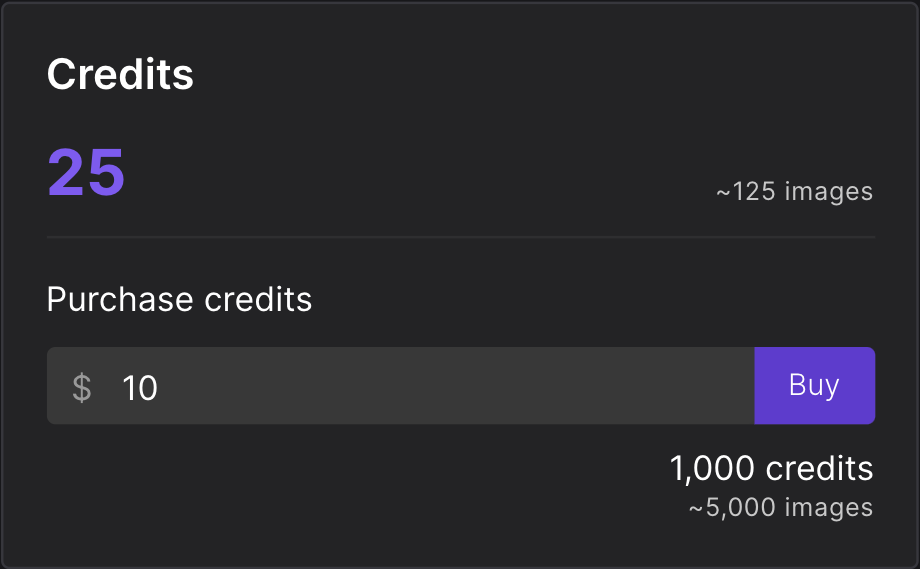
After signing in, you’ll get 25 free credits that are good enough to try different prompts and generate some images with the base (or default) settings.
The account page shows that you can generate ~125 images with the free 25 credits. You can buy 1000 Credits for $10, which are good enough to generate approximately 5000 images.
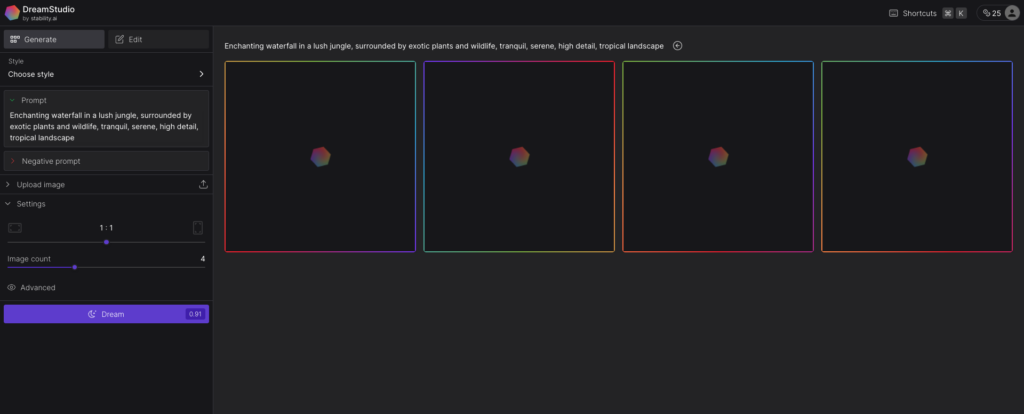
Let’s get started with generating your 1st image. In the left bar, you’ll see all different controls and settings. Here, you’ll get a lot more options in comparison with Dall-E2 or Clipdrop. Here’s a simple example of an image output.
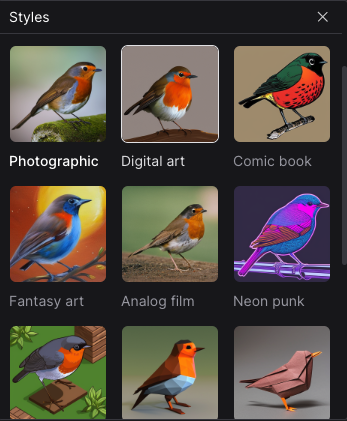
Let’s one by one learn about the options you see on the left sidebar. From the Style dropdown you can choose from a variety of image styles such as:
- Enahnce
- Anime
- Digital Art
- Comic Book
- Photography
- Fantasy Art
- Analog Film
- Neon Punk
- Isometric
- Low Poly
- Origami
- Line art
- Craft clay
- Cinematic
- 3D Model
- Pixel Art
The prompt box is where you’ll write the description of the kind of image that you want to generate. DreamStudio gives out a random suggestion by default for inspiration. You can find many interesting prompts for DremaStudio on the Internet. If you are looking for interesting Ai Art prompts, checkout Best Prompts for Ai Art.
Here are three diverse and imaginative prompts for AI image generation:
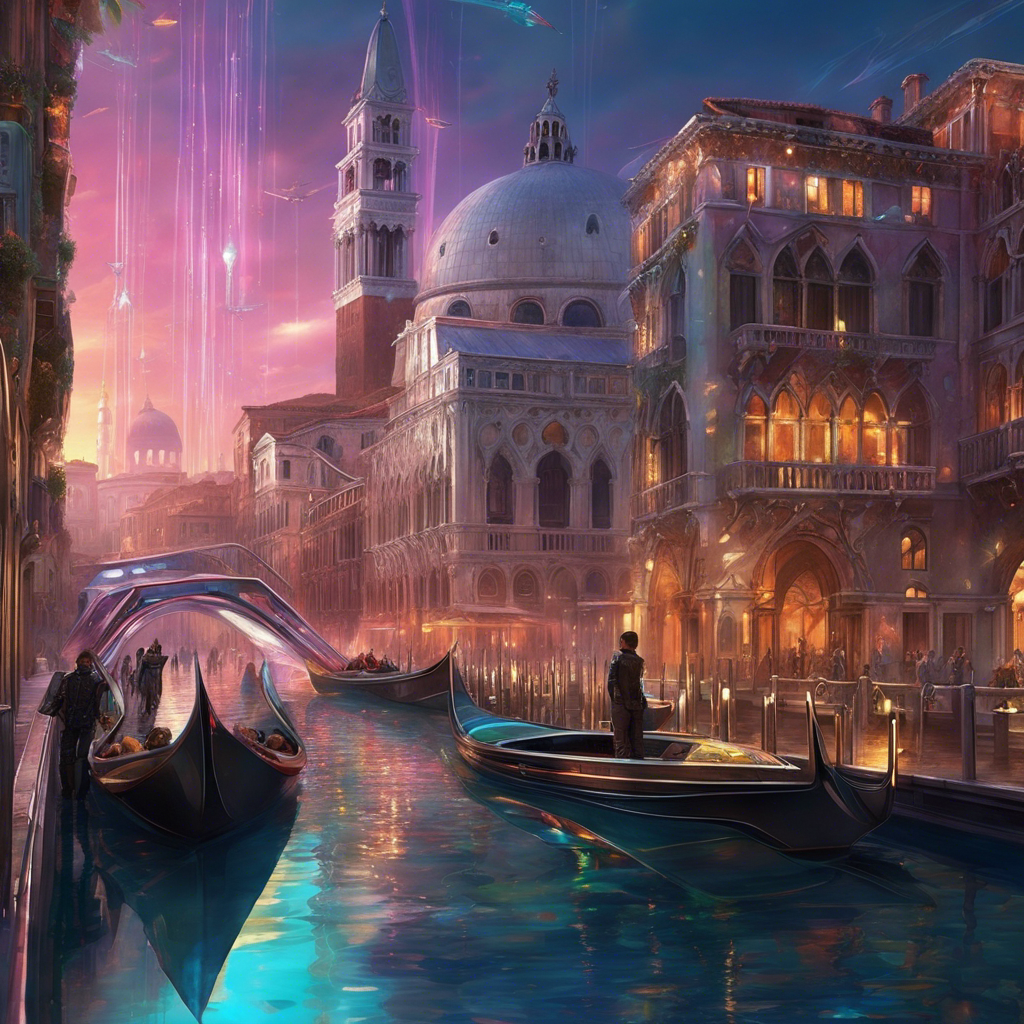
- A Futuristic Venice: Imagine Venice in the year 3000, where the city is a blend of advanced technology and its historic architecture. Picture sleek, floating vehicles gliding over crystal-clear water, with buildings made of shimmering, iridescent materials. The sky is a tapestry of neon colors, reflecting both the setting sun and the city’s vibrant, futuristic lights. In the foreground, a gondola-like vehicle with a robotic gondolier moves gracefully along the waterway, surrounded by softly glowing aquatic plants.
- A Mythical Garden at Twilight: Envision a large, enchanting garden as twilight sets in, bathed in the soft glow of the moon. This garden is home to mythical creatures like fairies, unicorns, and dragons, all coexisting peacefully. The landscape is dotted with exotic, luminescent flowers, towering ancient trees, and a small, serene pond reflecting the stars above. In the center, there’s a clearing where a fairy is dancing, surrounded by tiny, glowing orbs of light.
- Steampunk Safari Adventure: Create a scene set in an alternate, steampunk-inspired world where adventurers explore a wild safari on steam-powered vehicles. The landscape is a vast, open savannah with mechanical animals like gear-laden lions and copper-plated elephants. The adventurers are dressed in Victorian-era exploration gear, complete with brass goggles and leather boots, observing the wildlife through intricate, clockwork binoculars. In the background, a steam-powered airship floats in the sky, casting a large shadow over the terrain.
Once your prompt is ready, click on “Dream” button and within a few seconds you’ll get the image output.
On the “Dream” button you’ll see a small number, that shows how many credits it’ll cost you to generate that image output.
For the 1st prompt above, here’s the output image:
Once you find your favorite images, you can edit an image further. Once you are satisfied with the result, you can download your favorite image. There’s also an option to upscale the resolution. You can reuse the prompt, generate more variations, edit, or use that image as an initial image to make further changes on top of it using Prompts.
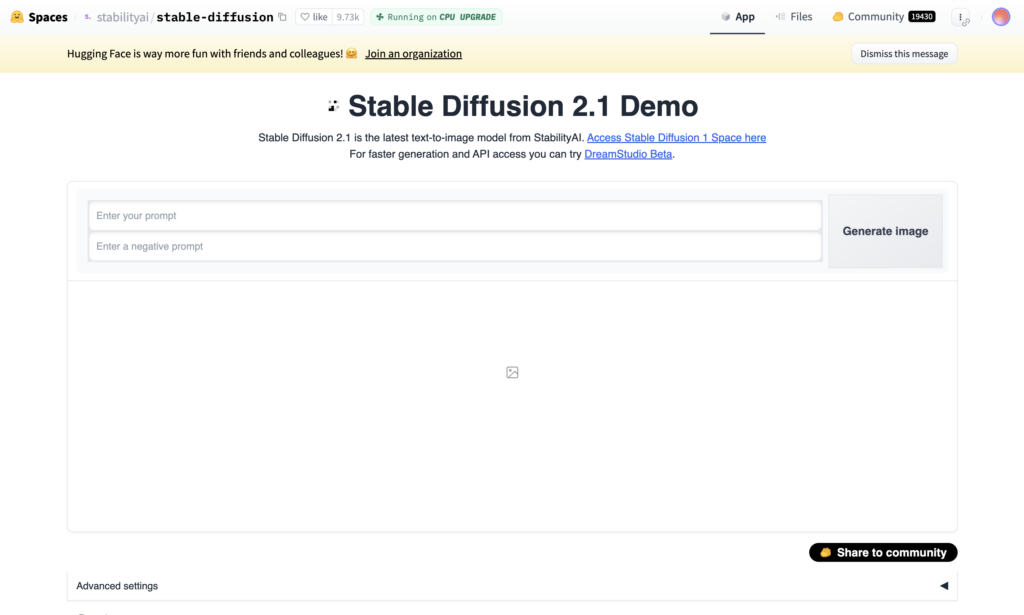
How to use Stable Diffusion with Hugging Face
Earlier in this blog we learned about Hugging Face, an online community for open-source development, contribution, and sharing of generative-ai models, computer vision solutions, and much more.
You can also access stable diffusion by Stability Ai from HuggingFace website.
The process of using it here is also same as it is on DreamStudio and ClipDrop. The only difference is that this is a demo version to showcase within the community.
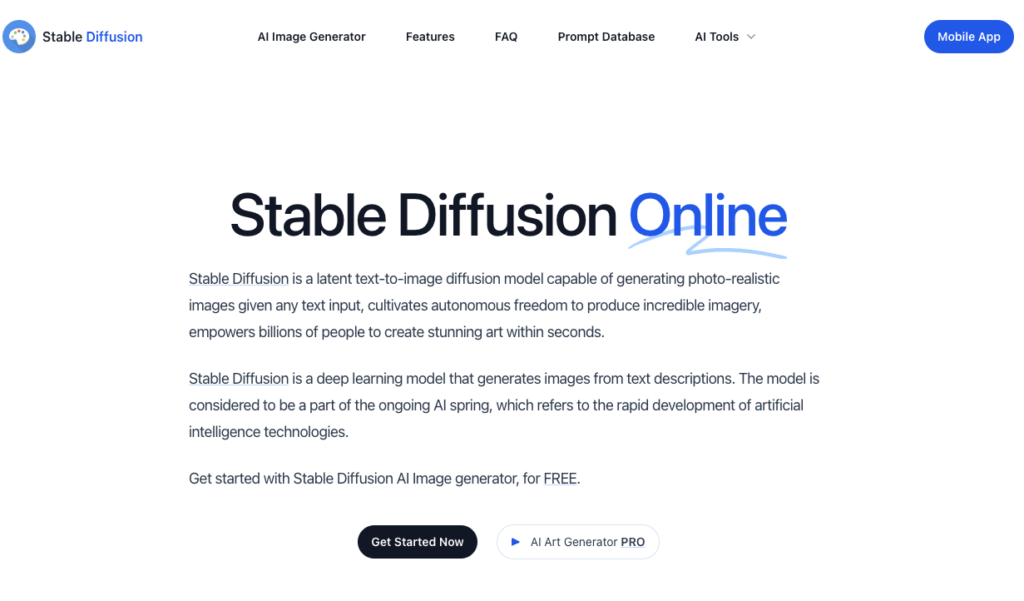
Use via StableDiffusionWeb
Another online website in this list is stablediffusionweb. From where you can access the ai image generator model.
Since SDXL and various other generative ai models for image generation by Stability Ai are available via APIs there are many mobile apps, websites, and softwares on the Internet that have build their own app using the APIs in the backend.
Each of these websites and apps build on top have their own special use cases and custom enhancements for various use cases. For example, Mockey is coming with its own Ai Image Generator that is more focused towards helping ecommerce brands and marketers in generating Ads, Social media posts, product photos, etc. for usage on the website and internet.
How to refine your image in Stable Diffusion
Let’s quickly dive into the options you get in various SD powered images generators to refine your image output. With both Clipboard and DreamStudio, these options are common.
Prompt Engineering in SD and SDXL
The pompt box is the most important part. Here are a few rules to keep in mind when describing your image.
- Go with specific information: If you want dog, don’t say pet animal – Say Dog. Specific information ensures consistent output with your imagination.
- Don’t complicate your prompts: At the same time, very minutes details in long paragraphs will lead to a confused output. It can struggle with quantity, sizes, and specific colors.
- Add details: Adding information about light, environment, mood, composition, etc. will lead to better results.
- Play around: The Generative AI Models are always learning and improving, which means by the time you try it out, there might be a lot of improvements. So the best approach is always to get some credits and play around with the tool.
Use Negative Prompts in Stable Diffusion
The Negative Prompt box is to input things that you don’t want in your image. Sometimes, there are certain obvious elements that AI Generates in the background or along with the images that you might now want. Mentioning them as comma separated keywords will make sure (to some extent) that it’ll not show up in your images.
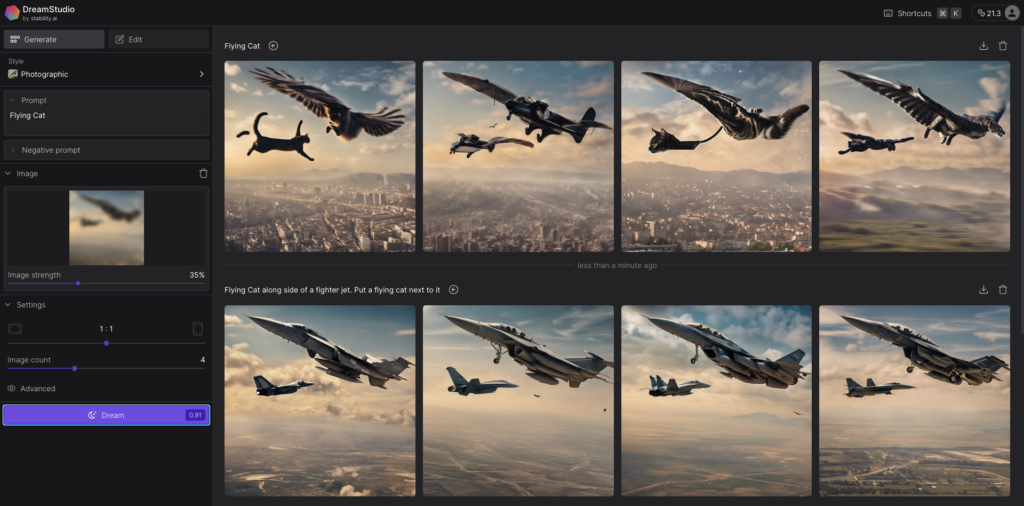
Use Image as a Prompt With DreamStudio
You also have an option to use input image as your prompt in DreamStudio.
This is a great feature if you want to generate something similar with your reference image. Make sure that you are not using copyrighted material as a reference image.
Once you upload a reference image, you’ve the option of how strongly you want the image output to be impacted by it. We recommend that you go ahead with 35% to 40%, it works pretty well and gives AI enough room for creativity and surprising you.
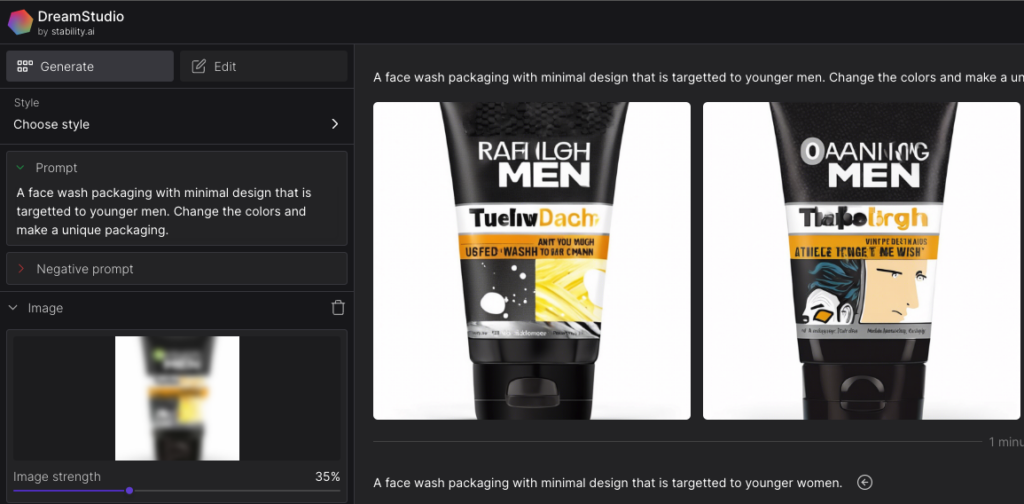
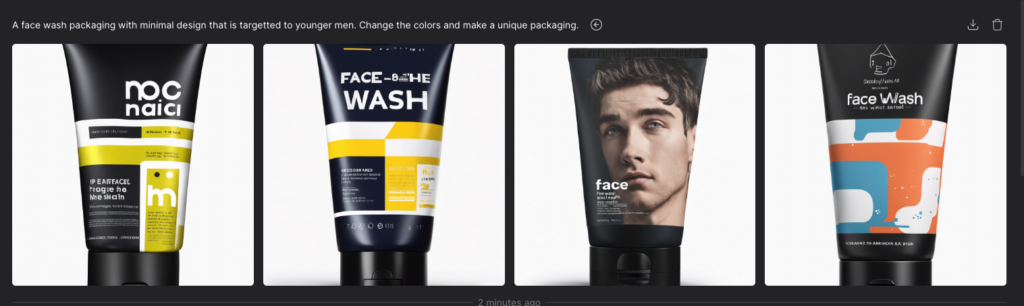
For example, I used an image of a facewash as a reference and asked DreamStudio to generate “A face wash packaging with minimal design that is targeted to younger men” with 35% Image Strength.
You can notice how the results become more unique when I reduced the image strength to 9% with same prompt: “A face wash packaging with minimal design that is targetted to younger men. Change the colors and make a unique packaging”.
Explore More Stable Diffusion Settings
There are a few more settings to play around with. Keep in mind that each of these settings affect how many credits get used. So the more control you seek on the image output, the more it’ll cost you in credits.
- Aspect Ratio: The default aspect ratio 1:1, but you can also select 7:4, 3:2, 4:3, 5:4, 4:5, 3:4, 2:3, and 7:4 for a wider image.
- Image count: You can generate from 1 to 10 images in one go.
- Prompt Strength: You can control how strong Stable Diffusion should follow your prompt. It is a number between 1 to 30, which is usually set at 15.
- Generation Steps: To control how many diffusion steps show the model take before arriving to the output. More steps may sometimes give better results, but it has diminishing returns.
- Seed: This controls the random seed used as the base of the image. It’s a number between 1 and 4,294,967,295. If you use the same seed with the same settings, you’ll get similar results each time.
- Model: You can choose between five different versions of Stable Diffusion: 2.1, 2.1-768, SDXL 0.9, SDXL 1.0 (the default), and the SDXL Beta.
How to edit images with Stable Diffusion
Once your images get generated, you can also tweak it from the “Edit” option in the left sidebar.
DreamStudio supports inpainting and outpainting, which means that the AI Art Generator can change details of an image outside its orders. To try out inpaint and outpaint, here are the steps:
- Select “Edit” option from left bar
- Create a new image or upload one from your laptop.
- Use arrow tools to choose overlapping area, enter your prompt, and click “Dream”. You’ll get 4 options for expanding your canvas of image.
- You can also use the eraser tool to remove something from the image or replace it with another prompt.
The capabilities of DreamStudio shows that there are many commercial applications and tools that can be built on top of Stable Diffusion model. According to many power users, the inpainting and outpainting tools in dreamstudio are better performaing thatn DALL-E2’s similar features.
FAQs on Stable Diffusion
What is a Stable Diffusion?
Stable Diffusion is a generative generative AI model that generates unique and realistic photos/images from text and image prompts. Stability AI launched the stable diffusion model in 2022. Along with images, Stability AI also launched models that generate video, 3D models, and language.
Is Stable Diffusion Free?
Stable Diffusion is an open source generative AI model and it is free to use. However, Stability AI does offers monthly subscription plans for APIs access to developers and businesses that want to use it for their own use cases. The base plan starts at $9 per month, the standard plan costs $49 per month and the most premium plan charges $149/month. Enterprise options for APIs are also available for various other needs.
Does Stable Diffusion allow NSFW?
Stable Diffusion doen‘t generate NSFW content. However, many users have used creative methods to bypass the limitations of SD and SDLX. But we highly recommend that we put new technologies to better use. You can run your own model on a local device and bypass the standard diffusion model with custom training data.
Where can I try Stable Diffusion?
Clipdrop is the easiest website to access it, it is run the official makers of Stability AI. Clipdrop provides you with access to Stable Diffusion and also have other tools like Reimagine XL, Stable Doodle, Animator, etc.. You can also access it on StableDiffusionWeb, DreamStudio, and HuggingFace.
Is Stable Diffusion safe to use?
Safety of stable diffusion or any other generative Ai model depends on the kind of input prompts we provide as users. In general, it is safe to use and don’t generate images that are not safe for work environment.
Can you use Stable Diffusion on mobile?
You can access stable diffusion on mobile Via Dreamer AI Art Generator. There are many Ai art generator apps available on play store and app store that use SD model as their backend by Stability.
What is better Stable Diffusion or Midjourney?
It depends on your usage and requirements. General consensus is that Midjourney gives you higher-quality images faster and with ease compared to Stable Diffusion. Stable Diffusion on the other hand provides users with a vast features and custom options to control the image output.
Is Dall-E better than Stable Diffusion?
Based on the usage and some online surveys, people preferred DALL-E over Stable Diffusion. From a creator’s perspective, Stable Diffusion generates more artistic images. But to generate higher-quality images, you’ll need to rely on the editing and tweaking tools on DreamStudio. While DALL-E’s simple interface within ChatGPT makes it a better choice for beginners.